Tag: Craftsmanship

  • The Sleet Hits the Fan

    The Sleet Hits the Fan

    Finished Fan. Photo by Brian Cox
    Finished Fan. Photo by Brian Cox

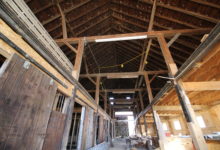
    On Friday, East Derry First Parish Church will be hosting a celebration in honor of the 300th anniversary of Nutfield, a Scotch-Irish settlement that was the precursor to today’s Derry, Londonderry, and Manchester, NH. The crew at East Derry has been hustling to finish the belfry in preparation for the event. For a bunch of timber framers, they’ve been doing an awful lot of finish work. A more accurate name for Preservation Timber Framing would include an “and”, but the name’s long enough already.

    Belfry Trim, Labeled
    Belfry Trim, Labeled. Photo and labelling by Brian Cox

    The crew was able to preserve some of the ample belfry and lantern trim, including the eight turned columns on the upper lantern. What they couldn’t restore, they reproduced. Every week, Brian creates a photo report to keep the building committee up to date, breaking this behemoth phase into bite-size pieces. It also serves as a documentary record of repair and this basis of this blog post. Between the mutules and the guttae (the swiss cheese and the sawtooths), I’ve been inspired by both the mass production and the attention to detail.

    Tom fastening slats. Photo by Brian Cox
    Tom fastening slats. Photo by Brian Cox

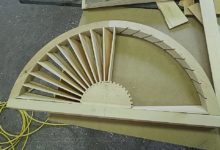
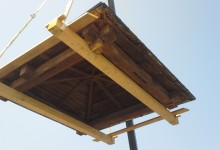
    In between enormous timbers and acres of primed trim, Tom has been quietly reproducing four of the arched fans at the top of the lower lantern louvers. In carpentry, fans are kind of a thing. Their arched tops require a choice between multiple joints, or extensive short grain. In the photo above, you can see that the curve of the arched top was cut out of two wide pine boards, their long grain oriented 45 degrees to the bottom rail. The fan’s slats are precisely twisted. This delicate assembly is then mounted to the side of the lantern and exposed to strafing wind, sun, rain and snow at the top of a hundred foot tower.

    Original Fan and MDF Template. Template by Tom Glynn, Photo by Brian Cox
    Original Fan and MDF Template. Template by Tom Glynn, Photo by Brian Cox

    Four of the fans were in good shape, and required “cosmetic” repairs, glueing and re-fastening. Four needed to be replaced completely. Tom started by transferring the measurements from one of the original fans to a sheet of MDF, creating a full size drawing. He used this template to begin cutting pieces from 2″ thick Eastern White Pine.

    Fan core, with blade angles laid out. Photo by Brian Cox
    Fan core, with blade angles laid out. Photo by Brian Cox

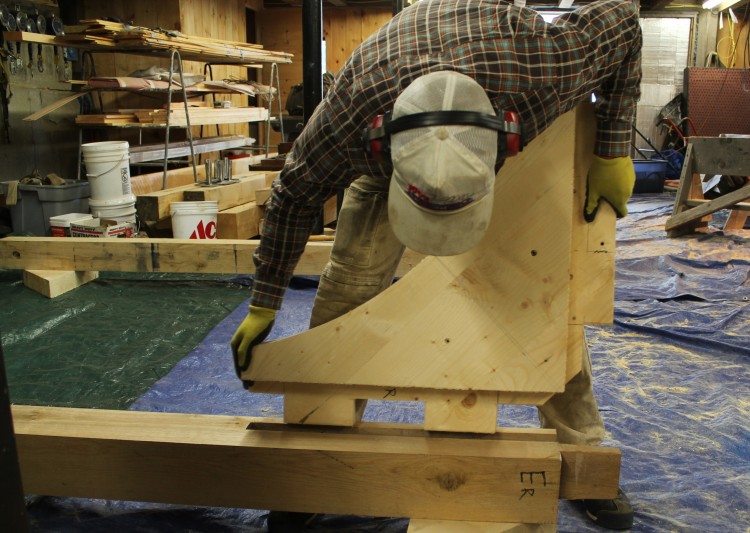
    Tom cut templates from luan on the bandsaw, and traced them out on the pine. He used the bandsaw to cut out his pieces and then laid out the dadoes carefully in pencil, copying the angles from the original fan. He used a dovetail saw and 1/4″ chisel to clean out each groove.

    Those dadoes are cut! Handiwork by Tom Glynn. Photo by Brian Cox
    Those dadoes are cut! Handiwork by Tom Glynn. Photo by Brian Cox

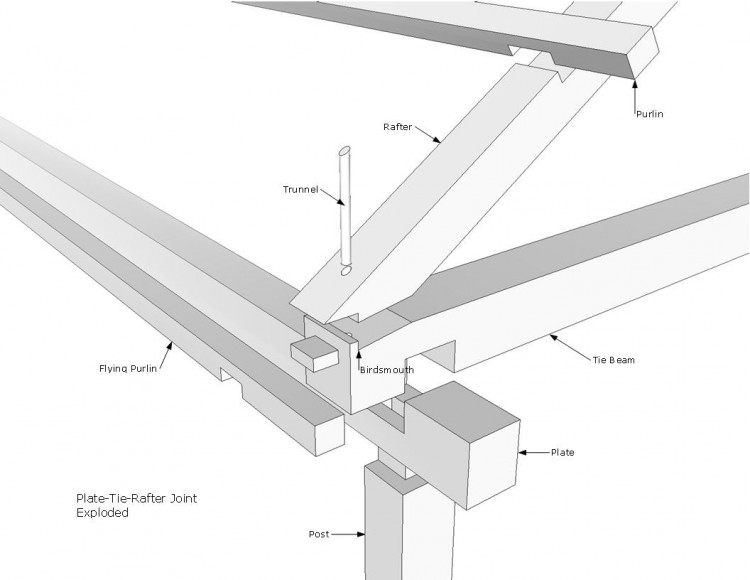
    Each fan blade is 3/16″ thick and was gently twisted as it was installed in its frame. The twist is created and held by the angled dadoes. The angle on the half round core is different than the exterior arch. At the core, the blade is more perpendicular to the face of the fan, which allows all the blades to fit, and gives the appearance that the rays are opening up like a sunburst.

    Fan blades. Photo by Brian Cox
    Fan blades. Photo by Brian Cox

    Fortunately, Tom was able to copy the angles from the original fan blades, rather than calculate the angles from scratch. A lot of folks think it’s easiest to scrap the old and start anew. On a piece like this, we were grateful to retain the knowledge of the old-timers from the evidence left in the original pieces.

    Half-finished. Photo by Brian Cox
    Half-finished. Photo by Brian Cox

    Once the fans were finished, they were primed with two coats of California alkyd primer and two more coats of California latex paint. Commonly, fans are decorative, which means that they were not always used for ventilation, and were applied over solid sheathing as was the case here.

    Fan fit with arched trim. Photo by Brian Cox
    Fan fit with arched trim. Photo by Brian Cox

    Still, each exterior element needs to shed water to protect the elements behind it. Each fan was fit with arched trim. The flush board trim projects 2″, while the frame and blades of the fan are only 1 3/4″ in thickness. This will protect the fan from wind driven rain running down the face of the flush board siding. Each vertical joint is backed with a spacer batten to prevent water from getting between the boards and penetrating into the frame.

    Louvers, Columns and Fans, installed. Photo by Brian Cox
    Louvers, Columns and Fans, installed. Photo by Brian Cox

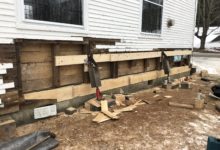
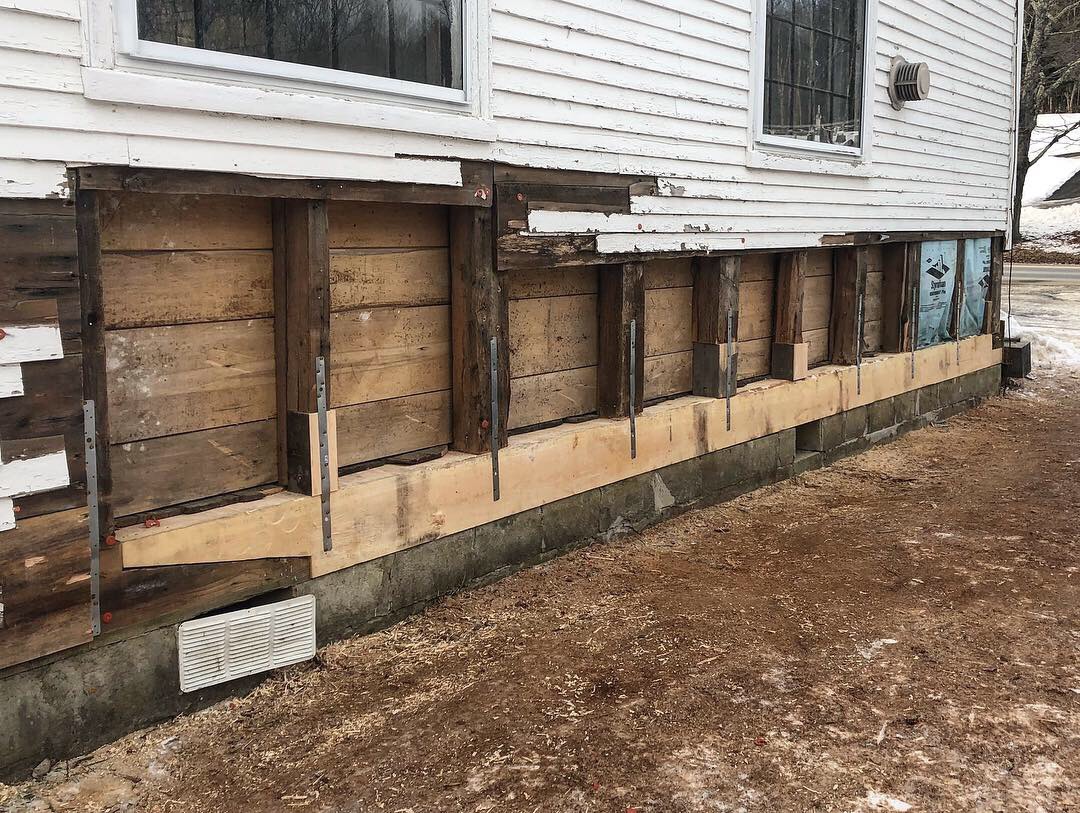
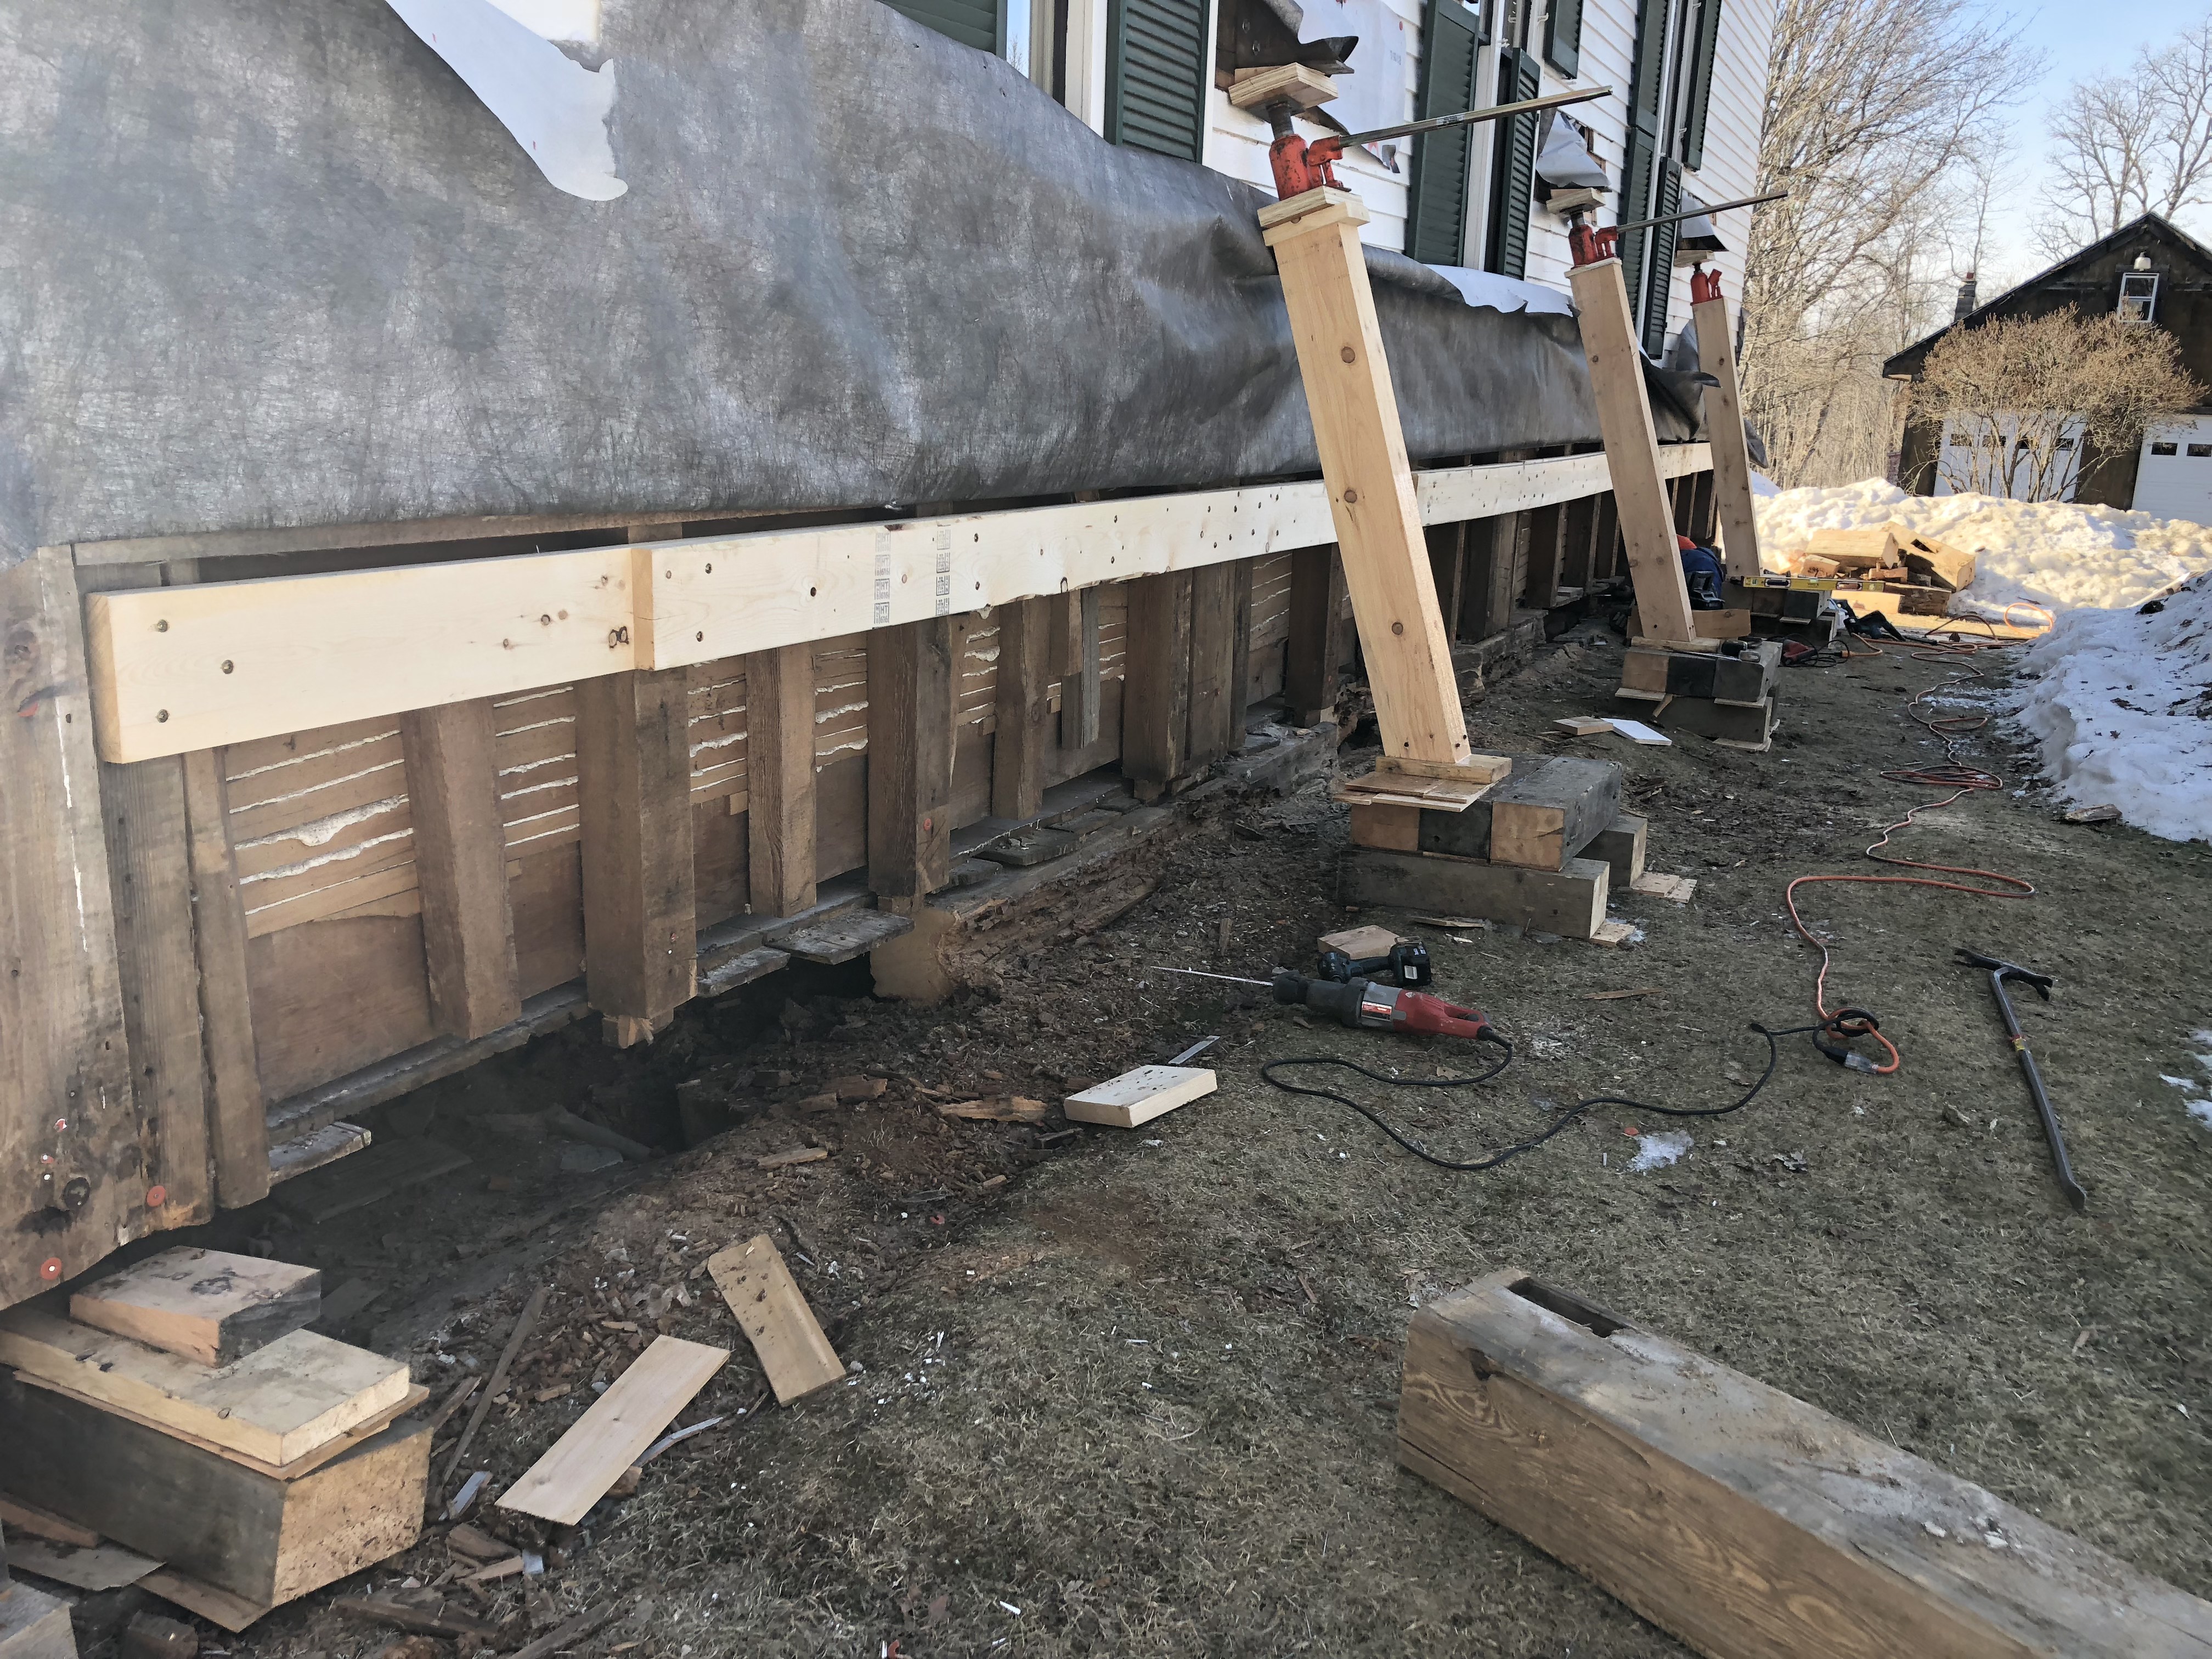
    With every detail in this tower, the crew considered the path of rain water. We use tight fitting joints and carefully considered flashing details to keep water out, rather than caulking. Caulk is an important tool to stabilize deterioration and prevent further rot. Ultimately, though, it is a band-aid, which is promised to last 20 years, and starts to shrink and fail in the first season. This is why PTF goes beyond the frame and performs finish work. We work on buildings that have commonly withstood 200 years, and we want our repairs to last 200 more. When the bottom of the structure begins 60 feet from the ground, we know that the caulking won’t be re-applied every five years, and the building will be lucky if it gets repainted every twenty. Protecting the frame starts with the finish, and our trim is not only beautiful, it is functional.

    We love to share our work in person. We hope to see you at the Nutfield celebration this weekend! 

  • Sill Life with Woodpecker

    Sill Life with Woodpecker

    Frames rot from the bottom up. Water condenses on the foundation and rots the sill from below, or enters at the eaves and runs down the wall framing, rotting the sill from above. Some sills are sunk by splash back. In the dead of night, sill rot can haunt you; it seems catastrophic. But rotten sills are so common that their repair is our most standardized process, and can be buttoned up in a little over two weeks. We’ve repaired two church sills already this year. The jobs in Troy and Benton Falls ran smoothly and efficiently in the background, while we tossed and turned over pilaster this and custom-trim that. These sill jobs aren’t flashy, they’re basic (in the best way). They are also amongst the highest repair priorities, and essential to a building’s longevity.

    I. Troy, lifted. Photo by Tim Sweeney
    I. Troy, lifted. Photo by Tim Sweeney

    Troy Union Church

    We repaired Troy’s sill first, in January. A short section of sill was completely rotten. The building still has some of its original sill, but the rotted section had been replaced before, maybe 25 years ago, in hemlock. It had been damaged by splash-back off the propane tank and condensation resulting from drilling through the sill for the propane line. The sill was fairly low to the ground and drainage was poor (typical). There was no gutter, which is probably best for the building, but the ten inch overhang didn’t protect the sill from its fate. We connected the posts and studs with a tripled 2×10 ledger. On each post, we hung a stout metal L-bracket. We used hydraulic jacks, resting on short, angled dead men and cribbing, to take the weight of the wall off of the existing sill. The 20th century replacement was installed with a nice stop-splayed scarf, which we matched with our repair. The job took a little over two weeks.

    II. Troy, repaired. Photo by Tim Sweeney
    II. Troy, repaired. Photo by Tim Sweeney
    III. Troy, buttoned. Photo by Tim Sweeney
    III. Troy, buttoned. Photo by Tim Sweeney

    Benton Falls Congregational Church

    The north eave sill at Benton Falls succumbed to years of organic matter built up along the eave wall, which made the sill nearly earth bound. Poor drainage and splash back didn’t help its cause. This building was different from Troy in that the sills were resting upon original granite capstones that had sunk and shifted over time. Using a laser level up in the attic and measuring the height of the plate at each post, we determined that the rear wall of the building had dropped three inches. During the repair, the crew gently lifted the rear of the building so that it was returned to within a half inch of level. The crew then replaced the entire 8″ x 8″ x 42′ sill. It was in three pieces connected by stop splayed scarfs, like those used at Troy. The building committee has contracted with a company to improve the drainage around the building, and, while they’re at it, pick up the rear cap-stones and install solid stone shims beneath them.

    Benton Falls, lifted (here we go again). Photo by Tim Sweeney
    Benton Falls, lifted (here we go again). Photo by Tim Sweeney

    You’d be forgiven for thinking I made a mistake and inserted the same lifting photo for Troy and Benton. Not so! The repair process was nearly identical. Don’t be afeared of sill rot. Just fix it, and sleep soundly.

  • The Barn at Bondgarden Farm

    The Barn at Bondgarden Farm

    Bondgarden Barn inside
    Bondgarden Barn inside

    The Barn at Bondgarden Farm has been the talk of Eliot all summer. Nearly a hundred feet long and roofed in slate, the barn was always a stunner, but in July, Rick Geddes lifted the barn 6 feet in the air, and neighbors and news crews took note. Geddes threaded four 50 foot, 12 inch H-beams into the building running in two parallel lines down the eave bays. Then he crossed the H-beams with eight perpendicular I-beams to pick up the loft joists in each bay. He gently lifted the H-beams using his truck’s hydraulic system, and rested them on six tidy cribbing piles. At this point, the repair work could commence.

    Dan explains lifting in front of the hole cut for the steel
    Dan explains lifting in front of the hole cut for the steel

    Built in the 1860s, the entire undercarriage was rotted, and the basement was no longer necessary. Bob Cantwell crunched up the undercarriage and excavated the basement. Chris McKinnon poured a new frost wall around the perimeter and two level grade beams beneath the drive posts. The new barn floor is crushed stone, which will be more appropriate for its equine occupants. 

    Bladed scarf repair
    Bladed scarf repair

    Most of the post feet were quite mushy, and required new feet or re-repairs. Fortunately, a few good posts remained, from which Dan and Tom could establish a standard post length. After checking for level with a transit, they used the top of the grade beam as a reference line. From there, they repaired each drive post to the standard overall length. In most cases, the post was repaired with a center tenon scarf, which resists twisting and preserves the maximum amount of original material. In cases where the rot extended above the loft or needed to be removed on one side more than the other, they repaired the foot with a bladed scarf joint, a traditional repair. We commonly see this scarf in old barns, repaired more than a century ago.

    Center Tenon Repair
    Center Tenon Repair

    For decades, cattle used the drive posts as scratching posts. Below the loft, their stallside faces have been carved into gentle curves. The joists above were scalloped by the teeth of bored horses. We preserved the patina of the posts and fared the fixes to their organic profiles.

    New girts and new eave wall
    New girts and new eave wall

    Once the repairs were installed, Dan and Tom could begin to address the hay lofts. Originally, there were a row of tying girts about halfway up the posts. The barn was converted to house taller livestock, after it had already begun to sink. The remuddlers removed the lower loft girts and snapped a level line on the uneven parallel posts. They neglected to replace the tying girts and erected stall walls, which were clad in 2x6s and filled with insulation. They slapped up loft joists, which broke over the stalls. In some places, the posts had dropped eight inches when replacement clapboards were hung. For now, on the backside of the barn, you can still see how far the barn was out of level by the undulation in the line of clapboards.

    New stall studs
    New stall studs

    The crew used staging boxes to stabilize the loft floors and remove the poorly designed stalls. Then they leveled the lofts to the newly plumbed posts and installed level loft girts between the posts in 6″ x 10″ eastern white pine. The Goranssons will stock the lofts with hay for their horses.

    Rear wall wave
    Rear wall wave

    Last but not least, Victor Wright, of the Heritage Company, will repair the slate roof. In some ways, all this work was to preserve the intact slate, worth tens of thousands of dollars. There aren’t many barns anywhere that were roofed in slate, but especially in Eliot. As they were interviewed by TV crews, the Goranssons explained why they went through this process to save their barn. They value the craftsmanship embodied within it. During the repair process, they witnessed how much work goes into raising a timber frame of this size. For centuries to come, their neighbors will witness the fruits of their efforts.

    Repairing cornice to prepare for slate
    Repairing cornice to prepare for slate

  • “We’ve been watching that steeple slant backward for years”

    “We’ve been watching that steeple slant backward for years”

    The Troy Union Meetinghouse had a crane day last week. The long-leaning steeple was partially dismantled, leaving behind the two front posts to stand like wooden antennae. The entire replacement frame has been cut by a crew of local craftsmen, and will be resurrected before the end of the summer. Read more about the process here, and show your support. If you don’t see a video below, click on the link to watch the story.

    http://wabi.tv/2016/05/12/construction-underway-on-troy-union-church/

    Check out Troy Union’s facebook page for the most up-to-date information about the project.

  • No Worms in this Birdsmouth

    No Worms in this Birdsmouth

    Roof framing, exploded
    Roof framing, exploded

    Last week, Arron and I saw a neat roof framing detail at a Greek Revival home in Brunswick.  The rafter was joined to the tie beam with a birdsmouth and pinned with a trunnel, the tie overlapped the plate and supported a flying purlin, and the plate ran past the gable end post to create the overhang for the return.

    Roof frame detail at return
    Roof frame detail at return

    There were areas that were badly deteriorated by critters and leaks, but the tie-plate joints were as tight as the day they were assembled.  The relish at the ends of the tie beams, after the birdsmouth, were all still intact, probably due to the work of the trunnel, pinning the rafter foot in place.  This was the first time I’d seen this particular joinery in a roof assembly; it’s always nice to see how well timber frame joinery withstands the pressures of weather and time.

    Dimensioned roof detail, from gable
    Dimensioned roof detail, from gable


  • New Castle Gaze Bo

    New Castle Gaze Bo

    In the shop, Seth fitting brace tenons
    In the shop, Seth fitting brace tenons

    Preservation in the field can take many forms.  Most of the time, preservation is the most practical and reliable answer to a client’s needs, but there are times when pure preservation isn’t feasible, or reasonable (see Demeritt-O’Kane).  The New Castle Congregational Church and gazebo offers an alternate model.  The congregation has endeavored to preserve the main body of the church, repairing the undercarriage framing, and rebuilding the foundation under the rear additions of the building.  When it came time to repair the dome topping the steeple, however, the building committee was faced with a proposal: if they allowed a cell tower to be built on top of the tower box, the cell company would pay for a new dome, in addition to monthly rent during the long-term lease.  When the congregation chose to lease the space to the cell company, the dome was replaced with a hollow, fiberglass replicate.

    Additionally, the cell company contributed to funds raised by community members for the complete restoration of the original dome.  Some of the money from the cell tower helped to pay for a custom gazebo to support the restored dome.  Its historical integrity was compromised, but at least the dome would be put to use.

    The design process was a challenge.  The building committee wanted a gazebo space that was large enough for weddings and other functions, but the original footprint of the belfry wasn’t big enough.  From a design perspective, the gazebo needed to echo the original tower trim, but not overpower it.  Due to distance and perspective, steeple cornice trim can be comically large when viewed up close; it is one of the most persistent surprises since I’ve started doing this work.  Given these restrictions, Ed and Keith designed a gazebo that honored the original craftsmanship of the dome, without distracting from the classic composition of the church.

    Frame design, shop drawings
    Frame design, shop drawings

    The preservation of the dome was completed first.  The huge, curved rafters reproduced using a Prazi beam cutter, which is a chainsaw bar and chain attached to a circular saw in place of the saw blade.  The Prazi functions like a jigsaw on steroids.  Other elements of the original framing were retained, like the struts that run diagonally from plate to mast.The gazebo’s timber frame design was ingenious.  The eight-sided structure consisted of four main bents and four diagonal plates, which overlapped and connected the main bents.

    Keith using drawknife to smooth curved brace
    Keith using drawknife to smooth curved brace

    The curved braces were cut from a solid, 3″ thick glue-up.  The curve was roughed out by the Prazi, and smoothed with a combination of drawknife, spokeshave, and sander.

    Bent Stack
    Bent Stack

    The main bents were assembled in the shop, their joints were pinned, and then stacked neatly.  They were loaded onto the trailer and driven to New Castle, where we were met by a crane.  The crane unloaded each bent from the trailer and stood the frame onto its feet already located on an octagonal concrete pad.

    Placing Bents
    Placing Bents

    As the bents were unloaded, they were braced temporarily, and capped with their respective plates, creating the alternate four faces.  Working against the crane operator’s clock, we carefully laid sleepers across the plates and tapped them into their final resting places.  Once the sleepers were placed, the crane lifted the cherry-colored dome and placed it on top.

    Tarp-tented gaze-bo
    Tarp-tented gaze-bo

    The weather in the weeks that followed started with a heat wave and finished with a week-long downpour.  When the weather threatened to derail and July 4th deadline, we opted to drape the entire structure in an improvised tarp tent.

    Cornice detail
    Cornice detail

    Under the tent, we were able to complete the cedar shingling of the skirt roof, hanging the cornice, casing the posts and braces and hanging beadboard on the ceiling.  Our friend Iain Mackenzie turned and installed a custom balustrade.  By July fourth, the tarp was removed, and New Castle was able to dedicate the gazebo on Independence Day.

    Gazebo, completed (unpainted)
    Gazebo, completed (unpainted)

    New Castle’s approach may not fit the preservation ideal, but it was a compromise that ultimately led to a new community space and the adaptive re-use of a significant architectural artifact.  See more photos in our Flickr set.

  • O’Kane Notebook VIII: Joinery, Exposed!

    Room 101 (The Pink Parlor), Wall D, Photo by John Butler
    Room 101 (The Pink Parlor), Wall D, Photo by John Butler

    On Friday, Scott finished removing the trim from the Pink Parlor, pictured above.  I had eagerly anticipated the joinery surrounding the fireplace, given our recent work on another fireplace surround.  The displaced surround, turned upside-down, is below:

    Pink Parlor Surround Turned Upside Down
    Pink Parlor Surround Turned Upside Down

    When I think about the era in which this house was built, in a relatively new country, with newly earned independence, it can feel very foreign to me.  I struggle to understand the mindset of these post-colonial carpenters.  But when I see the joinery detail below, and a fireplace surround constructed nearly the same way I’d construct it today, I feel much closer and more connected with our region’s history.   I realize that we are still a young country, and in the context of the rest of the world, this is a pretty young house.  The importance of preservation is emphasized not simply because the house is “old,” but because so much hard work went into constructing it.

    Mid Rail and Stile Joinery
    Mid Rail and Stile Joinery

    Oh, and the stiles were buried deep, just like in the Blue Room.

    Buried Stile
    Buried Stile

    For more photos of last week’s progress, click on the slideshow, below:

  • O Yea, the Boards they Split and the Nails they Wrought

    Dan, removing plaster in the blue parlor
    Dan, removing plaster in the blue parlor

    On Friday, we peeled plaster from the walls of the Blue Parlor, in the O’Kane Farmhouse.  Scott was Bill and I, Ted, as we traveled in our proverbial telephone booth through layers of plaster, lath, wallpaper and time.

    There were clues to some of what we might find.  Surrounding the door openings were wooden strips, wedge-shaped in profile, that served as plaster grounds.  They were a little over an inch thick, and were nailed four inches away from the opening itself, creating a border around the door opening that looked like a recessed casing.  The application of these plaster grounds became popular in the mid-18th century, and allowed the plasterer to create a flat wall plane within the borders of the ground (Much of this initial dating information comes from James Garvin’s A Building History of Northern New England, pp 65-71).  In most cases, the chair rail, baseboard, and door and window casings were applied directly to the frame, and served as the plaster ground.  In Shaker buildings, for example, the casing is nearly flush with the plane of plaster.  But in this wall, the plaster plane was an inch proud of the recessed door border, due to the applied ground, and there was a vertical, beaded joint between the side sections of the border and the top.  It looked like a larger section of beaded paneled wall was peeking through.

    As we carefully peeled the plaster from the lath, we paid attention to the composition of the plaster.  Older plasters have a higher concentration of goat hair, and regularly one will uncover a multi-colored tuft that was was never fully mixed in.  Older plasters were applied in three coats, a base coat, a straightening, or “brown” coat, and a skim coat.  The base coat is thickly applied and creates the keys that lock the plaster onto the lath.  The base coat squeezes through the slits between the pieces of lath, and droops behind.  A skilled plasterer will use the right amount of pressure to create an even pattern of keys, enough pressure to create a key big enough to hold, but not so much that the plaster breaks off and splooges into the wall cavity.  After the base coat has dried to a leather hard consistency, the brown coat is applied, and the plasterer drags a long straight-edged board, or screed, over the surface, flattening the wall plane between the grounds.  The brown coat is usually where you see the most goat hair.  The skim coat is the last, thinly applied coat, devoid of hair and leaving that hard, cured, eggshell finish.  On the first two sections of wall, we found sawn lath behind the plaster, hung with machine-cut nails.  This dates the added plaster surface to sometime after the mid-19th century, as we suspected (Garvin, p. 67).

    One Wall, Many Coverings
    One Wall, Many Coverings

    Behind the lath we found beautiful, psychedelic wallpaper.  The profile of beaded paneling telegraphed through, and punched vertical lines in the wallpaper at each panel’s joint.  On the wall, one could see three different periods all at once.  The horizontal shadow lines left behind by the lath, the lively geometric pattern of the wallpaper, and the vertical beads poking their noses through the surface.

    Scott, Salvage Detective
    Scott, Salvage Detective

    So I liked that, but the most exciting discoveries were yet to come.  So far, all we could determine in terms of dates was that the plaster was applied before the advent of wire nails during the late-1800’s, leaving no real indication of the date of the beaded paneling. Farther along the north wall, to the west, was a section that appeared to have once been partitioned off into a different room (according to a long joint in the floorboards).  When Scott began dismantling this section, the wall cavity was different.  There was a void behind the lath, and in its depths he could see the horizontal, bevelled profile characteristic of feather-edged paneling, and shiny, chrome yellow paint.  The paneled wall he uncovered was was hung horizontally, and it had a feather-edged profile, where the edge of the board is beveled to a thin tongue that slips into a groove on the adjacent board.  Conversely, beaded tongue and groove has a bead with an edge perpendicular to a quarter inch tongue.  The joints in such boards are typically tighter.  Both styles were used and re-used during the first half of the 18th century, but the feather-edged stuff is reminiscent of an earlier era.

    Across the face of the older, yellow paneling, we saw the regular shadow lines of shelving, leading us to believe that this section of wall had been obscured by pantry storage and left alone when the rest of the room was upgraded.  The wall plane of the beaded section is sufficiently proud of the feather-edged wall plane that the beaded paneling could be hiding more yellow feather-edged paneling–but this is only one of a number of possible scenarios.  The beaded paneling could be contemporary with the feather-edged paneling; the feather-edged paneling might have been recycled from elsewhere, or simply used to delineate a different room in the house.  In most homes, we’d never know the answer to these queries, because we wouldn’t dismantle the wall any more than was needed to make repairs, but the O’Kane house will be completely dismantled, and it is exciting to know that as we proceed, some questions will be answered, and even more created.

    Three Walls in One
    Three Walls in One

    Adjacent the feather-edged paneling was the most exciting section yet.  A section so exciting as to make the author flap her arms in an improvised, peacock-like dance.  Behind the plaster Scott found accordian, or split board lath, hung with wrought nails.  Accordian lath is hung using a wide, rough, knotty board.  The first edge is nailed to the studs, and then the board is split along the grain and checks are stretched open and nailed, creating voids for the plaster to “key” into.  This kind of lath supplanted the use of split, or riven lath around 1800.  It was used until the mid-19th century, with the introduction of sawn lath.

    Wrought Nail Detail
    Wrought Nail Detail

    Wrought nails were used until the advent of machine-cut nails, invented in 1790.  So we were finding a relatively newer lath style with an older nail technology allowing us to date the wall to sometime between 1790 and 1800 (Garvin, p 66). Dating a building without recorded documentation is a fuzzy practice.  Often, the invention of a technology allows us to bracket a building’s date into “well, we know it wasn’t built before such-and-such,” and this is an unsatisfactory conclusion.  Most technologies were in favor for at least fifty years.  We use all these time brackets, and the popularity of certain styles throughout the house, to come up with an approximate date.  It is unusual, and thrilling, to uncover a wall that so neatly falls between the advent of one technology and the extinction of another–and that was why I found myself flapping my arms, wildly.

    Please peruse the photos below for more information about our process, and stay-tuned for more exciting discoveries.

  • Carpentry Workshops at Mount Lebanon Shaker Village

    Rich Friberg, Timber Framing Instructor, shows off a Mount Lebanon timber frame
    Rich Friberg, Timber Framing Instructor, shows off a Mount Lebanon timber frame

    For the third summer, the North Bennet Street School is collaborating with the Shaker Museum and Library to offer a range of workshops in preservation and traditional woodworking at Mount Lebanon Shaker Village, in New Lebanon, NY.

    A number of PTF employees graduated from the Preservation Carpentry program at North Bennet and can vouch for the quality of their teaching.  Mount Lebanon is also an especially beautiful setting in which to learn carpentry.  If you are interested in woodworking, the site is worth a visit just for an ogle at their woodworking benches and the Great Stone Barn.

    Mount Lebanon Shaker Workbench
    Mount Lebanon Shaker Workbench

    The workshops:

    A Walking Exploration
    Saturday, July 9
    10:00 am – 3:30 pm; instructors: Jerry Grant & Peter Smith
    Enjoy a walking tour led by the museum’s curator and a preservation carpenter to explore the Shaker buildings at Mt. Lebanon. The tour starts at the Great Stone Barn and includes a bag lunch.

    Historic Window Sash Repair
    Monday – Friday, July 11-15
    8:30 am – 4:30 pm; instructor: Jackie Blombach
    Learn wooden window sash restoration in this hands-on class.

    Garden Tool Tote
    Saturday – Sunday, July 16 – 17
    8:30 am – 4:30 pm; instructor: Peter Smith
    Begin with a rough-sawn board and create a garden tote using only hand tools. The workshop is designed for ages 15 and up.

    Historic Timber Framing
    Monday – Thursday, July 18 – 21
    8:00 am – 6:00 pm; instructor: Rich Friberg
    This course offers students the opportunity to construct a timber-frame structure incorporating traditional mortise and tenon and other joints.

    Tuning and use of metal planes
    Monday, July 25
    8:30 am – 4:30 pm; instructor: Rich Friberg
    A one-day workshop covering techniques such as: flattening the sole, adjusting the throat opening and sharpening the iron. Learn to make perfect shavings.

    Tuning and use of wooden planes
    Tuesday, July 26
    8:30 am – 4:30 pm; instructor: Rich Friberg
    Techniques specific to wooden planes are learned and practiced. Students bring their tools to use in this one-day workshop.

    Historic moldings
    Wednesday – Thursday, July 27 – 28
    8:30 am – 4:30 pm; instructor: Rich Friberg
    This two-day workshop covers the history of moldings and the use of complex molding and sash planes.

    To register, or for more information, visit http://www.nbss.org/workshops/schedule.asp. Or contact Megan Kenealy at the North Bennet Street School, 617-227-0155, [email protected], or Becky Codner at the Shaker Museum and Library, 518-794-9100 x 220, [email protected].

Think we can help? Get in touch.