Author: Jessica MilNeil

  • Ice House in a Heat Wave

    Callie and Matt, fitting the middle tie beam
    Callie and Matt, fitting the middle tie beam

    On Friday we erected the Ice House, c. 1770.  This small, 10′ x 13′, frame is an exact replica of the larger barn to which it was found adjacent.  The Ice House had been fully sheathed inside and out, and the wall cavities filled with sawdust, for insulation.  It is extremely rare to find an extant ice house frame, and we were honored to work on it.

    The repairs were first initiated a few years ago, and the frame’s small size allowed its transport to a number of preservation conferences and its use in a semester’s long workshop with high school students.  While the Ice House was an incredible teaching tool, its age and significance prompt us to start looking for a good, final home.

    The final repairs were made with the help of two of this year’s Maine Preservation interns, Callie Douglass, and Matt Corbett.

    "Hewin'" Callie Douglass
    "Hewin'" Callie Douglass

    We began by assembling the deck inside the shop.  The frame required new sills, one of which was cut from a hewn sleeper reclaimed from the Damariscotta Steeple.  We filled in the deck with log joists from a frame that was not able to be salvaged.*

    Callie has experience with new timber frames, and was eager to learn how to preserve old ones.  Her first repair was an under-squinted scarf joint in one of the original 7′ posts.  When she was finished with her scarf, she hewed down the fix to match the old material.  This was the first time Callie had used an adze, but Arron helpfully counseled, “It’s just like golf, Callie, all about the follow through.”  Which may be the only apt analogy between timber framing and golf.  Despite her lack of experience, golfing and otherwise, Callie found she really had a knack for hewing.

    Matt "Look at those Curls" Corbett
    Matt "Look at those Curls" Corbett

    Because of the age of this building, we were repairing, rather than replacing, almost all of the studs, and Matt Corbett performed many of these repairs.  In addition to his historic preservation education, Matt had an undergraduate background in sculpture, so he was acquainted with some of the power tools in our shop.  In the process of repairing the stud feet, however, he most enjoyed the precision of hand tools, and took a shine to hand planing.

    Half Dovetail Mortise
    Half Dovetail Mortise

    After the fixes were complete, we were hoping that the test assembly in the shop would go smoothly.  The “Front Eave” plate fit nicely, with a parade of matching marriage marks down the posts, studs and braces.  The gable tie beams dropped on and stiffened the entire frame.  When we went to drop on the middle tie, however, we noticed that the half dovetail pocket was facing the wrong direction.  A half dovetail is a beautiful joint that allows the tie beam to hold the top of the wall in place, preventing it from spreading with the weight of the rafters.  We were mystified that the Front Eave plate, as labeled by its tag, fit so well, even though the wide part of the dovetail mortise was facing the interior of the building.  The dovetail on the middle tie beam was no help, because the tenon that connected to this plate was so deteriorated that it no longer had a sloped shoulder.  Matt suggested that maybe the original builders had made a mistake, but we shushed him out of reverence for the old timers.

    Tie Beam Wear, Here!
    Tie Beam Wear, Here!

    We took the frame apart, and tried turning the plate end for end, with the dovetail mortise oriented correctly, but nothing fit.  So we switched the plates, thinking that they had been labeled wrong, and there we found our answer.  With the plate on the opposite wall, the joints still didn’t fit, but sunlight streamed in from the upper windows and illuminated our joinery.  We could see a distinct shadow line from the shoulder of the tie beam on what should have been the exterior of the plate.  The old timers who built it had made a mistake (and made the Ice House today all the more interesting in the process).  They reversed the dovetail mortise on one plate and then reduced the tie beam tenon on that end to fit.  So we re-assembled the frame the way it was originally built, and the middle tie slipped easily into place, locking up the frame.  A pretty parade of matching marriage marks left no one the wiser.

    Click on the photos below to see the marriage marks, Matt’s tie beam fix, and more information about our process, and parts and pieces.

    *At PTF, we try to avoid Frankenstein frames, but believe there are cases where reuse of certain rare pieces is appropriate (and better than sending them to a burn pile).

  • Lebanon Barn Coming in for the Finish

    Cornice Fit for a King
    Cornice Fit for a King

    A few months back, we disassembled a barn in Lebanon, Maine.  Since then, we took the pieces back to the shop, repaired what we could, and re-designed the rest.  This Spring, we assembled the frame using original and remade pieces, and Shawn and his crew have been busy hanging the cornice.

    For more photos, explore our Flickr album.

  • Unveiling York First Parish Church,  (we took the staging down).

    Unveiling York First Parish Church, (we took the staging down).

    Ed, doin’ the Pick Shuffle

    Last week, we dropped the staging from the front of the York First Parish Church.  After the 24 ft picks were lowered smoothly, we took apart the rest of the ledgers and standards like a rogue band of dismantling Doozers.  Staging takedowns like that don’t just happen, they are engineered, by people like Keith Trefethen.  Thanks, Keith!  When the staging was finally on the ground,  and we were sweeping up the last of the debris, we heard a rustle in the trees — the collective sigh of York’s most elegant wedding planners.

    For more photos of the takedown, explore our Flickr album.

  • The Economic Impact of Historic Tax Credits

    Historic Preservation Tax Credit Properties
    Historic Preservation Tax Credit Properties

    Maine Preservation recently released an independent study of the economic impact of Maine’s Historic Preservation Tax Credit.  Read all about it.

    Since the start of Maine’s Historic Preservation Tax Credit in 2008, $135 million has been privately invested by developers rehabbing historic commercial buildings in the state of Maine .  This $135 million comes in the middle of a recession and while new construction is at a virtual standstill.  The study showed that the preservation rehab projects produced 2,700 jobs in Maine while unemployment in the building industry stands above 14%.  Maine’s Historic Preservation Tax Credit, which is responsible for spurring this construction activity, is scheduled to sunset in 2013.  The Legislature’s Committee on Taxation is currently considering recommending the removal of the sunset clause.

    “Quietly, consistently and effectively, for the past 30 years, historic preservation has become the leading catalyst in the revival of communities throughout the state and the nation.  This study proves that preservation is working here in Maine,” said Greg Paxton, Executive Director of Maine Preservation.  “The rehab of these vacant mills, former schools, and re-purposed churches is a big boost for towns and the neighborhoods around them.”

    Projects have occurred in larger cities such as Portland, Bangor, Lewiston-Auburn and Saco-Biddeford and also in smaller communities such as North Berwick, Farmington and Hallowell. Projects have occurred in areas with stronger real estate markets and in areas where there was barely a market at all. This is why preservation is such a successful revitalization strategy. It can occur in any community and it frequently stimulates other preservation investment around it.

  • Carpentry Workshops at Mount Lebanon Shaker Village

    Rich Friberg, Timber Framing Instructor, shows off a Mount Lebanon timber frame
    Rich Friberg, Timber Framing Instructor, shows off a Mount Lebanon timber frame

    For the third summer, the North Bennet Street School is collaborating with the Shaker Museum and Library to offer a range of workshops in preservation and traditional woodworking at Mount Lebanon Shaker Village, in New Lebanon, NY.

    A number of PTF employees graduated from the Preservation Carpentry program at North Bennet and can vouch for the quality of their teaching.  Mount Lebanon is also an especially beautiful setting in which to learn carpentry.  If you are interested in woodworking, the site is worth a visit just for an ogle at their woodworking benches and the Great Stone Barn.

    Mount Lebanon Shaker Workbench
    Mount Lebanon Shaker Workbench

    The workshops:

    A Walking Exploration
    Saturday, July 9
    10:00 am – 3:30 pm; instructors: Jerry Grant & Peter Smith
    Enjoy a walking tour led by the museum’s curator and a preservation carpenter to explore the Shaker buildings at Mt. Lebanon. The tour starts at the Great Stone Barn and includes a bag lunch.

    Historic Window Sash Repair
    Monday – Friday, July 11-15
    8:30 am – 4:30 pm; instructor: Jackie Blombach
    Learn wooden window sash restoration in this hands-on class.

    Garden Tool Tote
    Saturday – Sunday, July 16 – 17
    8:30 am – 4:30 pm; instructor: Peter Smith
    Begin with a rough-sawn board and create a garden tote using only hand tools. The workshop is designed for ages 15 and up.

    Historic Timber Framing
    Monday – Thursday, July 18 – 21
    8:00 am – 6:00 pm; instructor: Rich Friberg
    This course offers students the opportunity to construct a timber-frame structure incorporating traditional mortise and tenon and other joints.

    Tuning and use of metal planes
    Monday, July 25
    8:30 am – 4:30 pm; instructor: Rich Friberg
    A one-day workshop covering techniques such as: flattening the sole, adjusting the throat opening and sharpening the iron. Learn to make perfect shavings.

    Tuning and use of wooden planes
    Tuesday, July 26
    8:30 am – 4:30 pm; instructor: Rich Friberg
    Techniques specific to wooden planes are learned and practiced. Students bring their tools to use in this one-day workshop.

    Historic moldings
    Wednesday – Thursday, July 27 – 28
    8:30 am – 4:30 pm; instructor: Rich Friberg
    This two-day workshop covers the history of moldings and the use of complex molding and sash planes.

    To register, or for more information, visit http://www.nbss.org/workshops/schedule.asp. Or contact Megan Kenealy at the North Bennet Street School, 617-227-0155, [email protected], or Becky Codner at the Shaker Museum and Library, 518-794-9100 x 220, [email protected].

  • PTF! What a Load of Craftsmanship!

    On Thursday, June 9, Maine Preservation presented their Annual Honors Awards as part of the Vital Maine Communities Conference.  Maine Preservation presented an award of Excellence in Craftsmanship to the craftspeople who restored the Brown-Pearl Hall at the Museum of Fine Arts, Boston.  These included Robin Neely, Maker of leaded windows, Ben Coombs, Glass Blower, Norm Faucher, Welder and Arron Sturgis, Timber Framer.  PTF was honored to be part of this project and work with these exceptional craftspeople.  We look forward to more collaborations like this one.

  • Trim Time

    Geometrim
    Geometrim

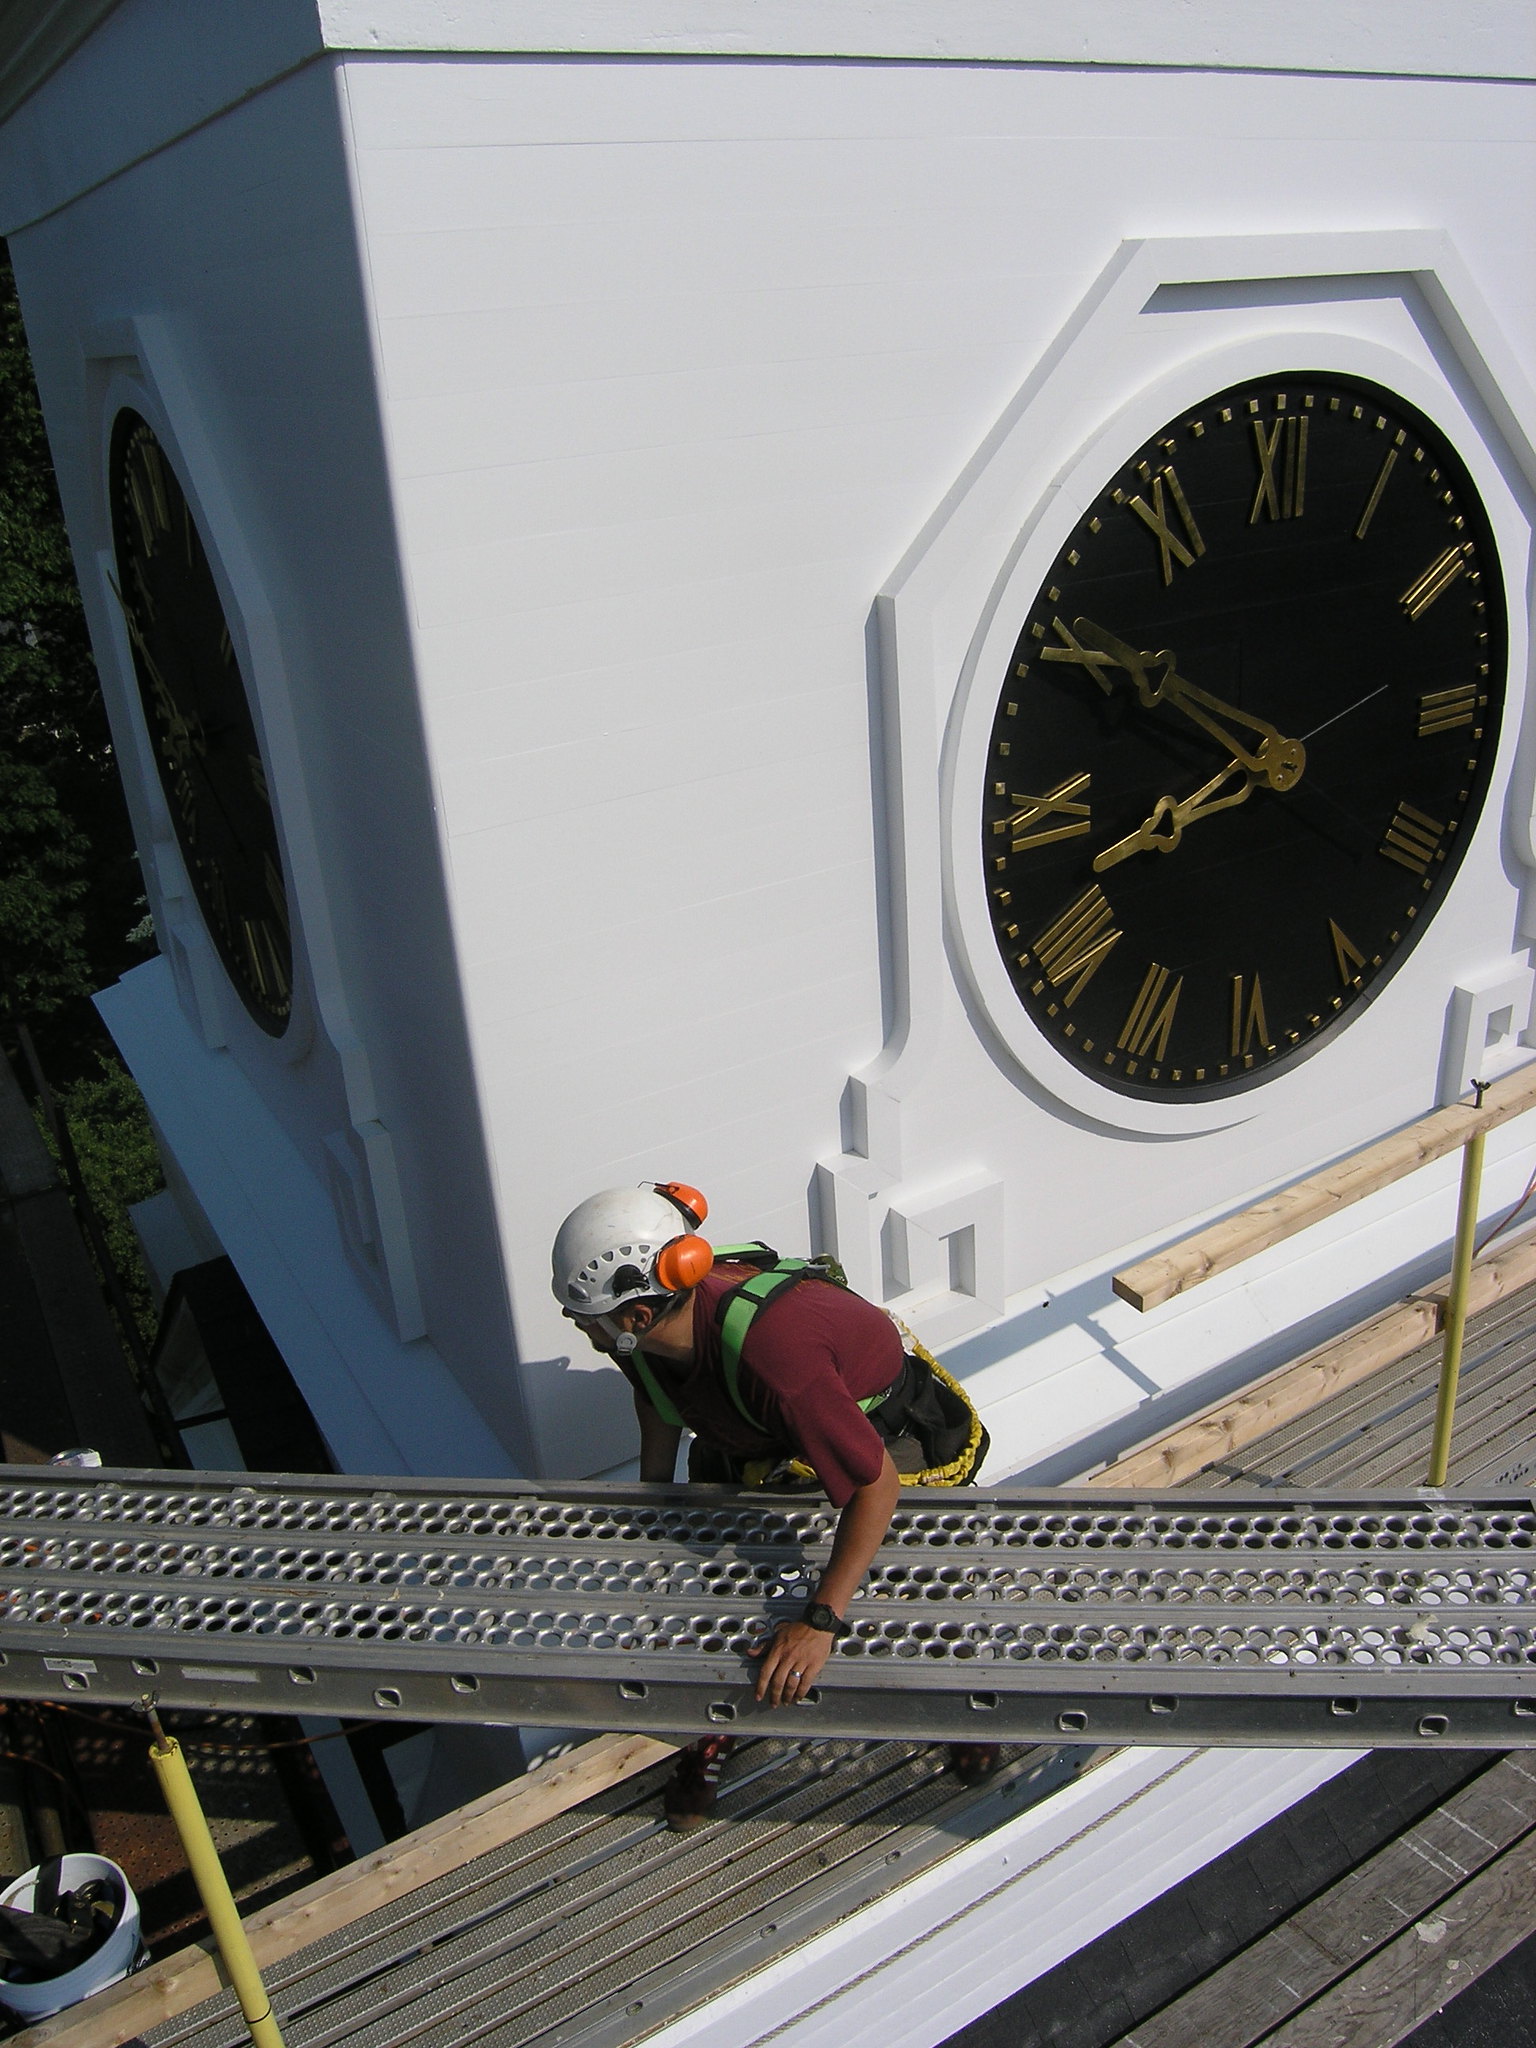
    These past few weeks, with the inclement weather, the York Congregational trim has kept us busy in the shop. Using a steam box, we carefully scraped the lead paint from the trim pieces, made dutchman repairs, and filled nail holes with West System epoxy. We were able to repair 90% of the scroll-shaped trim that surrounds the clock-faces, and about half of the curved pieces that create the outline of the clock-faces. The pieces at the bottom of the curve collect the most rainwater, and all needed to be replaced.  In order to cut the bevel on the concave edge of the new circular trim, Keith tilted the table of the bandsaw, and made a circular track for the trim to ride in.

    Please click on the photos below for more information:

  • Face Lift for an Old Girl

    We have begun replacing the clock faces of the First Parish Congregational Church in York, Maine.  Formed in 1636, the congregation is the oldest in Maine.  The current building was built in 1747, and moved to its position, facing the road, in 1888.

    Big Caulk
    Big Caulk

    It is time for this old girl to get a face lift.  Her frown lines brim with caulk.  The clock faces  are simply painted on the flush siding and framed with trim applied directly to the surface.  Considering the lack of flashing, the trim has held up well, and we suspect that we will be able to restore and reuse approximately 75% of it.  The white painted sides are in good shape, but because the faces are painted directly on the siding, we will have to replace the paneling totally.  We speculated that the deterioration of the black portion was due to the increased heat absorption and movement of black painted wood, but concluded that the difference in wear was more likely due to better maintenance of the white portion.  It is much easier (if you can call painting a steeple easy) to slap white paint on the trim and outer siding, than removing the numbers for painting, and cutting black paint in around the trim.  But we can only apply makeup for so long, and at this point, this clock tower’s going under the knife.  Click on the photos below for more information.

  • Our Biggest Fan

    Goodhue Sketch c. 1900
    Goodhue Sketch c. 1900

    In 1900, Charles Goodhue drew this sketch from the memory of an elderly parishioner.  This is one of the only remaining images that depict the building from this era.  Fortunately, evidence within the building has proven this sketch to be remarkably accurate.

    From the beginning of our involvement in the project, we have been looking forward to restoring the tripartite arched fan to the pediment.  We were unsure whether any evidence for it remained, and if the fan existed at all, whether we would be able to reproduce it accurately.  Much of the pediment had been changed, with three newer openings cut into the sheathing, and one window inserted directly into the space where the fan would have been.

    Arch Evidence
    Arch Evidence

    When stripping the pediment of its last remaining shingles, we found a series of tiny holes outlining a tripartite arch, with two sides flanking the central window, and a central arch likely to have had its apex somewhere in the top half of the window opening.  These holes had the pattern of flashing nails, small nails that were closely set in order to hold up heavy lead flashing.  It seems that the fan drawn in the Goodhue sketch was not a fully permeable louvered fan, but a decorative adornment that likely had a smaller central opening that vented the attic through the lower, central panel of the arch.  We will never know for sure, because the addition of a 20th century window obliterated the central section of sheathing.

    We used a cabinet and furniture maker in Sheepscot to reproduce the fan using a CNC machine.  Along with the Committee to Restore the Abyssinian, we decided to use a non-traditional method of construction because the fan will not be used to vent the attic, and traditionally arched louvers are notoriously difficult to flash and maintain.

    The new fan was flashed in a custom copper cap by The Heritage Company of Waterboro, Maine.  We work with Victor Wright, a fourth generation slate and copper roofing specialist, for virtually all our flashing needs; from soldering entire copper tile roofs, to custom trim flashing such as we needed for this project.

    When we went to pick up the fan, it took four of Victor’s employees to load it safely into the truck.  We were able to muckle the fan out of the truck and between the staging and the front of the church, and assumed that if two of us could carry it, surely we would be able to lift it into position using ropes and our body weight.  We secured two ropes to the ledger carrying the fan, and threaded them over staging ledgers at the top of the tower.  We pulled on the ropes and nothing happened.  Then we hung on each of our ropes and the fan still didn’t move.  Last we both hung on one rope, attached to one side of the fan, and not one corner would budge.  In the end, we needed a winch, attached to the back of Arron’s truck, to lift the fan into position, and we were happy for this safer solution.  Once we had the fan in position, we used timberlocks to secure the fan to the studs behind the pediment.  Click on the photos below for more information:

    Finished Facade, Finally
    Finished Facade, Finally

  • Shop Time

    During the past few months, Ed has been busy at the shop cutting a reproduction barn frame for a client.  The original barn fell in a Nor’Easter, and we salvaged as much as we could.  We will re-use much of the bracing, an upper gable, and a front gable drive post that has a large slot through which the front door will slide.  Click on the photos below for more information:

Think we can help? Get in touch.