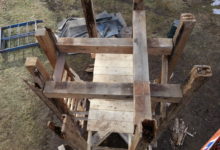
The Press Herald published a lovely profile of the Foleys, our longtime clients and friends this week. Charley is a surgeon and has been called to duty as part of his reserve unit. Sheila is taking care of the farm, the horses, cows, sheep, and new lambs, and she is preparing in case she is called up as well. It seems like Charley and Sheila are always doing the work that needs to be done. On a lesser note, I was excited to see lambs in the barn and an interior shot of the house. We are all hoping that Charley returns soon, and are so glad to know the Foleys exist in this world.
If you don’t already know Timber Framing, the journal of the Timber Framer’s Guild, you should. It contains information about techniques like simplified scribing, and engineering for framers, as well as in-depth coverage of projects that are even cooler than ours. I wrote the following article for the issue published last March 2019. It covers the adaptive re-use of the colloquially-known “Burd Barn” and benefitted from extensive editing by Michael Cuba and Adam Miller. I was so honored to have it published there. Subscribe, subscribe! You won’t be disappointed.
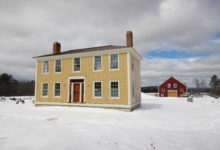
Smith-Bradbury in situ
New Life for a Kennebunkport Barn Timber Framing, Number 131, March 2019
At 17 ft. by 38 ft., Kennebunkport’s Smith Bradbury Barn is small. It is also remarkably intact, containing almost all of its original framing members. Although studs have been moved, and removed, and window and door openings added, the standing frame exhibits an impressive integrity and consistency. Recently, our company was called upon to repair the barn as part of a larger, house renovation and expansion project. While the rest of the project strains the bounds of preservation, in the technical sense, the barn remains an island oasis in a sea of modern construction.
The barn stands behind the Smith Bradbury house, built in 1793. The home is on the National Historic Register as part of the Kennebunkport Historic District, and was home to Charles Bradbury, author of the 1837 History of Kennebunkport. Smith Bradbury, the house’s namesake, was a merchant who came to Kennebunkport from Newburyport in about 1790. During that same year, the shipbuilder Tobias Lord moved his operation from the Mousam River to the more navigable landing site on the Kennebunk River. The site was called, descriptively, “The Landing”, and is located about two miles upriver from the Bradbury plot. Kennebunk merchants were granted their own customs district, and numerous shipbuilding operations made The Landing the commercial center of the region until 1860, when the main economic driver was shifting to tourism.
Roof Frame
The barn’s timbers are neatly hewn, with few visible juggling marks and little tear-out. The style, form and tool marks are consistent with the late 18th century. At that time, builders in the region had some sawmill access, but it was typical for the major timbers to be hewn. A notable feature, this barn’s braces are also hewn, which is atypical but not unique. The walls have mortise and tenon studs and the bevel-edged sheathing was hung with wrought nails. A hewn barn frame with studs and horizontal sheathing is uncommon for our region of southern Maine. From a structural perspective, the Bradbury barn is an artifact of profound historical significance for the town of Kennebunkport. It is extremely rare for a building of this size and age to remain so unchanged, especially in a bustling tourist town.
Currently, the barn consists of three bays, defined by four bents, which is typical for many 18th-century New England frames. At least one bent was removed and replaced by a breezeway, connecting the barn and house. In bent four, now the gable end of the truncated barn, the single original post contains empty loft-girt and brace mortises on its sheathed gable face. The first two bays are 9 feet and 12 feet wide. The third bay is wider at 16 feet, and is supplemented by an additional pair of rafters at the mid-span. The plates are 38 feet long and contain original, identical, stop-splayed scarf joints with 4-ft. tables. The plate scarfs are centered in the current iteration of the building, and don’t offer any clues to the missing bent. It is common enough for plate scarfs not to be centered that their centering now doesn’t negate the fifth bent theory. The overlaps of the purlins, on the other hand, are more informative.
Rafter-purlin connection
The principal rafter – common purlin roof is simple, beautiful, and typical for the region. The remaining bents contain all of their original framing members in excellent, functional condition. The pitch of the roof carries from the rafters through the tie ends. The rafter feet and tie beam ends show no deterioration at the eaves. Exterior trims are simple with just a narrow soffit hung on the flat, with a beaded edge. (Soffit pic?)Narrow purlins connect the rafters. Cut from saplings, the purlins maintain the taper of the tree and are quite charming. They are hewn and squared in the first bay and taper to the round thereafter. These purlins are continuous over the first two bents, and are staggered over the third and fourth pair of rafters, extending past the rafter like the tails of a bow. The location of the overlaps suggest that the barn was once one bent longer. If the building had an additional set of rafters, the carefully staggered purlins would have been centered over the middle two pairs of rafters.
West eave wall
The first bay incorporates a high girt in the eaves wall, almost nine feet above the sill, to allow for hay wagon or carriage entry. In the remaining bays, the loft hangs only six and half feet from the top of the sills. All the better to admire the loft joists, which are beautifully hewn. They extend the full width of the barn and rest on top of the wall girts. The studded walls have caused many a framer to look for evidence that the building might have once been a house. To date, it appears that the building was always and only used as a barn, from the drive-bay, to the lack of a chimney, and the consistent orientation in the reference faces of the bents. The lack of a foundation proved definitive. The sills were balanced upon dry-laid piers of stone, set on grade, and open to the elements. The studding is striking, and unusual, but ultimately, it is the only element that whispered “house.”
In the early aughts, the rear wall of the barn was melting into the landscape. The damage to the frame and subsequent repairs indicate a roof leak gone on too long. The lack of a foundation was finally wearing out the sills, and multiple generations of fenestrations were taking their toll. The owners sought a repair sympathetic to the timber frame, but they hired a contractor unacquainted with timber framing. The carpenter got as far as ordering a solid timber post, but severed all the associated joinery when he installed it. Unfortunately, this is a common occurrence, and among the primary reasons we get calls. We replace more timbers less than two decades old, than timbers older than two centuries. And, when original material is rotted, it is often due to recent alterations to the building, a re-roofing that fails its flashing detail or a foundation repair that relies too heavily on concrete. Fortunately, his alterations were localized to the immediate area surrounding the rear post in the fourth bent, and the rest of the frame was left intact.
By the time we were called, in late 2017, the barn frame was slated to be repurposed as a master suite and incorporated into an addition that includes a library and dining room. The adaptive reuse and respectful repairs will ensure that the frame will remain standing and in use. The architect’s design respects the historic character of the house as well as the contemporary needs of the occupants. In the barn, the clients have prioritized retaining original material wherever possible. The whitewash on the hewn timbers, left over from their working days, will be preserved. The scarf repairs will be visible in the bedroom. The juxtaposition between old and new will highlight the craftsmanship of the original frame and bespoke quality of the repairs.
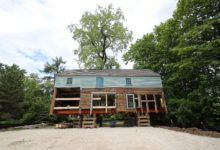
Burd on steel by Tim Sweeney
The first step in the barn’s reuse would be to eliminate its most barn-like characteristic and pour a basement. We wasted no labor toiling beneath a standing frame. Building movers made quick work of picking the frame up by its loft girts and rolling it over a grid of steel I-beams to four cribbing piles in the backyard. (crib photo) The sill system was completely rotten. We replaced it with a hybrid floor system: timber sills hung with I-joists and covered with engineered subflooring. Manufactured materials may not be our cup of tea, but that’s what contemporary collaborations are made of. Using conventional methods in the first floor allowed us to concentrate labor where it will be seen. We may have demolished the rotten floor framing entirely, but we were able to preserve historic posts that required extensive repair. The posts were joined to the timber sills with traditional mortise and tenon, and anchored to the foundation with Simpson straps embedded in the concrete.
Tom Glynn
In July of 2018, the building was rolled back to its foundation. Tom Glynn oversaw the timber repairs. You might recognize Tom from the guild conferences; he looks a lot like Willie Nelson (although that doesn’t really narrow things down). Tom’s worked with the company for over two decades. During that time, he’s embarked upon the reproduction of an 18th-century blacksmith’s shop using only period tools, and keeps a bench in his kitchen to sharpen his chisels and plane irons. In the repair of the Smith Bradbury barn, Tom is mentoring our next generation of traditional timber framers.
The first round of repairs addressed the posts. In order to accommodate contemporary humans in general, and a 6 ft. 2 in. occupant specifically, all of the posts were raised by six inches. The northwest half of the barn, including the high loft, was in sound condition. The posts in bents one and two maintained their post feet as well as their original bevel edge sheathing. Tom and the crew raised the intact posts onto plinth blocks. Three posts required extensive repairs, and the post that was replaced in the aughts was replaced yet again, with joinery.
Halved and bladed post repair
In order to retain the maximum amount of original material, the crew employed a bridle joint fix on the bottom halves of the bent three posts. A long slot mortise is cut into the old timber, preserving the interior and exterior faces, and a post foot with a long center tenon replaces the rotten end. The rear post required an additional shoulder repair at the girt level, on the sheathing side of the timber. The front corner post, in bent four, required a five-foot halved-and-bladed scarf joint. This scarf will resist twist in the corner post and replaces extensive rot on the sheathing side of the post. It is common for clients to fully replace posts that have been damaged along more than half their length, but it is not always necessary. When posts are replaced, their story is erased. A repaired post can be one of the most appealing details in a restored frame, and, if designed and cut correctly, plenty strong. As a result, the Smith Bradbury barn will contain much more original material, with only one post replaced in full. The scarf joints will add character and help tell the story of the building. The finished interior will have integrity and consistency.
To that end, the crew repaired stud feet with undersquinted lap joints and replaced missing studs to their original mortises. While post scarfs typically require more labor than replacement posts, stud fixes like these don’t take much more time than cutting and installing new studs. This is especially true with the economy of scale achieved by repairing an entire wall of stud feet.
Stop-splayed, under-squinted and keyed scarf joint
Touring the barn at the end of the framing phase, Tom pointed to Jake’s stop-splayed, under-squinted and keyed scarf joints as the element he was most proud of. “The joint works really well when it fits tight,” he said. “They came together really nice.” The stop-splayed scarf works well in shear, the under-squinting helps it resist twist, and the key in the center helps the joint to perform in tension. During the aughts, the well-meaning contractor replaced 11 ft. of the rear plate and joined it to the existing plate with a six-inch lap. A well-supported lap repair can work in a plate, especially if its abutments are under-squinted, but six inches doesn’t provide enough bearing to securely fasten the two elements. The tie beams were unceremoniously severed at the plate repair, with no joinery to reconnect them. In order to repair the ties, and reestablish their function, Tom and his crew cut one half of the scarf into the original tie beam end and a complimentary half into a new, in-kind timber. In the new end of the tie beam, they cut a traditional English tying joint with a teazle mortise and half dovetail.
East wall girt repair
The stop-splayed and keyed scarf was also used on each of the long, eaves wall girts between bents three and four. Tom’s compliment was specifically directed at the east girt, located in the center of the largest area of repair. The east wall, near bent four, had been damaged extensively by water infiltration. He was particularly happy with how the repairs came together during assembly. In that corner, the crew needed to replace a corner post, install the rear girt fix, and install a rather long plate fix. The plate repair alone extended 22 feet from the corner post to the original scarf joint at the center of the building. They cut and installed the tie beam fixes first. They precut the replacement post, plate and girt fixes on the bench. After everything was cut, the crew headered the loft joists and installed dead men under the tie beams, jacking the tie beam just enough to slide over the top of plate. With just three crew members, they installed the post, girt and plate fixes the following day. The pieces were cut accurately and required minimal adjustment. On a busy jobsite, crowded with multiple contractors, it was a relief to have the major part of assembly go so smoothly.
It isn’t every job that so thoroughly prioritizes repair over replacement. Our old-fashioned ideals weren’t even reflected across the rest of the jobsite. But inside this little barn, the attention to detail was the kind of challenge that thrills our crew. As Tim Sweeney, one of the members of the next preservation generation, said, “It’s the artistic part of the job.”
We work on a lot of buildings with small congregations. We’ve rebuilt churches with fewer than ten active members, and nary a millionaire among them. Most building committees rely on a combination of grants and community contributions to reach their fundraising goals. How does a tiny community raise the admittedly significant capital to restore a steeple when many congregants have long-deferred repair plans at their own homes? The answer lies somewhere in re-establishing the centrality of these places within their communities, to the secular and devout alike. It’s easy to appreciate the solemn presence of a spare steeple amongst the foliage of a sleepy Maine village; it’s harder to imagine how to transform that appreciation into funds to pay for its preservation.
We’ve been so busy over the past year that we’ve neglected to shed light on the impressive fundraising efforts put forward by our clients to support their projects. Below are links to better coverage than ours.
East Derry Belfry, rigged and ready
First Parish Church in East Derry has come a long way; they’ve rebuilt their entire foundation and undercarriage and a multi-stage clock tower more than 100′ tall. On November 2, their Story of the Steeple dinner raised about half the funds needed to restore the clockworks. The Union Leader covered the event, here. Elsewhere on the internets, Judy Hayward interviewed Arron about the project and our process. Her extensive quoting of my blog post on the subject reminded me that I need to do a better job copy-editing, sheesh.
The last bell to leave the Revere Foundry leaves its perch. Photo by Scott Lewis
Benton Falls church will hit 200 in the coming decade. Last year, its steeple was removed in their first step towards preserving it and restoring it to its perch. Since then, eave sills and cornice have been replaced. In October, the 42-member congregation hosted a Harvest Fest to raise funds and build community support for the project. The Morning Sentinel covered the event, here.
Assessing Bell Hill, prior to repairs
Back in July, Bell Hill Meeting House held their 100th annual summer service, following the restoration of that church’s copper dome. In 2020, Bell Hill will embark upon the next phase of their restoration, repairing the truss that supports the rear wall of the steeple. Get at ’em.
In September, the West Auburn belfry was restored to its former perch almost exactly a year after it had been removed. The restoration was funded by Maine Steeples Fund in conjunction with harvest suppers and grassroots fundraising.
We are inspired by the perseverance of our partners in preservation. These multi-year projects require a few individuals to be dedicated to a cause that benefits many. The impact of their efforts is both small and large, concrete and indefinite. It doesn’t take a religious calling to preserve a religious building, but it does take a leap of faith.
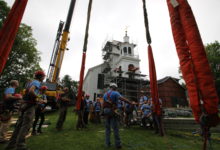
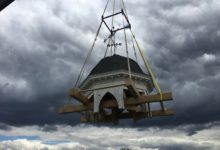
If crane days were measured by weight, last Thursday’s crane day would be our biggest to date. East Derry’s belfry, bell and double lantern weighed 43,400 pounds, not including the rigging. The crane day might also be the biggest in terms of scope. Since 2013, we’ve lifted and moved the church onto a new foundation, rebuilt the undercarriage, replaced two tower posts, 60′ in length, and disassembled, reproduced and rebuilt the belfry and lanterns. This crane day was the culmination of more than five years of nearly continuous site-work following more than two years of fundraising, assessment and preparation. Brian, Dave, Tom and Dan have persevered through a lot of guano. Paul Lindemann and the rest of the building committee stuck with the project after the scope and cost ballooned past our earliest expectations. From the start, they’ve stayed rooted in the history of Nutfield, the colonial settlement that built the church. On Thursday, the entire crew was there, along with a few news crews, the building committee and good crowd of East Derry residents.
Scott Tightens the Rigging Clamps
On Wednesday afternoon, the crane and crew installed the rigging steel. Four steel I-beams were inserted in a grid beneath a ring of ledgers bolted to the belfry posts. The belfry posts extend deep into the tower, 12′ below the tower plates. They emerge 15′ above the tower plate. Stationed on the ground, the belfry, lower lantern, upper lantern and mast are almost as tall as the base tower, rising to just 6′ shy of the tower plates.
Rigging a tower this tall is a challenge. We want the straps to be long enough so they won’t bind on the tower, but they can’t be so long that we run out of cable on the crane. Our first arrangement of rigging straps was doubly wrong: the straps bound on the belfry baluster and were too long overall; the crane operator couldn’t retract the cable enough to get the stretch out of the rigging. Fortunately, by reversing the upper and lower straps, we were able to clear the balustrade and stay short of the crane’s reach.
Belfry Roof, Urns, Fans, Columns, and Balustrade
After the crane took a little weight, we dismantled the front wall of staging and swung the belfry away from the church and the rear staging. The belfry had been built tight to the tower, and the staging had been built tight to the belfry in order to hang the trim and apply copper to the bell deck and lanterns. Brian and Dave planned the restoration so that nearly all the finish work could be done “on the ground” before the belfry and lanterns were lifted into place. It’s a lot easier to fit elaborate trim 20′ – 40′ above the ground rather than 60′- 80′. We needed to break down the staging and swing away from the tower so that the belfry would clear the building on its way up.
Belfry in Flight
The lift from the ground to the belfry was slow and steady. Half the crew climbed the staging to the tower plates, and the other half climbed the stairs to the belfry bed timbers, 12′ below. Once the post feet were inserted past the plates, the bed timber crew made minor adjustments to the mortises and pried the post feet a quarter of an inch this way and that. When the post tenons were seated in the bed timbers, the overhangs at the bell deck just kissed the belfry plates.
Belfry in Place
There’s still more to do. The cornice trim needs to be hung at the top of the tower, at the edge of the bell deck, and the copper roofing must be extended over the drip edge on the cornice. A second finish coat of paint will be applied. But regardless of the punch list items, the crane day Thursday was a huge achievement. The crew and building committee worked together to prepare for this day, and the celebratory ease of the day was a result of their strenuous efforts.
We had some excellent news coverage of the day. The Eagle Tribune and Union Leader interviewed longtime parishioners and the folks who made the restoration possible. Watch the lift on WMUR, here and here.
Norway UU Church is the kind of church that reminds me why we do this work. The congregation has been hosting a community lunch program for more than 25 years and the building provides a space for daily AA meetings. When I’ve been in the office for weeks, finishing up estimates I know will be shocking, I start to wonder whether all this old building stuff is worth it. What are these places worth anyways? Why save our historic barns and landmark buildings? Off-site, it gets existential.
One of my jobs is to provide an answer to these questions. Frequently, functionality is enough. A big old barn might be easier to repair than to replace and traditional approaches are proven. They last longer. They definitely give the building more life per buck. Intellectually, I’m convinced, but emotionally, I wonder, “Do these buildings really matter, to anyone?”
Norway Unitarian Universalist Church matters. The steeple has anchored Norway, Maine’s Main St for nearly two centuries. The building provides a place for people of all walks of life to gather, in a rural community, where people may love being alone, but also get lonely. In a diverse and sometimes disjointed society, we need welcoming, inspiring spaces like these, where the building reminds us of what we can achieve, and have achieved, when we work together as a community.
Norway UU Tower
We removed the steeple last month. Steeple removals, like all crane days, are exciting, but are tinged with melancholy. Removal is often the first step toward repair, but it’s still hard to dismantle an icon like this one, especially when we don’t know exactly when it will be restored. The steeple has an open belfry, with eight posts and a dome. Initially, we had hoped to save the posts and extract the belfry as a unit. In towers like these, the belfry posts telescope deeply within the tower. At these heights, steeples face powerful wind loads. The tower roof, or bell deck, is a potential hinge point for the tower. The length of post that extends above the tower box is only about half its total height. The belfry posts rest on bed timbers that cross tower girts deep within the tower walls.
Tower and Belfry Framing
Upon further investigation, we confirmed that five of the eight posts were rotted beyond repair. When this many posts are this badly rotted, we know that there is more damage hidden behind the trim and sheathing. Additionally, the tower roof had been re-built three successive times and each set of rafters, sheathing, and shingles was stacked over the last. Woven amongst this framing were a collection of weird posts attempting to stabilize the bell. Despite the beautiful tower and belfry timber framing, the framing below the bell was a mess, making it impossible to discern which timbers were really holding up the bell. There was no way to extract the bell with the dome in place, and there was no way to selectively extract any viable posts, which weren’t likely to exist (spoiler: they didn’t).
Ultimately, we made the tough decision to sever the belfry posts, and began to rig the dome accordingly. I can say, definitively, that we hate cutting posts. We hate doing it as much as we hate finding it done. We barely know the labor that went into extracting these logs from the forest, and hewing them. We know intimately the effort involved in laying out the joinery and cutting it. Cutting joinery is a joy; cutting posts may be made exciting by the adrenaline of a crane day, but is something else entirely.
Dome Crab, stabilized for flight
To prepare for crane day, the crew stabilized the crab, in the ceiling above the bell. The crab is the horizontal grid that connects the tops of the eight belfry posts and supports the half-round dome rafters. It looks like a timber hashtag and this one was #rotten. With 2x10s, we traced the layout of the crab timbers, stacking and blocking the 2x into a grid three layers thick. This stabilizes the crab for flight. Then, the crew used a laser level to establish the exact height of the rigging timbers, and the subsequent line on which we would cut the belfry posts. Early on crane day, the crane flew in the rigging timbers, arranged in another timber hashtag, about 20′ across and extending out the belfry by about three-and-a-half feet. Next, we installed bolsters between the rigging timbers and the stabilized crab, so that the dome would be lifted level. The load must be bottom-heavy, and very stable.
The crane will hold the dome in what is called an 8-point pick. A rigging strap is basketed around the end of each rigging timber, and connects to a custom-built “cage” that hangs from the crane. The cage is a square of heavy-gauge tube steel, with rigging plates at each corner. Two of the rigging timber straps shackle to each plate. Connecting the straps and shackles to the ends of the timbers is a slow and careful process, the shackles need to be oriented properly to ensure that they can’t unscrew during flight, and avoid twist in the straps. Everybody on the crew is focussed, and moving deliberately.
Norway Dome, off it goes
After the dome is rigged, the crane begins to cable-up and take a little weight. The crane will need to lift the dome enough that our reciprocating saw blades don’t bind, but not so much that the dome bounces as the last post is cut. Each person in the belfry was responsible for cutting two posts, as closely to the line as possible and leaving level feet for the dome to rest upon in the yard. Scott was on the radio, communicating directly with Arron and the crane operator on the ground. As we cut through the posts, we drove a wedge into the kerf to keep the kerf open, and to prevent the crane from having to take too much weight.
At every lift like this, one corner “sits hard”. No matter how evenly we’ve rigged the tower, or how centered the ball is over the building, there is always one corner that is heavier, due to the vagaries of wood density and concentrations of pigeon droppings. I was the lucky lady with the heavy corner, which meant that everyone else’s kerfs were open and free while I was still trying to finish my cut. I repeated a pass with my sawzall for the third time, and finally severed the remnant of corner board that was holding us down. The dome lifted gently, with no bounce at all.
The crowd cheered, and we descended for the best lunch I have received in more than a decade of crane days. A crowd had turned up with their lawn chairs, and we were treated to burgers, pulled pork, cole slaw, salads and desserts. A number of building committee members wanted pictures with the crew. We were enveloped in the love they feel for their church, and the enthusiasm they have for their community. On the job site that day, it was easy to understand why these places matter.
Ground Crew View
After the steeple had flown, we were finally able to see just how badly the belfry posts had deteriorated. In a number of places, the posts had been severed at the tower roof, and “secured” with small angle brackets, like you might use to fix your kitchen table. There was no scarf joint connecting the two halves of the “repaired” post, and the fasteners were rusted through. We had planned to extract the bottom halves of the tower posts one at a time, but we were able to push three of the posts over by hand, and lay the partially rotted stumps on the bell deck. The level of deterioration confirmed our decision to sever the posts. It would not have been safe to try and extract them whole. We flew the bell, and carefully demolished the upper layer of roof, upon which the bell had been sitting. We then covered the second roof level with EPDM rubber, wrapping the cornice and securing it to the tower wall with strapping.
Belfry Trim Notes
Next, we will begin the process of more thoroughly documenting and dismantling the dome, saving as much original material as possible. The bell deck will need to be re-framed. The congregation will leverage the grounded dome to finish the fundraising and get to the crane day that will restore the dome to the top of the tower as soon as possible. The congregation at Norway can take heart from East Derry, who, just this past week, hosted a crane day to restore their belfry and lanterns to the top of their 60 foot tower. come back to read about it next week.
On April 27, iFarm will be hosting a workshop for homeowners to learn about energy-saving renovations (that’s this Saturday, folks!) A working farm with lovingly restored buildings, iFarm combines 19th-century knowledge with 21st-century innovation to create a model for sustainability in agriculture. With the effects of manmade climate change now apparent, it is more important than ever to change to the wasteful way we build. We try to save more old, and are conscientious about what we replace, avoiding carbon-intensive manufactured materials. This workshop is geared towards saving money, but the practices Carl Solander teaches can also help homeowners reduce their carbon footprint.
The workshop will cover both passive renovations and alternative energy sources, it concludes with a tour of the farm buildings and should be wicked awesome. Sign up here.
On Friday, East Derry First Parish Church will be hosting a celebration in honor of the 300th anniversary of Nutfield, a Scotch-Irish settlement that was the precursor to today’s Derry, Londonderry, and Manchester, NH. The crew at East Derry has been hustling to finish the belfry in preparation for the event. For a bunch of timber framers, they’ve been doing an awful lot of finish work. A more accurate name for Preservation Timber Framing would include an “and”, but the name’s long enough already.
Belfry Trim, Labeled. Photo and labelling by Brian Cox
The crew was able to preserve some of the ample belfry and lantern trim, including the eight turned columns on the upper lantern. What they couldn’t restore, they reproduced. Every week, Brian creates a photo report to keep the building committee up to date, breaking this behemoth phase into bite-size pieces. It also serves as a documentary record of repair and this basis of this blog post. Between the mutules and the guttae (the swiss cheese and the sawtooths), I’ve been inspired by both the mass production and the attention to detail.
Tom fastening slats. Photo by Brian Cox
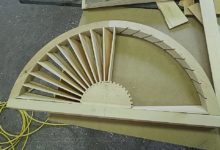
In between enormous timbers and acres of primed trim, Tom has been quietly reproducing four of the arched fans at the top of the lower lantern louvers. In carpentry, fans are kind of a thing. Their arched tops require a choice between multiple joints, or extensive short grain. In the photo above, you can see that the curve of the arched top was cut out of two wide pine boards, their long grain oriented 45 degrees to the bottom rail. The fan’s slats are precisely twisted. This delicate assembly is then mounted to the side of the lantern and exposed to strafing wind, sun, rain and snow at the top of a hundred foot tower.
Original Fan and MDF Template. Template by Tom Glynn, Photo by Brian Cox
Four of the fans were in good shape, and required “cosmetic” repairs, glueing and re-fastening. Four needed to be replaced completely. Tom started by transferring the measurements from one of the original fans to a sheet of MDF, creating a full size drawing. He used this template to begin cutting pieces from 2″ thick Eastern White Pine.
Fan core, with blade angles laid out. Photo by Brian Cox
Tom cut templates from luan on the bandsaw, and traced them out on the pine. He used the bandsaw to cut out his pieces and then laid out the dadoes carefully in pencil, copying the angles from the original fan. He used a dovetail saw and 1/4″ chisel to clean out each groove.
Those dadoes are cut! Handiwork by Tom Glynn. Photo by Brian Cox
Each fan blade is 3/16″ thick and was gently twisted as it was installed in its frame. The twist is created and held by the angled dadoes. The angle on the half round core is different than the exterior arch. At the core, the blade is more perpendicular to the face of the fan, which allows all the blades to fit, and gives the appearance that the rays are opening up like a sunburst.
Fan blades. Photo by Brian Cox
Fortunately, Tom was able to copy the angles from the original fan blades, rather than calculate the angles from scratch. A lot of folks think it’s easiest to scrap the old and start anew. On a piece like this, we were grateful to retain the knowledge of the old-timers from the evidence left in the original pieces.
Half-finished. Photo by Brian Cox
Once the fans were finished, they were primed with two coats of California alkyd primer and two more coats of California latex paint. Commonly, fans are decorative, which means that they were not always used for ventilation, and were applied over solid sheathing as was the case here.
Fan fit with arched trim. Photo by Brian Cox
Still, each exterior element needs to shed water to protect the elements behind it. Each fan was fit with arched trim. The flush board trim projects 2″, while the frame and blades of the fan are only 1 3/4″ in thickness. This will protect the fan from wind driven rain running down the face of the flush board siding. Each vertical joint is backed with a spacer batten to prevent water from getting between the boards and penetrating into the frame.
Louvers, Columns and Fans, installed. Photo by Brian Cox
With every detail in this tower, the crew considered the path of rain water. We use tight fitting joints and carefully considered flashing details to keep water out, rather than caulking. Caulk is an important tool to stabilize deterioration and prevent further rot. Ultimately, though, it is a band-aid, which is promised to last 20 years, and starts to shrink and fail in the first season. This is why PTF goes beyond the frame and performs finish work. We work on buildings that have commonly withstood 200 years, and we want our repairs to last 200 more. When the bottom of the structure begins 60 feet from the ground, we know that the caulking won’t be re-applied every five years, and the building will be lucky if it gets repainted every twenty. Protecting the frame starts with the finish, and our trim is not only beautiful, it is functional.
We love to share our work in person. We hope to see you at the Nutfield celebration this weekend!
Frames rot from the bottom up. Water condenses on the foundation and rots the sill from below, or enters at the eaves and runs down the wall framing, rotting the sill from above. Some sills are sunk by splash back. In the dead of night, sill rot can haunt you; it seems catastrophic. But rotten sills are so common that their repair is our most standardized process, and can be buttoned up in a little over two weeks. We’ve repaired two church sills already this year. The jobs in Troy and Benton Falls ran smoothly and efficiently in the background, while we tossed and turned over pilaster this and custom-trim that. These sill jobs aren’t flashy, they’re basic (in the best way). They are also amongst the highest repair priorities, and essential to a building’s longevity.
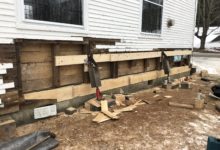
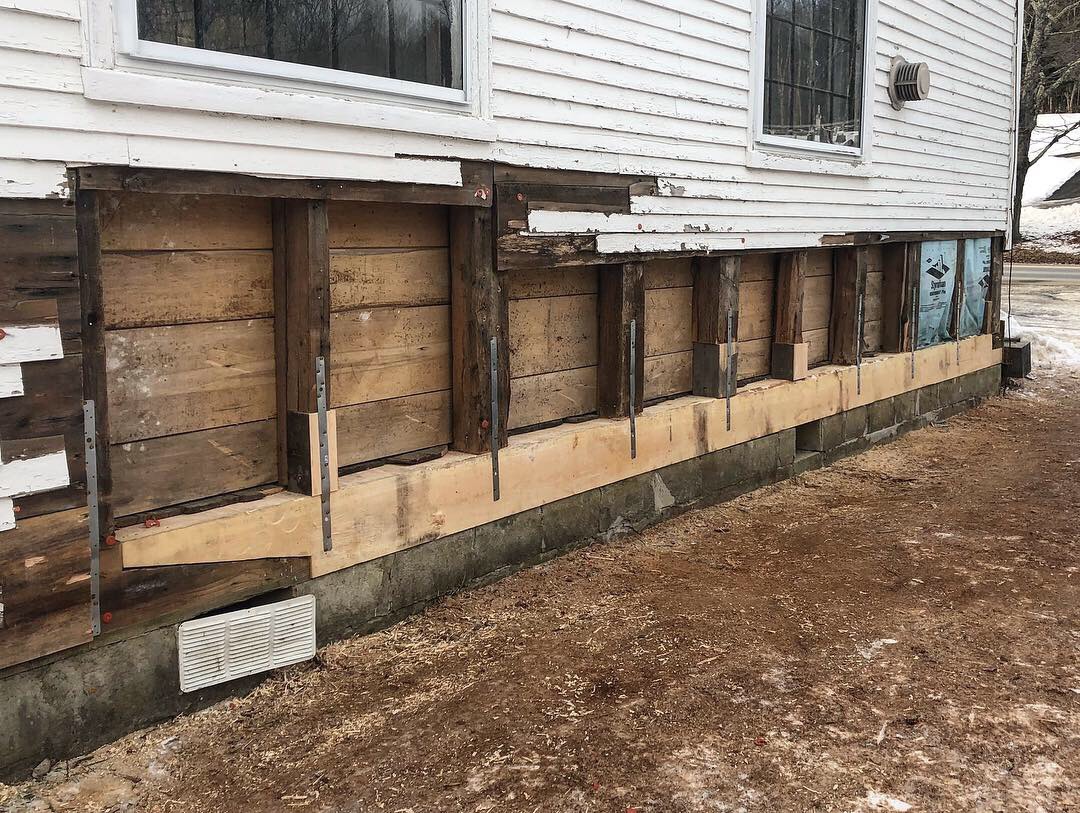
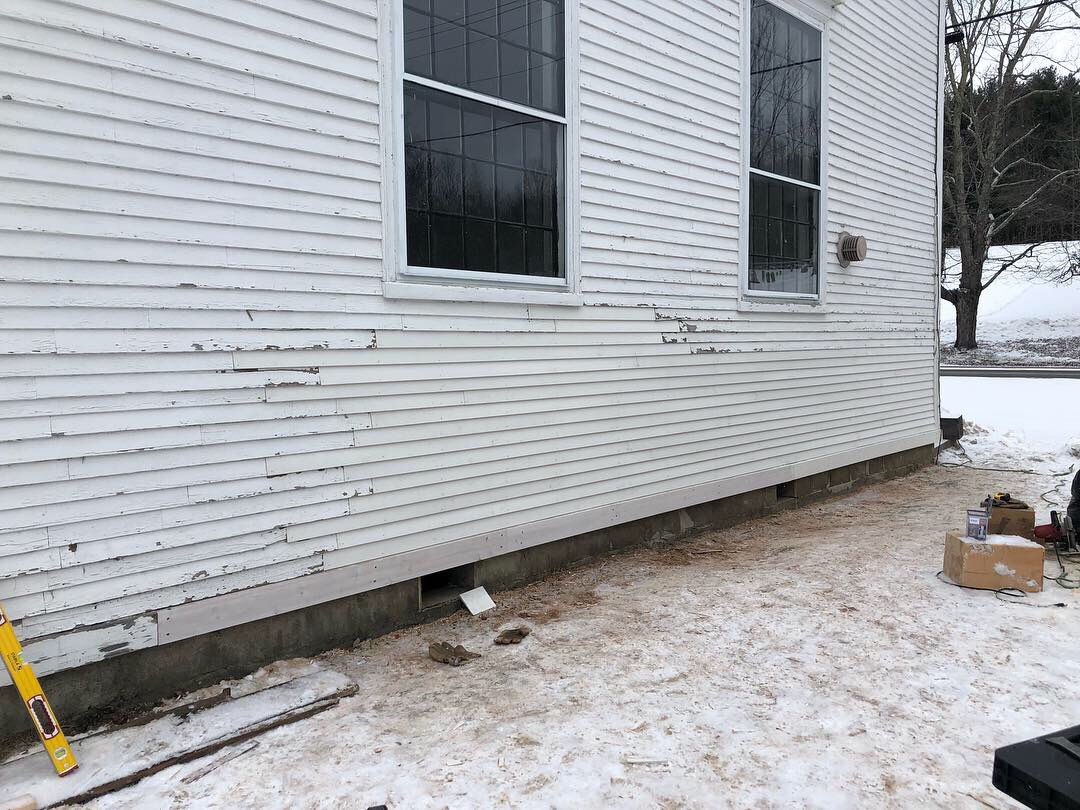
We repaired Troy’s sill first, in January. A short section of sill was completely rotten. The building still has some of its original sill, but the rotted section had been replaced before, maybe 25 years ago, in hemlock. It had been damaged by splash-back off the propane tank and condensation resulting from drilling through the sill for the propane line. The sill was fairly low to the ground and drainage was poor (typical). There was no gutter, which is probably best for the building, but the ten inch overhang didn’t protect the sill from its fate. We connected the posts and studs with a tripled 2×10 ledger. On each post, we hung a stout metal L-bracket. We used hydraulic jacks, resting on short, angled dead men and cribbing, to take the weight of the wall off of the existing sill. The 20th century replacement was installed with a nice stop-splayed scarf, which we matched with our repair. The job took a little over two weeks.
II. Troy, repaired. Photo by Tim SweeneyIII. Troy, buttoned. Photo by Tim Sweeney
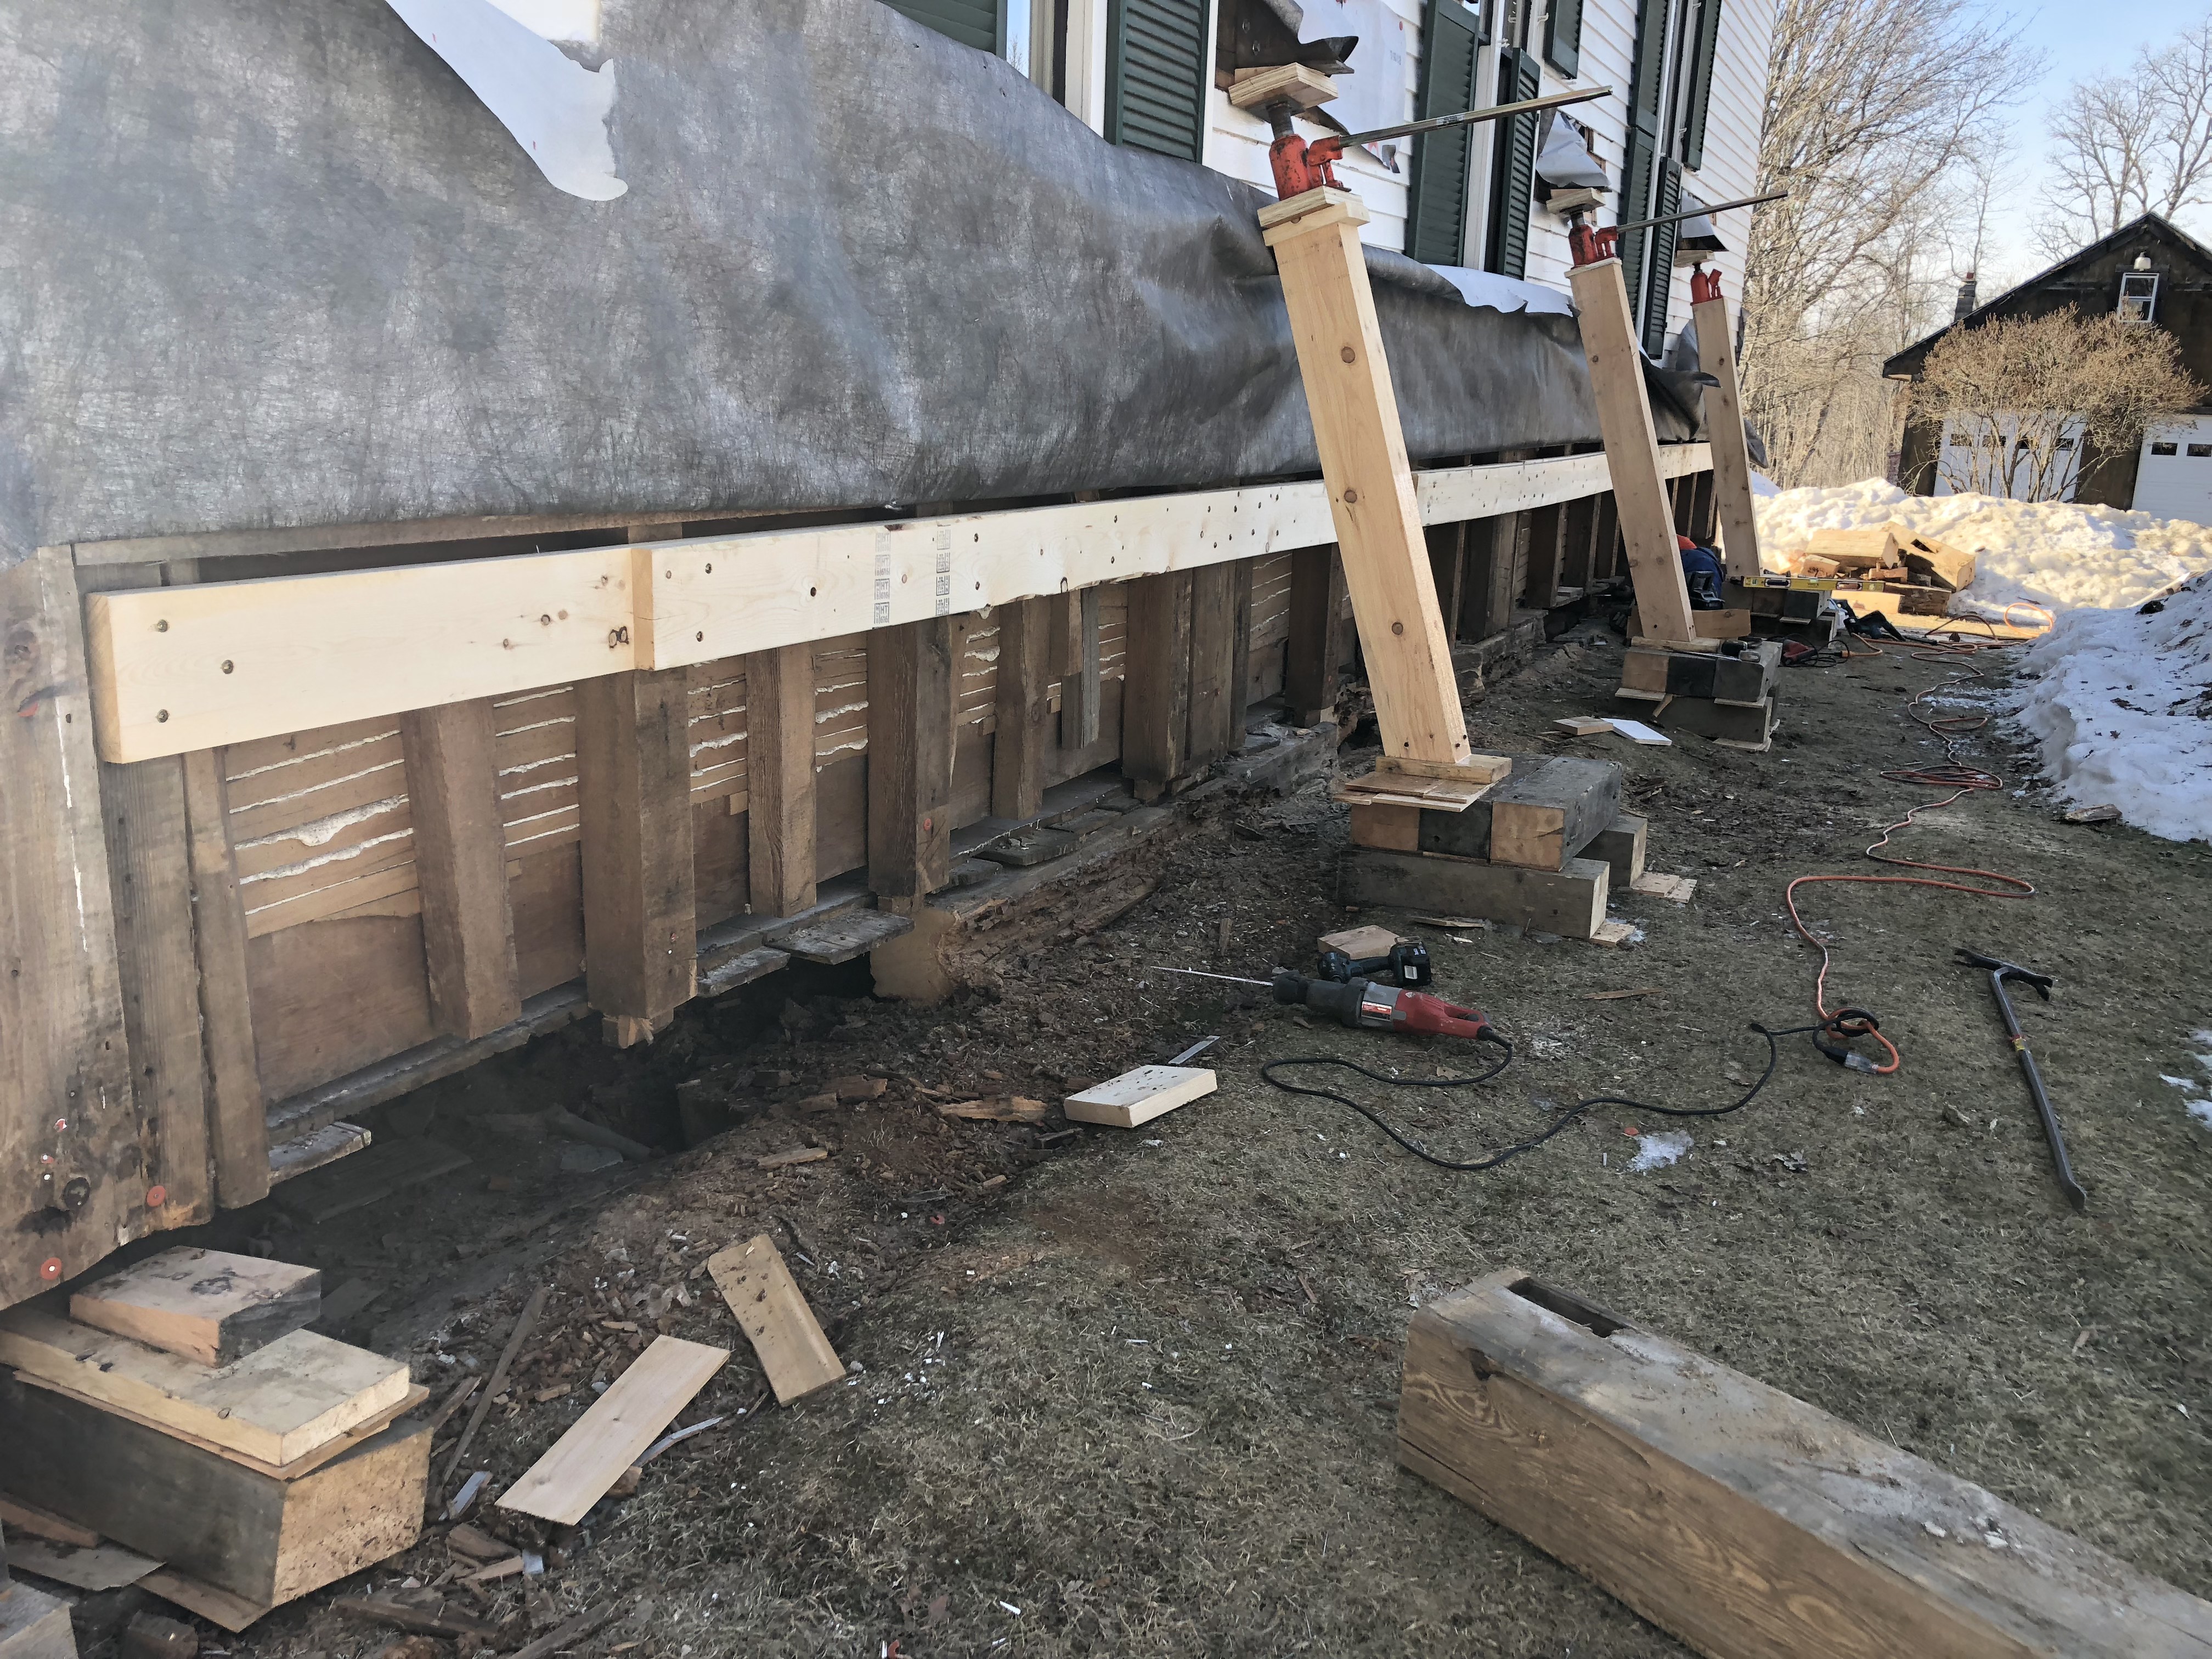
The north eave sill at Benton Falls succumbed to years of organic matter built up along the eave wall, which made the sill nearly earth bound. Poor drainage and splash back didn’t help its cause. This building was different from Troy in that the sills were resting upon original granite capstones that had sunk and shifted over time. Using a laser level up in the attic and measuring the height of the plate at each post, we determined that the rear wall of the building had dropped three inches. During the repair, the crew gently lifted the rear of the building so that it was returned to within a half inch of level. The crew then replaced the entire 8″ x 8″ x 42′ sill. It was in three pieces connected by stop splayed scarfs, like those used at Troy. The building committee has contracted with a company to improve the drainage around the building, and, while they’re at it, pick up the rear cap-stones and install solid stone shims beneath them.
Benton Falls, lifted (here we go again). Photo by Tim Sweeney
You’d be forgiven for thinking I made a mistake and inserted the same lifting photo for Troy and Benton. Not so! The repair process was nearly identical. Don’t be afeared of sill rot. Just fix it, and sleep soundly.
The Barn at Bondgarden Farm has been the talk of Eliot all summer. Nearly a hundred feet long and roofed in slate, the barn was always a stunner, but in July, Rick Geddes lifted the barn 6 feet in the air, and neighbors and newscrews took note. Geddes threaded four 50 foot, 12 inch H-beams into the building running in two parallel lines down the eave bays. Then he crossed the H-beams with eight perpendicular I-beams to pick up the loft joists in each bay. He gently lifted the H-beams using his truck’s hydraulic system, and rested them on six tidy cribbing piles. At this point, the repair work could commence.
Dan explains lifting in front of the hole cut for the steel
Built in the 1860s, the entire undercarriage was rotted, and the basement was no longer necessary. Bob Cantwell crunched up the undercarriage and excavated the basement. Chris McKinnon poured a new frost wall around the perimeter and two level grade beams beneath the drive posts. The new barn floor is crushed stone, which will be more appropriate for its equine occupants.
Bladed scarf repair
Most of the post feet were quite mushy, and required new feet or re-repairs. Fortunately, a few good posts remained, from which Dan and Tom could establish a standard post length. After checking for level with a transit, they used the top of the grade beam as a reference line. From there, they repaired each drive post to the standard overall length. In most cases, the post was repaired with a center tenon scarf, which resists twisting and preserves the maximum amount of original material. In cases where the rot extended above the loft or needed to be removed on one side more than the other, they repaired the foot with a bladed scarf joint, a traditional repair. We commonly see this scarf in old barns, repaired more than a century ago.
Center Tenon Repair
For decades, cattle used the drive posts as scratching posts. Below the loft, their stallside faces have been carved into gentle curves. The joists above were scalloped by the teeth of bored horses. We preserved the patina of the posts and fared the fixes to their organic profiles.
New girts and new eave wall
Once the repairs were installed, Dan and Tom could begin to address the hay lofts. Originally, there were a row of tying girts about halfway up the posts. The barn was converted to house taller livestock, after it had already begun to sink. The remuddlers removed the lower loft girts and snapped a level line on the uneven parallel posts. They neglected to replace the tying girts and erected stall walls, which were clad in 2x6s and filled with insulation. They slapped up loft joists, which broke over the stalls. In some places, the posts had dropped eight inches when replacement clapboards were hung. For now, on the backside of the barn, you can still see how far the barn was out of level by the undulation in the line of clapboards.
New stall studs
The crew used staging boxes to stabilize the loft floors and remove the poorly designed stalls. Then they leveled the lofts to the newly plumbed posts and installed level loft girts between the posts in 6″ x 10″ eastern white pine. The Goranssons will stock the lofts with hay for their horses.
Rear wall wave
Last but not least, Victor Wright, of the Heritage Company, will repair the slate roof. In some ways, all this work was to preserve the intact slate, worth tens of thousands of dollars. There aren’t many barns anywhere that were roofed in slate, but especially in Eliot. As they were interviewed by TV crews, the Goranssons explained why they went through this process to save their barn. They value the craftsmanship embodied within it. During the repair process, they witnessed how much work goes into raising a timber frame of this size. For centuries to come, their neighbors will witness the fruits of their efforts.
At East Derry, we knew the lantern was in bad shape, but we couldn’t know the full extent until we had it on the ground. Brian Cox was the job lead. He says, “The will of the church was holding that thing together, many layers of lead paint, and band-aid flashing details.” It was chilling to observe the extent of the damage, and know the structure was in this condition when it was still 80′ above the congregation.
Lower lantern, inside. Photo by author
Once the frame was exposed, we documented and measured every piece. The design is both complex and well-balanced. Each post is connected to its opposite with an upper and lower girt, and a plate across the top. The eight posts hold hands like four couples in a square dance. David Ewing produced cut drawings for each unique timber. To orient the crew, he provided a key alongside each drawing, highlighting the timber’s location within the frame. This helped the crew organize all the pieces, and to double-check their layout. The color-coded cut key is an innovation we’ll continue to use on all future drawing sets.
Lantern Posts C1 & B4. Drawing by David Ewing
The lantern posts are five-sided; when the building is trimmed out, a turned column will adorn each point of the octagon. Four parallel bed timbers cross the belfry plates and support the eight posts. The bed timbers are crossed by a fifth perpendicular timber, which bears the foot of the mast. The plate level is co-planar and arranged like a hashtag. Two full length plates run parallel to the beds, and two interrupted plates run counter to them. The timber hashtag is connected by hefty mortise and tenon joinery.
Lower Lantern, before. Photo by Arron Sturgis
The lower lantern frame was test fit in our yard in Nottingham, NH. The assembly was smooth and painless thanks to thorough drawings, accurate cutting, and the lull. The doubled, overlapping girts make for a stout frame, capable of enduring high wind-loads at the top of the tower. In dimension, this lantern frame is similar to the one we built to support the Camden spire last year, but the design is very different. Camden was reinforced by an array of braces and had stacked, overlapping plates. The bed timbers there were a stacked hashtag, while the ones here are co-planar and parallel. One of the great joys of this job is seeing the ways in which builders solve the problem of constructing a steeple or spire. The vocabulary of design in a barn is much more consistent; I can accurately model a barn from a phone description. Steeples are not that way, every time I crawl through the hatch, I am greeted by a new, intricate design. Part of our mission, and others, is to protect this repository of proven designs.
Lantern Fitting. Photo by Brian Cox
Obviously, there were aspects of the building that did not stand the test of time. The flashing between the upper lantern and the sweep roof was the most significant failure, and the extreme height limited the steeple’s overall maintenance. Brian was determined to minimize the plethora of tiny penetrations produced by face fastening. With every steeple restoration, we run into this conflict: it is much easier to mill and assemble trim elements in the comfort of our shop, allowing us the luxury of heat, and finely maintained cabinet tools. It is possible to work at the church, but then we have to contend with weather, job-site tools, commuting and staging. Brian decided to assemble the eight faces of the lantern in removeable panels that could be reapplied on-site.
Rusty fasteners indicate where water has penetrated the finish. Photo by Brian Cox
While the lantern was standing in the yard, the crew fit the sides with horizontal nailers, toe-screwing them to the inside of the frame. They sheathed each face with wide tongue and groove pine, blind-nailing through the tongue. Then they backed out the screws and removed each face as a solid panel. The louvers will be hung on top of the panel – they were never functional – and the panels will be craned in as a unit. This will limit the amount of time the crew has to spend working from a hundred foot staging tower as well as water penetration around the fasteners.
Flute testing. Photo by Brian Cox
The frame was decimated, but the most iconic trim details will remain in service. All sixteen urns will be reused, a handful will require new bases. All eight turned columns will be repaired and returned to new, well-flashed pedestals. The louvers and fans will be stripped and re-used, as will the weathervane, and both railings. Cornice trim was painstakingly documented. Sixteen distinct profiles were custom milled by Noah Tremblay and his crew from African Mahogany; the fluted panels and guttae were carved in house.
Lower lantern and belfry railings. Photo by Brian Cox
We’d prefer that these buildings not need our help at all. But given their deteriorated circumstances, we’re grateful we get to do the fix. Next up: scarfing the belfry posts, and joining together the floor, in 12″ x 12″ white oak.