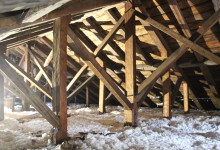
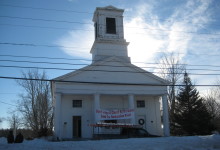
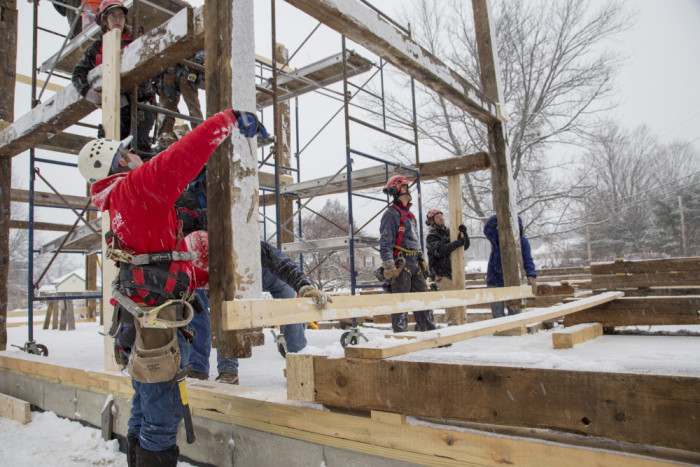
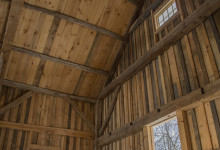
Hey, real quick! We’ve been cutting scarf fixes for enormous post feet, and fitting teleport pads for octagonal lanterns. Updates on Chestnut St Lantern, Brasen Hill Barn, and Jennison Barn, below.
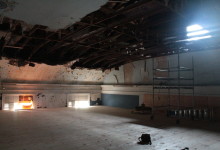
Teleport Pad, Photo by Jacob Imlay
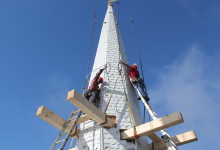
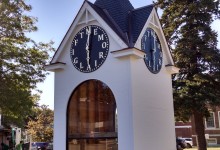
Chestnut St Church Lantern, Camden, ME: This cute little lantern was cut and fit at the shop, and is ready for transport to the Lyman-Morse boat shop later this week. There it will be fit with a 50-foot fiberglass spire and four 7-foot half-round hoods. Jake laid out the frame and Tim, Zach and Charlie cut and fit the joinery. Zach’s experience building guitars and Tim’s experience making furniture helped maintain tight tolerances. The entire lantern and spire will be laid down on a low-riding flatbed for final transport to the church, where a crane will tip the entire assembly up vertical. It is important that the joinery is tight in order to withstand the torque and lateral loads. Scott, Tim and Arron worked with Taylor-made builders up in Camden to plumb the tower and repair the belfry post feet at the Chestnut St Church. More about removing the old spire, here.
Lady Lantern, photo by Jacob Imlay
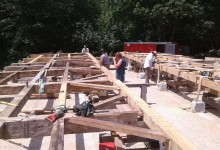
Brasen Hill Barn, Barrington, NH: Led by Dave and Dan, the rest of the crew have been busy with an enormous barn restoration at Brazen Hill Farm. The barn is beautifully hewn, with drive posts like tree trunks. The deterioration was extensive and the barn was completely dismantled for repairs. The extent of rot meant that the barn was heavily braced and was disassembled piece by piece by a crew of eight over two days.
Brasen Barn from above, photo by Josh McNally
Dave, Dan, Tom, Byam and Michael have been busy making traditional timber frame repairs at our shop in Nottingham, NH. Given the extent of damage, the crew worked hard to preserve any viable original material. That means a lot of dutchman and post feet fixes. Dan Boyle documented the repair and fitting process. A few of his process photos, below.
Undersquinted face fix, photo by Dan Boyle
An under-squinted dutchman repair can be used to repair the cheek of a mortise where a pin has blown out the relish. The rest of the post was in good condition and of a dimension and quality that is difficult (but not impossible) to find today.
Get (in the) Bent Brian, photo by Dan Boyle
After the rotten timbers are repaired or reproduced, we use come-alongs to pull the joinery tight and the bent square. Then we drill holes for the 1-inch oak pins that will hold the joinery together.
Eave fitting, photo by Dan Boyle
The barn is big, almost 70-feet long and 40-feet wide. It contains seven bents. The finished frame was raised almost a month ago, and Dave and Scott documented the process by helmet-cam. Stay tuned for the movie.
Jennison Barn, photo by Josh McNally
Jennison Barn, Lee, NH: New Hampshire Preservation Alliance has featured the Jennison Barn as one of their 52 barns in 52 weeks. The NHPA article captures why preservation is important on a human scale, from families to communities. Read their story, here.
Last Thursday, I popped out of bed at 4 am, like Sal on her way to Bucks Harbor. Scott informed me that if I wanted to help remove the Chestnut St Church spire in Camden, I needed to be there by 6:00. By the time I arrived, Scott and Arron had set the rigging. About a third of the way up the spire, eight laminated KD 2x10s poked through the spire like an avocado pit ready to sprout. PTF was hired to direct the spire removal and design a timber-framed transition from the old belfry frame to the new fiberglass spire. We’d worked with the G.C. before on True-Randall farm, Taylor-made Builders are good folks who do high-quality work; so even though fiberglass replacements are not our thing, we got over ourselves because Taylor and his crew are such a pleasure.
This steeple is so tall that a 120′ man-lift couldn’t reach the weathervane on the day we went up there to remove the weathervane (oops). The main church is two full-height stories. Starting just below the main ridge-line, the belfry posts rise 30′ to a plate level just below the clock dials. The original spire rafters penetrate into the belfry, landing on a girt 5′ below the plates. The spire rafters pass through the dial level, behind four 6′ diameter glass dials. Above the dials, the original spire rafters were severed and sistered with relatively light, laminated 2x4s. That repair was performed in the 1990s by a talented and eager Eagle Scout. This go-round, we designed a timber-framed “lantern” that crosses the belfry plates like a crab. Eight 8×8 posts rest upon the lower crab and support a maintenance floor behind the clock faces. The upper lantern plates, or upper crab, extends well into the fiberglass spire, 6′ above the horizon of the clock faces. Four new fiberglass dial hoods will protect the dials, and be structurally fused to the new fiberglass spire. The lantern frame we’re cutting reproduces the telescoped framing levels found in this building and other historic steeples.
Lantern Iso, X-Ray
The model we’d created for the lantern design allowed us to accurately calculate the height at which the rigging would need to be placed in order for the spire to be slightly bottom-heavy as it flew. In fact, once prone in the driveway, the spire balanced like a seesaw on the fulcrum of its rigging. A top-heavy spire might flip mid-air, which would be just as dangerous and scary as it sounds.
Chestnut St Church, Crane, and Rigging
We hung a cage from the main ball of the frame to protect the weathervane from the rigging straps. We linked together the crane operators’ longest cables and our longest rigging straps, to connect the four corners of the metal frame to our rigging beams. The last strap was doubled over, resulting in an eight point pick.
Spire cage
The crane flew the rigging up to the crew on the top of the staging, and we pulled the rigging straps away from the spire as the operator located the ball directly over the weathervane. The rigging was accessed by ladders off the staging, which was less efficient than it was photogenic.
Teamwork
Once the rigging was securely attached, we crawled inside the spire and used saw-zalls to cut first the spire sheathing, then the mast and then all eight rafters. In my experience, the penultimate step of severing the last connections is the most stressful and variable part of the entire crane day. As Arron warned the crew, a forgotten toe nail could prevent the spire from releasing safely and evenly. We were lucky to have a skillful crane operator from Keeley. We wanted the crane to take enough weight, and put enough tension on the rigging to prevent our sawzall blades from binding, but we did not want the spire to bounce or release with any energy.
Witch’s hat with a crown of thorns
Scott and Arron checked in with the operators. When we started cutting the sheathing, the crane had 1500 lbs of weight on the ball. For the mast, 2500 lbs. As the last of the rafters were cut, the crane was taking 3500 lbs. Unfortunately for the spectators on the ground, a safe spire removal looks slow and boring. Unfortunately for my story, the spire released without any hitches. The spire weighed about 8800lbs, which reflects its light framing.
A Bittersweet Triumph
The crane operator lowered the spire safely to the street, and the crew cut the cone into sections small enough to carted away by a pulp truck. The Penobscot Bay Pilot got some beautifully boring drone footage of the removal, and covered the story, here. For more photos of our process, visit our Flickr album.
Last Tuesday night, we brushed the dirt off our shoulders and attended the New Hampshire Preservation Alliance Honor Awards Ceremony. The Northwood Congregational Church, Canterbury Shaker Village and Hampton Town Clock received awards. As David Ford, a former PTF employee and current property manager at Canterbury Shaker Village, accepted the award for restoring the Trustee’s Building, I was reminded of how good preservation is defined by collaboration. I am no longer inspired solely by a building and its history; it is the community that comes together through preservation that keeps us going. Karen Payne, President of the Effingham Preservation Society, said it best, “We’ve been preserving Effingham ‘one slice of pie at a time’ and while we were baking and sharing…and baking…we built camaraderie and community.”
Hampton and Northwood were projects that were defined by the group of committed individuals who worked together to save a piece of history that was personally meaningful. As David Adams, another winner, remarked, these collaborations are not always easy and without conflict. He said, “there were times the client hated me.” But we feel fortunate that we are able to work with people who are passionate about their projects. Working together as a group, with our conflicts and our successes, we become part of a building’s history. We are grateful to have participated in these projects and are grateful to the New Hampshire Preservation Alliance for bringing us all together to celebrate our successes. Read the stories of this year’s honor awards winners on their blog.
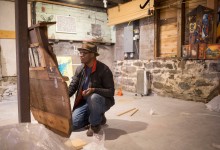
Daniel Minter installs ‘A Distant Holla’ at the Abyssinian. Photo by Portland Press Herald photographer Brianna Soukup
This Friday, May 5, do yourself a favor and attend the opening of ‘A Distant Holla,’ Daniel Minter’s art exhibition at the Abyssinian Meeting House. The work will showcase Maine artists of color including Daniel Minter, David Driskell, Elizabeth Jabar, Rafael Clariot, Ebeneza Akapko, Titi de Baccarat and Derek Jackson. Michael Wingfield, Samuel James and Ahmad Kalari will be playing music, and there will be a performance by the Theater Ensemble of Color. Read more here in the Portland Press Herald.
In 30 years of investigating New England’s historic churches, PTF has never encountered a better truss system than that of Eastport’s Central Congregational Church. Built in 1828, the roof system combines the traditional strength of a king post-prince post truss and principal rafter-principal purlin roof with innovative tying geometry that prevents the pitfalls of rafter slippage experienced by other churches we have investigated. The roof geometry has maintained its joinery even though the foundation appears to have suffered a landslide into the basement of the church, and most of the carrying timbers are being carried by their floorboards.
Front Facade
The exterior façade stands out for the near complete preservation of its original composition and trim detailing. It serves as a prime example of how some Federal Era builders used relatively simple building methods and a small collection of hand tools to create arresting architecture by integrating detailing with overall composition of fenestration and major trim elements. The proportions of the pilasters are arresting, but the trim is not ornate. The pilasters are not fluted and the capitals have a simple, muted profile, devoid of carvings. The capitals are incorporated into the architrave and terminate at the full length gable return, which is deep, but has a short fascia. The pilasters terminate neither in an efflorescence like late Federal, nor in a broad stripe like Greek Revival. Instead, the return is a fine line. An eyebrow window, the width of the center third, punctuates the tympanum. The sash is decorated with three ovals drawn in tracery that repeat the rhythm established below. The building presents a façade that is both austere and elaborate. Austere in that the building is embellished exactly to the degree necessary to show reverence for the building’s purpose, and no more. Elaborate in that the design reflects a serious consideration for proportion and how every detail relates to the whole.
Cantilevered carrying timber
The failure of the foundation can be seen from the outside of the building. In many places, the grade almost reaches the bottom course of clapboards. In the rear northwest corner the foundation stones have caved in. A river runs through the right north bays of basement, where the clearance is 6’. The grade slopes upward to the south; the clearance in the southern joist bays is 1’ – 2’. Bulk moisture and lack of ventilation have deteriorated the timbers over time and the carrying beams bear the scars of inadequate repairs and forced-air heating ducts. The two rearmost carrying timbers are no longer connected to the sills, and the third is fractured. A replacement sill, under the narthex, is undersized, so that the adjacent joists don’t quite reach it. Fortunately, most of the joists are so oversized that they will function ably after the exterior ½” of slough is removed with a drawknife.
Sweet daisy wheel
In the process of undercarriage replacement, much of the foundation will also need to be rebuilt, and as much of the grade removed as possible to reveal pier footers and ensure good drainage and improved ventilation. Foundation and grading will comprise the bulk of repairs.
King post – prince post truss system, looking rearward
The roof system has withstood the extreme deterioration of the foundation and undercarriage due to its exceptional design and level of craft. To the layperson, the Central Congo truss system is beautiful; the hewn surfaces of the timbers are shiny from the use of a sharp adze, and gently mottled, like hammered copper. At the center of the truss, the broad diamond-shaped head of the king post hangs from the apex of the rafters. Its long slender neck widens at two sloping shoulders from which two struts spring. Two wedged braces form an “X” connecting the trusses along the longitudinal axis. The struts each land in a undersquinted notch at the head of a prince post, from whose knees spring yet another pair of struts. There are two additional struts, or jack posts, just outside of the prince struts.
King post – tie connection with stirrup strap and butterfly bolts
To the timber framing professional, the roof system is sublime. The truss itself is at the peak of craft, from the detailed shaping of the king post to the undersquinted joinery at the prince posts. The bottom chord, or tie beam, 10” x 11”, appears to have forced camber so that its center is 2” higher than its ends. The king post/bottom chord joinery is reinforced with an iron stirrup, fastened with butterfly bolts. Not only is the truss exceptional, but they are tightly spaced, less than 10’ 6” on center. But it is the framing between the trusses that is truly innovative. The roof system is a principal rafter, principal purlin roof, with common rafters between the trusses. The principal rafter, or upper chord, is 9” wide, and tapers from 9” deep at its apex to 11” deep at its foot. It is connected to the next truss by a horizontal beam, called a principal purlin. The purlin is parallel with the eave, and about halfway down the roof pitch. Between the trusses, there are three common rafters. In a typical church roof, these commons land on a flying purlin that is joined into the ends of the adjacent tie beams. The problem with this design is that the tie beam is already missing a good chunk of material from the rafter mortise, and the rafter is actively pushing outward against the relish on the end of the tie. The flying purlin is often too undersized to really resist the thrust of the common rafters, and bows out and blows out the end of the tie beam, further compromising its joinery. Commonly, this results in the upper chord of the truss slipping out past the end of the tie.
Truss Iso
In the Central Congregational roof, there is no flying purlin. Instead, each common rafter lands on its own short tie beam, perpendicular to the eave, which runs over the top of the plate and ties back to a ceiling purlin connecting the trusses. The ceiling purlin is 9’ from the end of the tie so it doesn’t compromise the rafter joinery. The ceiling purlin and short tie are substantial. They are strong enough to actually resist the outward thrust of the common rafters. This means that the rafter mortise in the end of the tie is resisting a lot less thrust, and not a single one is blown out or even slipping. Additionally, the principal rafters are fastened to the bottom chord with an iron trunnel pin. The short tie solution is also found in the North Free Will Baptist Church, just up the road, and appears to be unique to Eastport. The truss system appears to be free of rot or any other damage.
20th century spire rafter-belfry post connection
The tower was significantly rebuilt in the late 20th century, and while the repairs were not in-kind, they appear to be functioning. With the exception of one girt stabilization, all the tower needs is a good reaming and a coat of paint.
The octagonal belfry and spire have clearly been through multiple generations of repair. The original spire was blown off the building in the Saxby Gale of 1869. This apparently does not include the belfry, much of which was also rebuilt in 1986 and 1994. Above the tower plates, the eight spire rafters join directly to their posts about 5′ from the belfry floor. There is no intermediate horizontal girt level for them to land on; the spire rafters join the tower posts at the center height of the louver openings. At the louver header, each spire rafter is further secured to a tower post by a 1 ½” iron stirrup that wraps around the rafter and is bolted to either side of the post. The belfry plates do not cross over the tops of the plates, they intersect the plate 6” below the top of the post. The tower posts terminate in a level cut. A belfry roof rafter connects the top of each post with a spire rafter.
King and prince post truss, looking frontward
Access to the building has improved significantly since our first visit in summer of 2015. The removal of substantial pigeon detritus and installation of lighting is a testament to the high-quality stewardship of the Tides Institute and Museum of Art. The organization stands out for its initiative, community involvement, and generation of momentum. TIMA is clearly committed to the continued preservation of its historic structures.
This blog post is a severely abridged version of the Central Congregational Church assessment that we performed for the Tides Institute this spring. TIMA has published a lot more about the building’s history, here.
Deep into the winter of 2014, a banner stretched like caution tape across the front of Northwood Congregational Church. It implored commuters from Portsmouth and Concord, “Don’t Judge a Church By It’s Outside. Look for Restoration Coming Soon!” The red text on white vinyl was the freshest trim on the front facade. The porch sagged, the paint was peeling, and the carved finials once crowning the belfry were many years gone. Still, any driver might have noticed the huge fluted columns more than 30″ in diameter. An unhurried driver might have recognized the church as one of the best examples of Greek Revival architecture in the state, even in its dilapidated state. The slight skew to the banner underscored the meaning in its message. No passerby could have guessed the depth of commitment within the building committee and dynamism of the congregation behind it. The PTF crew restored their church from 2015-2016.
The work was far-ranging, from repairing lightning damage in a king post to reproducing those finials from photographs. But the most impressive repairs were in the columns. The open portico is an important structural element, bringing half of the belfry weight to ground. But they are also an important decorative element, each stave carved with a tapered flute. When we first assessed the site, in winter of 2014, the deck supporting the columns sloped dramatically away from the building. The bottoms of the columns themselves were rotting, showing signs of decay, and the belfry leaned precipitously toward the road. Beneath the deck, we found a rubble stone foundation build on grade. There was no footer, no stone below grade, much less frost line. We supported the belfry on timber deadmen, staging, and steel I-beams while we removed the columns, replaced the foundation, rebuilt the deck, and repaired the columns. Arron documented the process in a series of photos, below.
He described the tilt of the porch as “not quite 45 degrees.”
The crew transferred the belfry weight to structural staging, timber “deadmen”, and a steel I-Beams that picked up the corners diagonally. The rigging was accessed and adjusted by the crew using ringlock staging. Once confident that the belfry was adequately supported, the crew began to cut away the old, decaying deck, to prepare the columns for removal.
Using a chain fall, Tom lowered the columns safely to the ground. A custom carriage was used to transport the columns to our shop. At nearly 20′ long, one column claimed the entire trailer.
After the columns had been removed, we focused on foundation repair. The parish hall foundation had a granite cap stone foundation that was built at grade; there was no frost wall or footers beneath it. The parish hall was supported on cribbing and jacks, and the granite capstones were carefully removed. Using extreme care, Bob Cantwell excavated the soils below the parish hall. Chris McKinnon poured substantial footers. Then he used a one sided form to pour a frost wall up to and underneath the parish hall slab. The granite capstones were replaced, and new sills installed.
The front wall of the church, under the columns, was similarly unsupported. The sagging deck was removed, and new footers, frost piers and frost wall were formed and poured. This foundation accepts the all of the weight from the front pediment, the portico, and half the tower loads. The crew replaced the deck framing with white oak. The dimensions and layout of the timbers were identical to the original. They were tenoned into mortises on the front sill, and pitched slightly away from the building.
The new deck will support the portico and tower above. The structural columns were hollow. They were constructed out of individual staves toe-nailed to a series of round wooden forms. We assessed each individual stave for damage, trying to retain as much original material as possible. Where replacement was necessary, we cut tapered Eastern White Pine dutchmen and spliced them to the original flutes. Each column capital was inspected, repaired and painted. They were constructed from rings of boards stacked, rotated, and laminated together. Each top was modified slightly to accept a structural post. Structural timber posts were hidden inside the fluted columns. The posts were a necessary upgrade that will better transfer tower loads to the ground. The structural post was installed directly beneath the front exterior tie beam. The columns were not originally centered under the beam, and are not centered around the structural post. Once the front half of the columns is installed, the structural post is completely hidden. The front portico looks as it did originally, but is much more structurally sound. Once the columns were replaced, the crew could focus on structural repairs inside the belfry. The lower tower girts were replaced in-kind, along with the belfry bed timbers. All framing repairs were completed without dismantling the tower or removing the belfry. Once the structural repairs were completed, the exterior trim was restored. Balustrade elements were carved by hand, matching the few remnants of the original details, and early photographs. New louvers replaced poor reproductions. Bump outs were flashed with copper and new copper step flashing was installed at the base of the tower. The copper belfry roof was in good condition, and was modified slightly to accept the balustrade. George McKie, of Service Painting out of Lynn, MA, did a beautiful job of scraping, priming and finish painting. We are very proud of the result, but more than that, we are grateful to have been invited into this community. This project was so successful because the building committee recognized the importance of their landmark and committed themselves to appropriate preservation. They were one of the most responsive and knowledgeable groups with which we’ve ever had the pleasure to work.
We all have illusions about longevity. Many people think that a building’s strength is derived from its foundation, made of stone, or brick, or concrete, but that’s only partly true. A good foundation is a blessing, but a bad foundation is not damning. We’ve seen so many foundation failures that in a well-designed timber frame, we consider the foundation a sacrificial element.
The Lord Barn is one such example. Over the past decade, the barn had emulated a pat of butter on hot toast. Its fieldstone foundation was slipping, and the eave sills had rolled out from under the plates. The building looked dangerous to teenagers. With this kind of failure, we expected to find a lot of rot. But with the corrugated metal roof and deep overhangs, water infiltration was never the main problem. There was plenty of air flow, so bulk moisture wasn’t being trapped inside the building. While the foundation and undercarriage melted into the ground, the timbers above stolidly endured.
Lord Barn plate-to-post connection.
Dating a barn like this is hard, and not just because it’s a hot mess. Many of the larger beams, the tie beams, rafters, plates, and posts, are hewn, which means that their surface was smoothed with an adze or broadaxe, resulting in a texture like hammered copper. Hewing was replaced by up-and-down milling throughout the 19th century, depending upon proximity to a sawmill, and frugality. But the frame design and joinery of the Lord Barn follow later trends, especially the plate/post connection. The plates are discontinuous, and are joined into a mortise at the top of each post. The end of the plate rests on a 1″ let-in, or shoulder, characteristic of square-rule joinery, which became popular in the late 19th-century. Hewing is a labor-intensive and thoroughly handmade practice, while square-rule framing, although also cut by hand, was an innovation in efficiency that made pieces more uniform and interchangeable.
Lord Barn, principal rafter-principal purlin roof, with stacked common rafters.
Both gable ends have integrated pocket doors, where the door slides through the middle of a 12″ deep post. Pocket doors look slick, but aren’t suited to this climate; the door and post expand and contract, and the gable sill isn’t well-protected. Arron says Tom Visser’s field guide dates interior pocket doors between 1870-1880, but I can’t find the book to quote it directly, so.
Lord Barn, Rafter-Tie Beam joint
The roof system, with common rafters stacked over a principal rafter-principal purlin frame, is 1870s’ish. The common rafters are sawn and relatively small, 3″ x 5″. By stacking them over the purlins, the major roof framing is better protected. The rafters join the tie beam well inboard of the end of the tie, which means more material in the tie is resisting the outward thrust of the rafters. There is also better airflow around the principal rafters and purlins. In the Lord Barn, the common rafters run well past the plate, creating a deep overhang, which protected the sidewall framing as the sills slid and spread. The frame’s design brackets this barn between 1860-1880. We think it is a late example of a totally hewn frame.
Lord Barn overhang
When the foundation failed, the joinery was put into tension. In a pinned mortise and tenon joint, the pin prevents the joint from separating as the building settles and moves. But it doesn’t matter how strong the oak pin is once the relish past the pin hole gives way. In places where the joinery failed, tenon relish was the culprit.
Lord Barn, post-top tenon relish failure
The left eave sill rolled right off the foundation, pulling many of the left eave posts with it. It racked the entire frame, the posts pulling away from the loft girts. The tenon relish, just past the pinhole, was sheared in nearly every loft girt, and in many of the post tops, too. In bents where the post-tie beam connection held strong, the end of the tie beam dropped dramatically away from the rafter.
Lord Barn, rafter-tie beam separation
A year ago, we disassembled the barn with the entire crew. The clients, Pat and Paul Boisvert and Linda and Frank Underwood, de-nailed the timbers and helped dismantle the bents once they were on the ground.
Paul and Frank pull sheathing while Pat and Linda de-nail studs.
Over the course of the summer, the clients had the foundation poured and built the floor system themselves. In the Fall, PTF made the few necessary repairs to the frame which included small repairs to a few post feet, and some face fixes where the pin had checked the cheek of a post or tie beam.
Third H flying in, photo by Joshua McNally, jamcnally.com
Almost exactly a year later, the whole crew came together again with the clients to re-erect the frame. Because of the discontinuous plates, a frame like this needs a lot of hands on crane day. We assembled each bent into two “H’s” on either side of the drive, with an eave post, a drive post and a loft girt. There were five bents and ten “H’s”.
Arron signals the crane operator as he places the “H”. Photo by Joshua McNally, jamcnally.com
We started in the left side aisle. The crane lifted the left rearmost “H”, and the crew stabilized it with a KD kickstand. Then two loft girts were installed, perpendicular with the first “H” and propped up with temporary deadmen. The second “H” was stood up by the crane and we worked in two teams of three to engage the loft girts. Two additional people on rolling staging lifted the plate and inserted it between the two eave posts.
Engaging the fourth H with the plate. Photo Joshua McNally, jamcnally.com
When the first two “H’s” were plumb, all the joints were temporarily secured with KD gussets. At this point, the box was relatively stable, and we moved onto the third “H”. After the left side aisle was completed, we repeated the process in the right side aisle.
The crane operator flies a purlin to Dan. Photo by Joshua McNally, jamcnally.com
After a late lunch, the crane began flying in the upper triangles formed by the tie beam and rafters. The installation was complicated because the bottom of the tie beam needed to engage with four posts and four braces. Over time, a few of the tie beams had bent to conform to the drooping left eave, and each tie beam fit with some idiosyncrasy. Additionally, there was a pinned purlin between each pair of rafters. These beams needed to be installed by crew-members on staging at roof height. Before each tie triangle was flown, two staging towers needed to be dismantled and re-erected in the subsequent bay in order for us to be able to install those principal purlins. Every member of the crew and each of the clients were needed to erect the frame in a single crane day. It was a lot of fun.
Lord Barn Frame, Re-erected, Photo by Joshus McNally, jamcnally.com
Ultimately, the frame was saved, but the foundation was a lost cause. The relative flexibility of timbers and the strength of their joinery often allows them to outlast their granite and fieldstone foundations.
Crane Day crew, photo by Joshua McNally, jamcnally.com
Our newest crew member, Joshua McNally, took a bunch more lovely photos of our crane day and of the Lord Barn after the roof was sheathed. For more, photos, explore our Flickr album.
I write a lot about our unusual jobs: a deserted island, an elevated dance floor, or a building-sized jewelry box, but most of us got into this to do jobs like the Jennison barn. The job incorporates so many of PTF’s defining motifs: barn preservation, adaptive re-use, local history and creative clients. The Jennisons called in early 2015 about a barn that had collapsed under extreme snow loads. After assessing the damage to the frame, and a long period of negotiation with the insurance company, we concluded that the barn was not salvageable, and that its replacement would need to be significantly scaled down. Ultimately, too many of the posts had snapped in the collapse, and the replacement coverage did not include the embodied value of the craftmanship and timber joinery. Fortunately, PTF had dismantled a smaller frame the previous year, and had hoped we could find it a home nearby.
Brock standing
Brock’s Barn was located at Brock’s Crossing in South Berwick, near Slut’s Corner (the etymology of “slut” is facinating!). Simeon Brock bought the farm in 1790 and lived there with his wife, Judith, and their five children until his death in 1814. None of the children married or moved from the property. The youngest, Deborah, began working for the Portsmouth Manufacturing Company when she was 23. She was known for walking the mile and a half commute to the textile mill and for her thrift. Deborah managed the farm until she died in 1883 at the age of 74.*
Two barns in one, 18′ x 18′ extension on the left, 28′ x 42′ on the right
The Brock barn was actually two barns in one. A smaller, earlier 18′ x 18′ frame was expanded with a 28′ x 42′ frame. The rafters and ties of the former were extended to match the dimensions of the latter. Above, you can see the two adjacent posts where the gable ends of the frames meet. The 18′ x 18′ frame appears to have been built earlier, as the joinery was clearly retrofitted to expand the footprint and raise the peak to match the larger frame.
18 x 18 barn, original roof framing lower right. The ridge was raised, and roof plane extended.
Both frames have hewn timbers and scribed joints. Both frames exhibit the English tying joint, where the plate crosses over the post, parallel with the eave, and the tie beam crosses over the top of the plate. The interior face of the post, about half its thickness, extends past the plate to join to the tie beam with a teasel tenon. Both frames are eave entry, which was an earlier, “English”, floor plan. Both frames are early enough that it is difficult to date them definitively. The larger frame has up and down sawn braces, some of which exhibit the natural curvature of the limb, as above, but this does not date it. The first saw mill to operate on the neighboring falls was established in 1634. The 28′ x 42′ frame is also distinguished by much larger timbers, especially the lower tying girt and longer braces. Based on framing methods alone, it could have been constructed anywhere between 1790 – 1840.
English tying joint joins post top to plate and tie beam
Given the history of the property and surrounding town, we suspect that the 18′ x 18′ barn was built at the time Simeon bought the property in 1790. The smaller frame may have preceded the Brocks, but the only evidence is that they so drastically altered it. The 28′ x 42′ frame may have been built towards the end of Simeon’s life and appended to the smaller frame without any retrofit. The craftsmanship of the alterations to the 18′ x 18′ is significantly later and of lower quality than either barn frame. Some time after Simeon’s death, one of his children or one of Deborah’s farm hands may have extended the barn across the gable, and raised the ridge height. These are the histories we write as we repair the frame, fine-tuning each tenon and scarf joint.
Post scarfs on parade, photo by Dave Ewing
The Jennisons bought the 28′ x 42′ frame. Dave, Tom and Dan performed the frame repairs, and the results are stunning. Standing, the barn is defined by its array of post repairs. Each scarf joint was designed to maximize the preservation of original wood, and withstand the array of forces endured by each post. They planed the new timbers and fared their edges to blend seamlessly with the old.
Bent assembly, photo by Dave Ewing
Dave enjoyed the opportunity to work consistently on timber frame repairs. Nearly the entire roof system was in good shape, and he said, “getting to preserve that was a joy.” He also thinks that part of the reason the rebuilt barn looks so good is that all the new timber ended up in the same quadrant of the barn, in the new loft. The crew repaired the barn in our shop in Nottingham, NH and fit the bents together inside the shop. Then they disassembled the frame and transported it to its new home in Lee. Nearly the whole crew attended the raising, and both Seths and Brian assisted with the finish.
Jennison Barn, rebuilt. Photo by Josh McNally
Charlie Jennison plays saxophone and teaches music at Exeter Academy and UNH. He wants to the barn to serve as a concert space, and we hear that they’re already hosting successful events. Along with the outdoor sculpture gallery across the street, the Jennisons are creating an art enclave in Lee, and we’re proud that the barn gets to be a part of that.
The following photos of the finished Jennison Barn are by Josh McNally. Visit our Flickr page to see photos of the two frames before they were dismantled. Brock’s 18′ x 18′ frame is dismantled and looking for a good home.
Over New Years, my intentional friend likes us to sit in a big group and practice “Rose, Thorn and Rosebud.” We say the best thing that happened to us this past year, and the worst, and the thing that we’re looking forward to in the coming year. My rose took so much time that it’s been nearly absent from the blog, but it’s an easy pick: the completion of the Hampton Town Clock Tower. (This is me talking for me, Arron would surely have a harder time choosing. There’s the completion of the first phase of Wood Island, the East Derry undercarriage, Northwood Church and Jennison barn. There’s the installation of the trusses at Troy, and the commencement of undercarriage repairs in Readfield. There’s the long-awaited restoration of the windows in the converted barn that serves as our office, shop and home for Michelle and Arron. Scott Lewis returned to PTF to be our Project Manager, a top contender for blue ribbon). My thorn was losing Joe McAllister to the wilds of Minnesota; I hope his rose was one of projects that he’s since completed out that way.
Hampton Town Clock Tower stands out because it wasn’t the typical repair fare. Instead of repairing a historic building, we re-interpreted one. In 1990, a catastrophic fire destroyed the Odd Fellows Building in Hampton, NH. The only artifact that could be saved was the Hampton Town Clock, and that had been warped by the intense heat. The clock was given to the town by John T. Brown in 1897, with a dial which spelled out “M E M O R I A L G I F T” in place of numerals so that every person who wonders why it’s half past “G” remembers his generosity. Since 2004, a dedicated group of Hamptonians have been working to restore the clock. They wanted the clockworks itself to be on display, in a housing that referenced its original home.
Most people think of a clock as a round face with hands and numbers, but a tower clock is the size of a sideboard, with large bronze gears and a 9′ pendulum that swings below it. The round face is called a dial and might be the least interesting part of the whole contraption. Hampton’s clock is a Howard Round top, which means that the gears sit between two half-round carriages, about 4′ wide, 4′ high, and 2′ deep.
The original tower, built in 1895, was too small for the clock, and was raised twelve feet and rebuilt in 1897. The roof was unique, with cross gable pitches topped by a spire reminiscent of a witch’s hat. The roof and dials perched above a belfry with large open arches on each face, and pilasters on each corner. The committee wanted us to build a standalone clock tower that displayed the clockworks at eye level, referenced the original building, and fit into their budget of just under $100,000. We also learned that the clock would work best if the bell was located beneath it, so that the drive train could be relatively straight, and not be diverted around a large bell. This created our biggest design challenge. We wanted to display the clockworks at eye level, but the clock needed to be located above a bell that stands 5′ high in it’s carriage.
Tower and staging
At first we designed a building that nearly reproduced the belfry, with its open arches and fluted pilasters. We kept the original gables, but eliminated the witch’s hat. We presented the project at the Crit night of the Portland Society of Architects to get their input on the arrangement of clockworks and bell, and ended up getting better feedback about the roof and trim. They encouraged keeping the original roofline and accentuating the timber frame. We learned from the committee that the pilasters didn’t fit into the budget anyway. Ultimately, we arrived at a design that replicated the iconic roofline, over a much simpler box. We enlarged the arches, which echo the round top of the clock, but lost most of the Victorian trim, which took the focus away from the main object anyways. The timber framed floor hovers just above the bell, and is cut away at either window, so that the view of the clock is obscured as little as possible. The bottom of the clock is directly at eye level, so that visitors look up into its workings. One of the architects dismissed the design as looking like a ticket kiosk, which was OK by us, but I think of it as a building-sized display case for a desk-sized clock. The design process was incredibly rewarding, and the inputs from each stakeholder and committee member improved the design. Together we created a building that better fulfills its purpose than we could have on our own.
Slated Roof
Lee Hoagland, Jake Imlay and I cut and fit the frame at the shop. The new clocktower would be erected on the front lawn of the Centre School in Hampton, and we needed to complete as much offsite work as possible before we could work onsite during summer vacation. The foundation and site work was donated by Kenny Lessard by the end of the school year, and we erected the frame in early July. With Scott Lewis and Seth Rowell’s help, we sheathed the building and completed the trim. Portland Glass manufactured and installed the 10′ high arch-framed windows, many thanks to Paul Vermette and his crew. Skip Heal of Northeast Lantern donated a reproduction of the elaborate wind directional. The Heritage Company graciously accommodated our tight timeline and slated the eight peaks and eight valleys in August. In November, the clock was installed and running and we celebrated with the community, including many residents who fondly remembered the original tower and the clock’s tolling.
Hampton Town Clock Tow
While I certainly hope for more new design-build jobs in 2017, my “rosebud” for the coming year is the work we are doing with communities throughout Northern New England to preserve their historic landmarks, and that was the real pleasure of Hampton. We will be collaborating with local contractors in Troy, Readfield and Eastport in the Acworth Model to develop repair plans and share specialized skills. From the committee chair to the on-site carpenter, we are fortunate to work with folks who really care about their neighbors. We work with people who donate a lot of time, knowledge and money to a communal cause: saving the structures that serve as a reminder of our shared history and as meeting places that knit the community together.
The Winter Street Church Sanctuary, before remediation.
(Hey readers, this was a cool job we completed over the summer, and Jake Imlay wrote up a nice blog post about it. Enjoy!)
The Winter Street Center in Bath ME, home of Sagadahoc Preservation Inc., is striking at first glance. Sitting near the top of a hill, its gleaming white tower is outlined sharply against a blue sky. The tower is three tiered and ornamented in a Gothic revival style, with layers of pointed arches and slender spires topped with carved finials that look like spring onions. The building is flush board sided and bright white except for the window trim, which is red. The windows are triple hung and topped with a fourth fixed sash shaped into a pointed Gothic arch. On the whole, the simple strong lines of a New England church in white, and the more pronounced Gothic revival ornamentation work well together and the building manages to be eye-catching while fitting comfortably into its surroundings.
Inside, the main sanctuary space is defined by subtle curves. The balcony wall is curved, along with the narthex wall below it, and the ceiling has, or had, a deep cove. The narthex wall is the wall separating the front entrance, or narthex, from the sanctuary, and often offers structural support to a tower. This wall is where the curves originate. The sanctuary is close to 40 feet across and the curve starts at one wall and swings to the other catching the back center of the room at its deepest part. The pews mirror the curve as they move towards the altar as does the back portion of the balcony that wraps around three sides of the room. The last place the curve repeats is in the ceiling in an arch spreading from wall to wall. It was this ceiling and its spectacular failure that brought us onto the project.
During a windstorm in August of last year, about a third of the plaster and lath detached itself in one huge sheet and came crashing down onto the pews below. The reasons for this are not entirely apparent, but the plaster ceiling is/was attached to a surprisingly slight structure of 1” thick pine boards suspended from the roof trusses. The one inch thick boards are widely spaced and the edges provide by a very small amount of fastening surface for the lath. It may also have had something to do with the family of raccoons living in the space above the ceiling. The combination of weather, light framing and furry squatters proved disastrous.
Sagadahoc elevated timber deck, partially erected
We worked with EnviroVantage to clean the ceiling off the pews and erected a semi-permanent timber-framed platform from which they can demolish the remaining plaster and lath. The floor will pass over the balcony pews and land about 10 feet below the highest point of what remains of the arch. After the demo is completed, we’ll address structural issues in the roof trusses, and rethink the ceiling framing that defines the arch.
Sanctuary interior iso
The timber framed platform was conceived as a cost effective alternative to a more traditional staging setup due to the point loads in the basement, the nine foot cantilever over the balcony and and the amount of time it is going to have to be in place. Usually, it’s more economical and efficient to rent ringlock staging than to timber frame our own, but the timeframe for this repair is on the order of years not months. SPI was facing the rental of a lot of staging for several years or paying to erect and disassemble a lot of staging several times. The timber frame will result in fewer penetrations of the original sanctuary fabric, point load directly to ground and result in a work surface that is inherently stronger and easier to work off of than temporary scaffolding. The timber floor solution will allow the abatement crew to remove the remaining ceiling from rolling staging.
Timber frame floor, from below
The elevated floor is supported by four timber frame walls, consisting of seven posts, with paired braces and topped by a 60′ scarf-joined plate. The four plates are spanned by engineered I-joists, which pass over the balcony and rest on a knee wall adjacent the exterior eave walls. The biggest challenge in installing the timber frame floor was cutting the posts to the correct height. The tops of the posts needed to be level with one another for the joinery to fit, and the floor needed to be level in order to accommodate rolling baker’s staging. The main sanctuary floor rests on a series of six carrying timbers that run from eave to eave and the widely, unevenly spaced joists between them. The height of the sanctuary floor varies by more than two inches. We first mapped the carrying timbers in order to locate the posts directly over the carrying timbers, and to ensure the the carrying timber was supported by a pier directly beneath each post. We cut the joinery for the entire floor leaving the ends of the posts long. Once on site, we strung level lines across the sanctuary at the height of the elevated floor and parallel with the carrying timbers and measured down from the lines to the floor. The joinery was cut uniformly, but each post was custom cut to length. We were very pleased with how the joinery came together. If you want to see the plans, check out the Sagadahoc conceptual drawings. Sagadahoc Preservation Inc. is currently fundraising to restore their historic sanctuary, find out more or donate here.