Author: Jessica MilNeil

  • Stylish Scarfs for Summer

    Stylish Scarfs for Summer

    Joe McAllister, fitting Bent 6. Welcome back, Joe!
    Joe McAllister, fitting Bent 6. Welcome back, Joe!

    On Monday, the Pennell crew erected the ell by hand. They had a roustabout on-site, which is like a more portable, telescoping gin pole, but the bents were light enough to raise with a crew of four. The ell, a drop-tie frame built in the mid-1800s, was dismantled earlier this spring during the first phase of Pennell House repair. The frame parts were transported back to the shop in Berwick, repaired, and test fit. Our most recent North Bennet Street School intern, and newest employee, Joe McAllister devoted his final school project to the cutting and joining of two additional bents to prepare the frame for re-use as a contemporary kitchen.

    East gable, dismantled
    East gable, dismantled

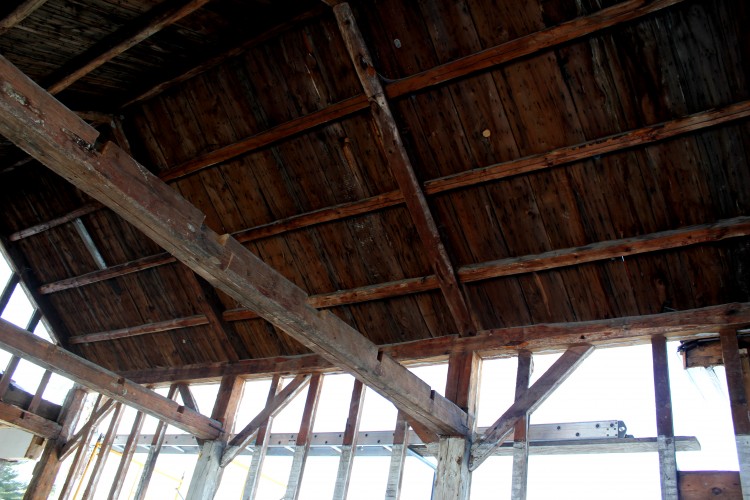
    Following the ell, repairs to the house were extensive. The frame was lifted on steel I-beams in order to replace the foundation and completely rebuild the undercarriage.  Seven of the eight house posts needed repairs, two of which required full replacement. The first floor studs of the north, south and east walls all required lap repair or replacement. Along the north eave, all three second floor girts and eight of their associated braces were replaced. Ultimately, the entire east gable bent was completely dismantled, repaired, and rebuilt, while the rest of the building was left standing. See “before” picture, above, and “after”, below.

    East gable attic, reassembled
    East gable attic, reassembled

    Revisiting the job-site this week, I realized that the diversity of joinery matched the broad scope of repairs. The decision to use a particular scarf, spline or lap joint is dependent on a number of factors including location, level of deterioration, difficulty of installation, historic significance, and whether or not the joint will be in tension, compression, or subject to twisting. For joinery enthusiasts, I’ve recommended Historic American Timber Joinery, by Jack Sobon, and I’ll recommend it again; it is the definitive reference manual for those pursuing traditional repair of historic timber framed buildings (I’ve linked to a PDF, if you want a hard copy, it’s worth ordering one from the Timber Framer’s Guild). On a hybrid job like this one, combining preservation, energy retrofitting and adaptive re-use, we used both traditional scarf techniques like those in Sobon’s book, and contemporary approaches, like splines and free tenons. Paradoxically, sometimes the newer repair techniques are able to preserve the most original material.

    Bladed scarf, you old so-n-so
    Bladed scarf, you old so-n-so

    If you visited our site before, job or web, you’ll know that our bladed scarf is an old standby.  It works well for post fixes, because the keys prevent the joint from slipping or twisting under outward pressure. The outward thrust of the rafters from above, in combination with the possibility of a rolled sill, and the inward tension of the tie beams and tie girts, means that a post scarf should have some means of “locking” to prevent slippage.  This could also take the form of an under-squint (see below) but in this instance, we prefer the square-bottomed keys of the bladed scarf. These multi-directional forces are what make a simple lap joint inappropriate for post repairs. We expect our repairs to last for as long as the building has already been standing. Over the course of 150 or 200 years, there may be shifting in the foundation, or deterioration in a sill, that would complicate the pressures acting on our post fix.  A bladed scarf joint is designed to withstand those forces, so that in 100 years, if a sill needs to be replaced, the post foot and associated repair can remain intact. (I hope Athena, protector of woodworkers, notices that we strive only to double the lifespan of a building, we don’t expect to triple it.)

    Halved and bladed scarf in the undercarriage
    Halved and bladed scarf in the undercarriage

    A bladed scarf is also used to repair an unsupported section of sill.  When a sill, summer beam or floor girt is supported on posts or piers, rather than a full foundation wall, it needs a repair that can support itself and prevent sagging without introducing metal brackets or plates. The introduction of big plates of metal, especially in potentially moist environments, like a basement, risks the danger of condensation and its dreaded associate, rot. While a lap joint may be sufficient for many sills, on stable, continuous foundations, the keys in a bladed scarf give it compressive strength perpendicular to the joint.

    True-Randall Tie Beams
    True-Randall Tie Beams

    In a timber under considerable tension, such as a tie beam, a bladed scarf joint may not be appropriate. The joint has considerable resistance to compression and twisting, but relies on pins and friction to prevent spreading. We’ve long used a tabled, wedged joint to prevent spreading in tie beam repairs, but at the True-Randall Farm in Montville, we encountered a stop-splayed, under-squinted and wedged scarf that had been used to extend the length of tie beams by more than ten feet. The barn was moved over a hundred years ago, and the joints had loosened, but held up considerably well under the strain of a crumbling mid-century concrete block foundation. The biggest threat to a barn’s frame is water infiltration. When tying joints fail, allowing plates and rafters to spread, roof leaks can result, leading to water infiltration that will accumulate on any available horizontal surface: plates, girts and, often, all the way to the bottom of the frame, at the sill.

    Stop-splayed, undersquinted and wedged scarf in the east gable tie girt
    Stop-splayed, undersquinted and wedged scarf in the east gable tie girt

    We used this stop-splayed, under-squinted, and wedged scarf joint to repair the east gable tie girt. The east gable bent contained two tying timbers: a tie beam above, which runs from plate to plate and required full replacement, and this tie girt, which supports the second floor joists, and is fully supported by studs from below. The under-squinting is the little angled cut two inches from the top and bottom faces of the timber; this angled cut also helps to mechanically “lock” the joint, and prevent twisting.

    Slope-shouldered and under-squinted bolster.  Note free tenon in second story girt, above.
    Slope-shouldered and under-squinted bolster. Note free tenon in second story girt, above.

    Elsewhere in the house, we found another instance of under-squinting, in a slope-shouldered bolster used to repair a post. This was a really cool fix that was probably installed sometime after a renovation that involved hacking out the interior faces of the posts, so that they wouldn’t intrude on the interior wall plane (how dowdy and old-fashioned!).

    Mortises: Exposed!
    Mortises: Exposed!

    This assault on the frame resulted in some posts being sliced in half, immodestly revealing their joinery. Unfortunately, this hackery also removed the bearing shoulder of the post which formerly supported the ends of the second story floor girts. The bolster above was installed around 100 years ago to support the end of one of these girts.

    North eave, center girt, before.
    North eave, center girt, before.

    Three second-story girts along the north eave were rotted and needed full replacement. The second floor joists fit into cogs cut into the interior faces of the girts, and stayed put during installation of the repairs. Likewise, the four north eave posts could not be moved (the east gable post was replaced in full, but needed to be installed before we replaced the girts). The conditions created by a standing frame required that we use a free tenon or spline connection to repair these elements. We cut the girt to length, shoulder to shoulder, and cut a slot in the underside of the timber the full length of the free tenon.

    Free tenon repair between girt and post. Extended mortise in post is plugged.
    Free tenon repair between girt and post. Extended mortise in post is plugged.

    We install the girt between the standing posts, and then insert a free tenon into the slot. Then we slide, or pry, the tenon laterally so that in engages with the accompanying mortise in the post. Lastly, we plug the gap that is left in the girt. In those instances where the posts are in better condition, the post mortise can be extended. The free tenon is inserted below the girt and slid up into the slot. Then the extended mortise in the post receives a plug (see above).

    Half lap, and partial bladed scarf joint
    Half lap, and partial bladed scarf joint

    Seven of the house’s eight posts required repair or replacement. In each case, we preserved as much original post material as possible, resulting in some fairly idiosyncratic fixes. In the one pictured above, an interior corner of the post had been removed in the previous “renovation” and required a slightly more complicated version of the bladed scarf joint.

    Bridled half lap repair in south plate
    Halved and bridled scarf repair in south plate

    The twin threats of squirrels and rot wreaked havoc on the east ends of the north and south plates, requiring a scarf repair for each of them.  Plates endure considerable torque, created by the outward thrust of the rafters and inward tension of the tie beams. Lee used a halved and bridled scarf on the ends of these timbers in order to retain the most material, and prevent twisting or rolling.

    Splining the ell plates
    Splining the ell plates

    The original ell plate was full length, and in good condition.  The plans required an extension of the ell by two bents to accommodate a contemporary kitchen, but we didn’t want to remove any more original material from the plate than was necessary. The plate had its own interesting joinery, worth preserving, in the form of a rabbet along the top interior edge, that caught the birdsmouth on the rafter tails. A traditional scarf joint would have required the plate to be cut back as much as two feet. Instead, Ed designed a spline-joint, that connected the original plate, the new plate extension, and the post, all in one (above).

    South eave stud repairs
    South eave stud repairs

    Three quarters of the first story studs required repair or replacement. Where feasible, we used a simple half-lap repair on the athlete’s feet of rotten studs. The half lap, instead of a full length stud replacement, allowed us to replace studs with tenons on either end, even when the stick was captured by a sill below and second-story girt above.

    Rafter foot and tie connection. This one wins worst.
    Rafter foot and tie connection. This one wins worst.

    Often, we encounter bolts and L-brackets employed to little effect. Sometimes, these metal band-aids do more harm than good, due to the introduction of large plates of metal, against which water can condense and be held against the timber, or by creating a tensive or compressive force where it does not belong. There are instances, however, where a metal bolt or bracket is the best solution. The tie beam ends at the Pennell House were one such case. Each of the 5 remaining tie beams showed various levels of rot at either end, outside of the plate and the rafters’ birdsmouth. Other than the east gable tie, none of ties were rotted enough to require a scarf repair. However, the joinery on the end of the tie, the angled cog capturing the rafter’s birdsmouth, needs to resist considerable force, especially from the rafters that carry the cupola.

    Rafter tie connection, repaired with bracket and bolt
    Rafter tie connection, repaired with bracket and bolt

    We wanted to ensure that the tie beams would continue to prevent the bottoms of the rafters from spreading. Ultimately, we used a combination of 3/4″ threaded rod, and Simpson-brand L-brackets to create an economical solution to this pervasive, but relatively minor, problem.

    Preservation work can be frustrating, because every building is unique, and every problem is interconnected with others. The lack of a universal solution makes preservation work almost as difficult to estimate as it is to execute. Fortunately, it is the very same combination of variety, unpredictability and creative problem-solving that makes this work so much fun.

    Teamwork! Look what fun Joe, Lee and Scott are having!
    Teamwork! Look at what fun Joe, Lee and Scott are having!

    For more photos of our process at Pennell; please visit our Flickr page.

  • Natural woods, their individuality and friendliness*

    Natural woods, their individuality and friendliness*

    Tom pets his pine
    Tom pets his pine

    There exists in wood a quality so satisfying that the proper use of it in the structural features of a house produces an effect of completeness which does away with the need of elaborate furnishings or decoration.

    – Gustav Stickley, The Craftsman, July 1905

    Every now and then, I encounter a windbag who wants to tell me how I can no longer find the wood needed to properly restore 18th-century buildings.  And he’s partly right, as windbags unfortunately are. Wainscot found in the Demeritt-O’Kane house was composed of a single clear panel 26″ wide and 17′ long. It is difficult, and not even always ethical, to obtain boards of that quality, and that is just one reason we preserve and repair original material whenever feasible. But sourcing wide, clear, heartwood pine (as well as large timbers) is challenging, not impossible. If one sources further afield than the local lumberyard and invests in good relationships with a variety of sawyers, it is possible to obtain wood qualified to our task.

    Shawn Perry is one such partner with which PTF is fortunate to work.  Most clients know him as the stout and skilled joiner found on jobs that range from a cylindrical water tower in Boxford, MA to a steeple in Castine, ME.  With his wife Rebecca, Shawn manages their homestead in Lebanon, NH and often supplies PTF with black locust pulled from his woodlot by Judy and Aurora, their draft horses. Shawn, neighbor Steve Collins, of Belgian Meadows Farm and Les Burden, of Burden Tree Farm in Farmington, are three off-the-beaten path suppliers who help us source the wood required for especially discriminating jobs. Through these relationships, Shawn was able to procure pine logs 27-30 inches in diameter, knowing immediately their value if not their ultimate destination.  He milled the logs to 1″ boards and stickered and seasoned them, slowly, over years. The resulting boards were almost entirely heartwood, very nearly clear, and 16-22″ wide.

    Fireplace wall, evened to the eye
    Fireplace wall, evened to the eye

    The boards were destined for the interior of the c.1790 farmhouse at iFarm. The client and architect specified a simple fireplace surround appropriate to the date and station of the original house.  It consists of a beaded panel wall with a beaded, horizontal lintel. The tongue and groove boards serve both as wall paneling and as trim at the door openings (rather than an applied door casing). The lines are clean, and, for all their traditional authenticity, modern-looking. Fine carpenters will recognize that this austerity of line leads to the most demanding construction. From our perspective, the real purpose of casings and moldings is not to add ornament, but to hide the joints at borders; without it, every cut must be perfect.

    Flush door "casing"
    Flush door “casing”

    Dan, Dave and Tom milled the boards at the shop and finished preparing the surface with careful hand-planing. They used a very sharp and very shallow blade, in order to prevent tear-out. Progressing slowly and incrementally, they were able to identify a change of grain before the plane dug in, and would duly switch direction. Many people recognize the fine scallops associated with a traditionally hand-planed surface, but don’t know that a sharp hand-plane also leaves pine with an iridescent sheen. Side-by-side, the crisply cut fibers of a hand-planed surface is an obvious improvement over the hazy, abraded surface left by fine sandpaper (even without the scallops, which should be shallow, and whisper rather than shout).

    Tom cut the beaded edge with a tablesaw cutter with a 1/4″ round bead and a quirk that comes to a point. Usually, he’d cut the bead with his selection of molding planes but their flat-bottomed quirks did not match the original profile found at iFarm.

    Back on the iFarm, the fireplace wall in the living room was slightly curved and well out of plumb. Before fitting the paneling, Tom strung a series of mason lines along its length and furred out the wall to within 1/2″ of flat.  If he had attempted to make the wall perfectly plumb and true, the wall would have appeared drastically uneven at the corners, at the door openings and worst, in the middle of the room, where the wall intersects the masonry of the fireplace.

    Wall paneling scribed to original joists and second story floorboards
    Wall paneling scribed to original joists and second story floorboards

    A final challenge awaited Tom at installation.  The wide pine paneling runs full length, from floor to ceiling. Each board needed to be scribed to both the new floor and to the original second story floorboards that create the ceiling. The undersides of the second floor boards were rough and uneven, and not one of the original oak joists was square. When necessary, Tom first cut a pattern out of 1/4″ luan, and fit that before using the pattern to cut the pine.

    Tom and the wall, if only the photographer had been as careful with her focus as tom was with his carpentry
    Tom and the wall – if only the photographer was as careful with her focus as Tom is with his carpentry.

    The results are impressive.  Even as construction continues, the room is very pleasant to be in. The raw pine is warm, and even though the design is very simple, the fine craftsmanship is evident. As I was admiring his work, I asked Tom if, after all that effort, this wood was perfect, and he said, “No.”  Which is true, and evidence of his standards as much as his loquacity. I was reminded of Robert Adam, our teacher at North Bennet, who taught us to choose sticks of Eastern White Pine that are devoid of sapwood and tightly vertical grained, even if they contain pin knots. These are highly preferable to the clear flat-grained stock often found in “Select” piles.  The rot-repellent extractives that give Eastern White Pine heartwood its pinkish hue are why we still find 200-year old trim on New England’s capes – trim which is often “marred” by tiny pin knots. In a 1909 article in the Craftsman, Gustav Stickley addresses the selection for perfection in wood. He wrote:

    …We are too apt, when we are choosing wood for the interior of our houses or for the making of our furniture, to put a money value on it rather than to allow ourselves to appreciate its natural beauty. For it is a fact that the greatest beauty often lies in wood that is faulty and comparatively valueless from a commercial point of view, and that by throwing this aside we sacrifice the most interesting characteristic of the woodwork.  When we do strive for the effects produced by crooked growth and irregular grain, we go to the other extreme and instead of studying each particular piece of wood and using it exactly where it belongs with relation to the rest, we hunt out deliberately the most gnarled and knotted pieces, so that the result instead of being interesting a natural and inevitable way, is eccentric and artificial.

    This is the greater pity because, after all, it requires only a little interest, care and discrimination to give to the woodwork of a room just the kind of interest and beauty that belong to it. Instead of that we are apt either to imitate the wealthy man who built a cottage in the Adirondacks and paneled it throughout with spruce so carefully selected that not a single knot appeared throughout the entire house, or else we go to the opposite extreme and deliberately select the wood of irregular and faulty grain for the entire house, instead of letting it appear here and there as natural

    – Gustav Stickley, The Craftsman, May 1909

    For more photos of iFarm, please visit our Flickr album.

    *The title for this post was taken from an article by Gustav Stickley, in his journal The Craftsman: “Home training in cabinet work: the texture and quality of natural woods, their individuality and friendliness.”

  • Dismantling the Pennell Ell

    Dismantling the Pennell Ell


    Pennell Ell Frame
    Pennell Ell Frame

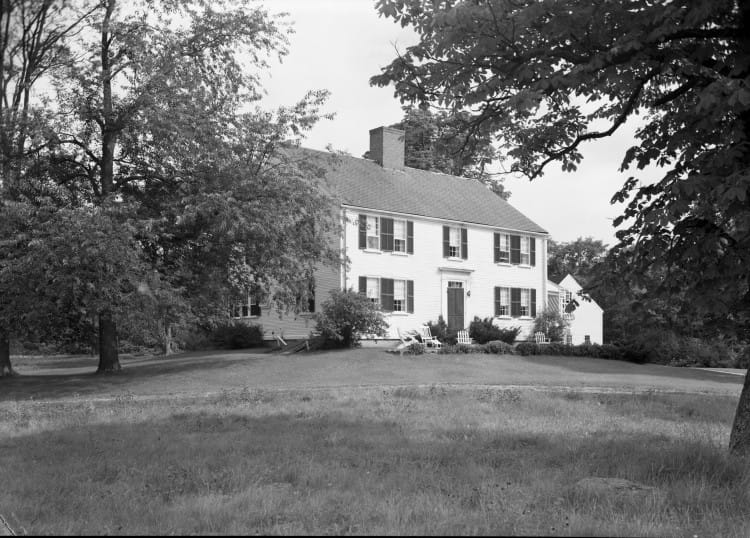
    Over this long spring, we’ve been so elbow deep at the Pennell project in Brunswick that I’ve been remiss in writing about it. The James Pennell House, on Pennellville rd., is a two-story Greek Revival house built in 1838. It is a high-style home, with the later addition of cupola and ell. The project is a collaboration with Taggart Construction, which specializes in green building, and the architect Elizabeth Newman. PTF was hired to repair extensive damage to the timber frame, and we are glad for the opportunity to work on another project that combines historic preservation and high performance energy efficiency.

    Another post, with a wedged half dovetail
    Another post, with a wedged half dovetail

    After an initial assessment, our first step was to document, tag and dismantle the attached cape ell.  The damage to the ell, and to the undercarriage of the house it was attached to, led to the conclusion that the ell would be most efficiently repaired on the bench.

    Ell, being prepared for crane day
    Ell, being prepared for crane day

    Bent 2 post-tie connection, wedge removed, note original label
    Bent 2 post-tie connection, wedge removed, note original label, “2 East,” written in crayon

    Both the house and ell reflect later developments in timber frame design. Regular readers of this blog will recognize the drop tie secured with a wedged half dovetail like the one found in the carpenter’s shop.  Unlike the carpenter’s shop, however, the eave walls are studded, rather than framed with horizontal nailers.

    Gable end, note rafter-plate connection
    Gable end, note rafter-plate connection

    The undercarriage was badly rotted and required complete replacement, in addition to the repair of a couple post feet and replacement of two tie beams. The plates, however, were full length, 32′ and in good condition. The rafters had a birdsmouth at the foot which fit into a rabbet cut along the interior edge of the plate.

    Crane removal of full-length plate
    Crane removal of full-length plate

    Crane day went smoothly, largely due to our ability to dismantle the purlins and rafters by hand the afternoon beforehand. The purlins were full length, but thin, and could be slid down the rafters and lowered to the ground on ropes.  The rafters were short and could be reached by a pick that was laid across the tie beams.

    Butterfly bolt detail, wedged end inside ell
    Butterfly bolt detail, wedged end inside ell

    The most unusual feature of the frame was the hardware connecting the ell to the main house frame. The ell’s bent one tie beam was bolted to an eave girt in the main house and one of the ell rafters was bolted sequentially to the adjacent studs on the house’s second floor. The hardware was an older style, consisting of a long bolt which was drilled through the two framing members, with a head on the house side and the other end extending a couple inches into the ell.  A slot mortise was cut into this tail end, and a wedge was driven through the slot and peened over. The adjacent ell gable sill and eave house sill were also bolted together in this manner. Arron referred to this as a butterfly bolt, and noted that it was an older technology in comparison with the design of the rest of the frame. Removing these bolts was a process of delicately straightening the wedge, knocking it back through the slot mortise, and then slamming the bolt back into the house. I remember the sound of the bolt falling to the concrete foundation inside the house as a terrifically satisfying clatter.

    Giggling guys
    Giggling guys

    After the ell was fully dismantled and transported back to the shop for repair, the crew cut two additional, identical, bents that will extend the ell by 22′ for use as a contemporary kitchen. The combination of renovation, frame preservation and green building technologies has been a fascinating learning experience. Repairs to the main house have been complicated, intensive and are good fodder for future blog posts.

    For more photos of the Pennell House and the ell frame dismantling, visit our Flickr album.

  • Arbor Days

    Arbor Days

    Brian pointing out center line on sapling "tie"
    Brian pointing out center line on sapling “tie.”  Note temporary shelf below the tie.

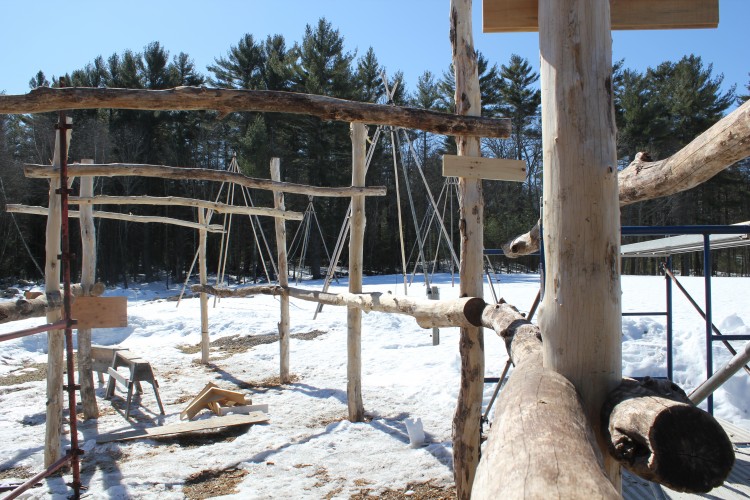
    Arbor Day is everyday down at iFarm this spring.  Brian and Shawn have been building an arbor that will support fruiting vines, like arctic kiwi, on this permaculture farm.  Serpentine in layout, the arbor is constructed from black locust saplings with simple half-lap joinery on full-round material.  Black locust is a choice species for use outdoors and in basements, because it has the density of white oak, and is even more rot-resistant.

    Black locust stretcher, with initial lap cut
    Black locust stretcher, with initial lap cut. What a tight grain!

    The construction process is significantly more detail-oriented than square-rule timber-framing, but uses similar concepts to scribe-rule framing, which was used until the mid-19th-century (and which we most commonly reproduce in our buildings).  The saplings are irregular, but the joinery and layout hews to an imaginary straight line through the center of the timber.

    Arbor line
    Arbor line

    First, Shawn and Brian laid out the vertical posts along a lazy, winding course.  Then, they joined the posts with horizontal ties creating a series of frames similar to timber-framed bents.

    Brian demonstrates the use of the double bubble scribe
    Brian demonstrates the use of the double bubble scribe on a post-tie connection

    Brian’s Veritas double bubble scribe has seen a lot of action throughout this process. Brian screwed temporary shelves to the vertical posts and rested slimmer locust saplings between them, creating stretchers that follow the bents parallel to their course.  When he is satisfied with the orientation of the stretcher, relative the the bent, he uses his bubble scribe to draw the outline of the vertical post onto the inside edge of the horizontal stretcher.  The benefit of the bubble scribe over a regular compass is that it has two bubble levels incorporated into its arms, allowing Brian to keep the scribe level and plumb.

    Initial lap joint cuts
    Initial lap joint cuts

    Even with this increased level of accuracy, Brian makes his first cuts a full quarter inch shy of his line. If he cuts directly to the line, the unevenness of the two timbers might cause him to carve a void where there needn’t be one.  The imperfections and knots along the surface of the timber pose a challenge that makes it important to creep up on the joint.

    Creep up on it
    Sneak up on it

    After carving the initial lap, Brian refines the fit of the joint the way you catch a unique rabbit (u-nique up on it). Above, he demonstrates how a common compass can be used to create a tight fit between two fairly lumpy, cylindrical surfaces. Approaching the joint in this way allows him to achieve a complex and tight fit between the stretcher and post, and sometimes, with an additional stretcher.

    Stretchers shaking hands, saying, "How do you do? They're really saying 'I glove you'"
    Stretchers shaking hands, saying, “How do you do? They’re really saying ‘I. Glove. You.’”

    The joints are fastened with lags composed of grade 8 steel.  This metal will acquire superficial surface rust, and blend in with the wood, then stop rusting.

    Locust sapling post, tie, and stretcher
    Locust sapling post, tie, and stretcher

    iFarm continues to be an exciting project, posing new challenges every season and demanding an expert level of attention to detail.  We can’t wait to see the fruits of our arbor, and what new challenges await us around the bend.

    More photos here.

  • Todd Farm Barn: Guest post by Brian Cox

    Todd Farm Barn: Guest post by Brian Cox

    Todd Farm Barn.  Photo Jessica MilNeil
    Todd Farm Barn. Photo Jessica MilNeil

    With spring in sight, it’s easy now to look back with pride at the frigid months spent repairing the frame of the Todd Farm Barn. Shawn Perry, Jesse Turgeon, Reese Crotteau and Brian Cox worked diligently to repair posts, tie beams and undercarriage of this large transitional frame in Rowley, MA. When all contractors have completed their repairs, the barn will expand space for Todd Farm antiques. Todd Farm flea market opens this Sunday, April 13th (experienced treasure hunters recommend getting there early, 6 am early). Below, Brian illustrates and describes PTF’s repairs, including photos of some sweet tie beam scarfs.

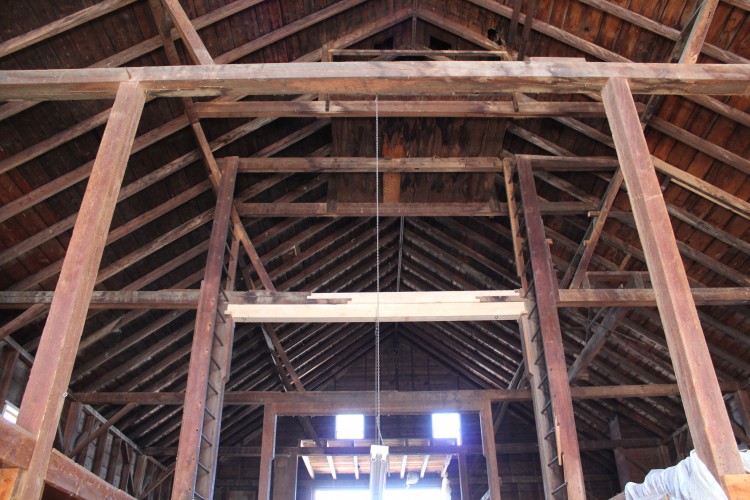
    The Todd barn measures approximately 45’ x 65’.  It dates from the early twentieth century and is a transitional frame, with little joinery.  With the exception of the girts in the undercarriage, most frame elements are nailed.  It has doubled top plates of nominal lumber, nailed together, studded eave walls, and as you would expect, studded gable walls above the tie beam.  PTF was contracted to complete structural work, illustrated in the images below.

    North eave looking west. Photo by Brian Cox
    North eave looking west. Photo by Brian Cox

    Lifting brackets were placed on each of the seven posts along the north eave, as the entire length of sill needed to be replaced due to extensive rot.  Cribbing piles were placed under the center of the lifting brackets and jacks and jack posts were installed.  The barn was lifted only a minimal amount in order to cut the nails holding the studs at the sill level.

    North eave sill, one half of a bladed scarf joint.  Photo by Brian Cox
    North eave sill, one half of a bladed scarf joint. Photo by Brian Cox

    The existing sills along the north eave were approximately 6”x 8”, with a 2” ledger on the inside face, which supported the joists. We repaired this sill using a bladed scarf joint, with the blade, or table, being 24”. The sill timber measures 8”x 9”. We chose to install an 8”x 9” based on the dimensions of sills in place in the remainder of the barn.

    North eave scarf, where sill timber #2 meets sill timber #3.  Photo by Brian Cox
    North eave scarf, where sill timber #2 meets sill timber #3. Photo by Brian Cox

    There were a total of five sill timbers cut and installed along the north eave.  A marriage mark made in pencil was used for easy identification purposes.  Upon completion of the sills being cut, they were fit and drilled with a 1” ships auger bit. Hardwood pins were driven after stringing the face of the sills and a straight line on all five timbers was achieved. Mallet marks are visible, where gentle coaxing was needed to drive the timbers into position.  Knots prove to be great driving locations, when available. 

    Cribbing piles in basement.  Photo by Brian Cox
    Cribbing piles in basement. Photo by Brian Cox

    We built piles of 6”x 7” hemlock cribbing to support steel I-beams, which were used to hold the joists and girts off of the foundation while a new foundation wall was built. The new foundation was a poured concrete wall topped and finished with brick. Hydraulic jacks placed beneath the steel were used to level each bay while eave posts were lifted using jacks, brackets and dead men.  A 2″x 6″ ledger was fastened across the posts, and timber-locked to each stud in between. This ensured that the studs were lifted along with the posts and girts.  Where viable, we left sheathing and clapboards in place.  This makes the wall a little more difficult to lift because the sheathing and clapboards hinder fine tuning.

    East gable tie beam, from exterior.  Photo by Brian Cox
    East gable tie beam, from exterior. Photo by Brian Cox

    On the east gable, we built wedgelock scaffolding to the tie beam level. Upon labeling and demo of sheathing and clapboards, we discovered what an old colleague of mine would refer to as “termites holding hands”, or in this case, ants holding hands. We found, as illustrated in this image, significant ant damage. Many braces and studs above the tie beam no longer reached the tie beam and, where they did, there was no structural surface remaining that could accept any compression forces. At this level of rot, the sheathing in this area was structural. This damaged material was removed and, where sound material was encountered, a 24” bladed scarf was cut and a new corresponding bladed fix was installed.    

    East gable tie beam fix, from inside.  Photo by Jessica MilNeil
    East gable tie beam fix, from inside. Photo by Jessica MilNeil

    One end of the fix and original material shown in above image.  The studs in this gable were cut away and compression blocks and sisters were added.  Similarly dimensioned fixes and sisters were installed.
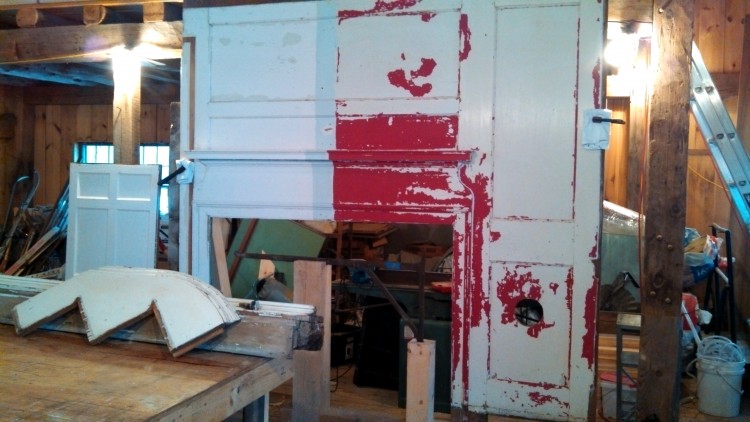
    Bent #4 floor girt repair.  Photo by Brian Cox
    Bent #4 floor girt repair. Photo by Brian Cox

    We uncovered additional rot in the floor girts in the barn. The girts running eave-to-eave were continuous and the drive girts were discontinuous.  Temporary deadmen were used to stabilize the joists adjacent to the girt repair.  The drive girt between bents #4 and #3 was replaced concurrently.  Beneath the girt, we installed a permanent dead man, topped with two crossed oak bolsters. This configuration was placed beneath each drive post point load.  A lead barrier was placed between the concrete footer and the post bottom at each of these locations.

    Bent #5 tie beam fix.  Photo by Jessica MilNeil
    Bent #5 tie beam fix. Photo by Jessica MilNeil

    Water infiltration at the cupola lead to deterioration of the tie beam at bent #5. A tie beam fix, with a bladed scarf on each end, replaced the center segment of the existing tie. A 6” x 7″ bolster was then placed under the tie beam fix. This bolster is also in place at bent #4.  There was a loft above this area that was removed prior to work commencing. Note the lack of bracing from drive post to tie.  There are braces from the eave posts to the tie, and these are nailed in place, rather than connected by mortise and tenon. The rafters are full length from peak to eave.
  • NH EXPOnential Success

    NH EXPOnential Success

    At the Expo
    At the Expo

    The NH Old House and Barn Expo was a great success.  To be honest, I expected what I’d seen at other “old home” trade shows: booths hawking fiberglass steeples and plastic decking.  Instead, I was inspired by the level of craftsmanship and care on exhibit.  Sometimes it can feel like we are alone in the wilderness, caring about a level of preservation that gets ignored by those who care only about an historic “look.”  We were fortunate to speak with like-minded individuals at the expo, who care deeply about their old homes, and are proud of their building’s age and authenticity (whether it be an 18th century vernacular farmhouse, or mid-century modern).  We were surrounded by folks who cut moldings by hand, and insist on appropriate joinery.

    Arron and I gave a talk on comprehensive assessment and documentation that focussed on the Middleton Old Town Hall assessment and the dismantling of the Demeritt-O’Kane house.  We had a full room at the talk and a great response from the audience, another delightful surprise.  I’ve posted the PowerPoint, with notes, here.

    NHPA Expo 2014 ppoint


  • Join us at the NH Old House and Barn Expo this weekend

    Join us at the NH Old House and Barn Expo this weekend

    Less-Pink Parlor Surround, all cleaned up for the NHPA EXPO
    Less-Pink Parlor Surround, all cleaned up for the NHPA EXPO

    This weekend, we’ll be sharing a few choice parts and pieces of the Israel Demeritt-O’Kane house with visitors to the NHPA Expo.  We’ll be at the Radisson in Manchester, NH soaking up good talks ranging from “Old Home/New Technology: Explore Solar Energy for your Home!” to “The Masonry Detective: Exploring Chimneys, Bake Ovens and Fireplaces” (there’s a surprising amount of exploration in preservation).  We are especially excited to be giving a talk on Sunday, at 1:00p; “Comprehensive Assessment of Your Barn and Home, Case Study: the Demeritt-O’Kane House.”  We’ll be talking a little about assessments in general, and a lot about the specifics of the Demeritt-O’Kane house.  If our series of journal entries about the complete dismantling of this Federal-era farmhouse piqued your interest, you won’t want to miss the talk.  Our booth will showcase a few pieces of the house, including the fireplace surround from the “Pink Room.”  We’ll be inviting folks to inspect examples of various intricate molding profiles, and see if they can identify the Asher Benjamin pattern from which they came.  Hope to see you there.

  • Maine Steeples Project

    Maine Steeples Project

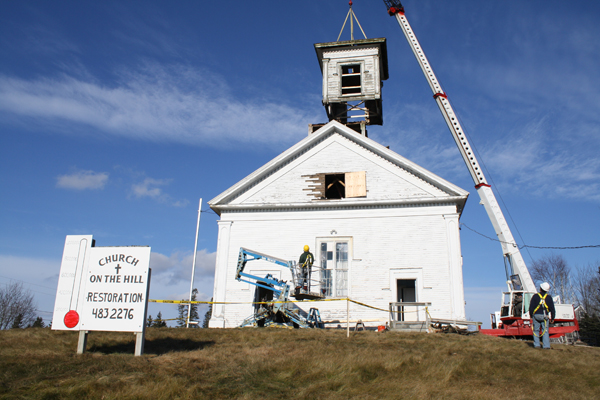
    Church on the Hill - photo credit Maine Steeples Project
    Church on the Hill – photo credit Maine Steeples Project

    The Maine Steeples Project provides crucial support to the communities that are preserving Maine’s most iconic structures.  A collaborative effort of Maine Preservation, the Maine Community Foundation, and a donor-advised fund, the foundation matches community-raised funds and provides professional guidance.  From their newly-updated website:

    The Maine Steeples Project supports local efforts to assess and restore church steeples of historic, cultural, and community significance to cities and towns in Maine. The program seeks to match local resources devoted to restoring steeples. Its priority is to support efforts to restore existing steeples, but reconstruction requests may be considered in unique circumstances.

    For those interested in preserving a steeple in their community (or steeple-enthusiasts in general), we encourage you to visit their fresh website with information about the program, and eligibility requirements.

  • Watch “Reviving the Freedom Mill” on MPBN, Thursday, March 6, at 10:15 pm

    Watch “Reviving the Freedom Mill” on MPBN, Thursday, March 6, at 10:15 pm

    Reviving the Freedom Mill, photo courtesy Tony Grassi
    Reviving the Freedom Mill, photo courtesy Tony Grassi

    Maine Preservation writes:

    When Tony Grassi takes a crazy gamble to rehab an abandoned mill, he inspires both skepticism and hope that its revived bond with the river will breathe new life into the town of Freedom, Maine.

    With the help of a colorful team of builders, masons, engineers and architects, he sets out to reconstruct a forgotten historic treasure. Can his 21st century vision of preservation re-power this rural community, which is now welcoming a new generation of young farmers?

    Watch “Reviving the Freedom Mill” on your local MPBN station on Thursday evening, March 6, at 10:15 pm.  This was one of PTF’s biggest and most inspiring projects in the past few years.  A significant portion of the crew devoted their time and energy to the project, staying in Freedom, away from their families, during the months spent on the project.  We were honored that the project was a recipient of the 2013 Maine Preservation Honor Award and are especially thrilled that the crew’s efforts were captured in such an engaging documentary.

    View more photos of the finished project, here

  • I’ll take a Gin Pole, straight up.

    I’ll take a Gin Pole, straight up.

    Lee on Deck
    Lee on Deck

    Here’s one to please our 11-year-old selves, and the folks over at Low-Tech Magazine: we raised the Carpenter’s Shop using a gin pole.  This is a simple and traditional method for raising a timber frame by hand, and straightforward solution to a site with little crane access.  It’s constructed from a long, straight pole with a block and tackle hanging from the top, and two guy lines (in our case, come-alongs) that help to counter the weight of the pole and the timbers, and locate the posts in their mortises.

    This is an eave assembled on the deck.  A bent assembly isn't pictured, but looks similar, rotated 90 degrees
    This is an eave assembled on the deck. A bent assembly isn’t pictured, but looks similar, rotated 90 degrees

    After test-fitting the eaves, we assembled the first bent (like a bread slice of the timber frame, parallel with the gable) flat on the deck so that the post tenons were hanging over their corresponding mortises – so that, when rotated to vertical, the tenons would “tip” into their holes.  The pieces of the bent were fit together so that the tie beam was placed towards the center of the deck and all the exterior reference faces were facing up.  The bent was fit, measured, bound, remeasured, and then pinned and wedged.  Each bent has two ascending and two descending braces, creating an especially stable and sturdy frame.  What original wedges couldn’t be reused were cut from seasoned white oak.  It was satisfying to knock the wedges in tight, locking the half dovetail tenon at the end of the tie beam to the sloped shoulder of the post’s complimentary mortise.  Ah, wedged half dovetails.  We screwed stop blocks to the corners of the sill so that the post feet couldn’t slip off the deck as the bent was raised.  We also screwed two 2x8x16′ pieces of KD to the exterior face of posts, at the top of the post, so that they could be used as kickstands once the bent was nearly vertical.  That completed the first bent assembly.

    Lee cut a maple sapling that was at least 18′ long, which is half again as tall as our posts (we realized through trial and error that this could have even been a little longer, but you could realize that sooner using a physics textbook). He attached a block and tackle to the top end of the sapling (again, if one was so inclined, we could calculate the exact number of pulleys needed to create the mechanical advantage to pull the bent up using human-power, but we had a tractor, so we used the block and tackle that Lee had).  Directly beneath the block and tackle connection, we attached two 24′ come-alongs.  That completed the gin pole assembly.

    Gin Pole in Tension
    Gin Pole in Tension

    We screwed a U-shaped block to the deck at the foot of the gin pole, near the center of the frame, to keep the foot from slipping out of place.  The opposite ends of the come-longs were secured to the rear corners of the deck, so that the gin pole come-alongs and block and tackle created a peace sign on the deck (a peace sign without a circle, and with two extra long come-along legs).  Scott and I lifted the gin-pole into a nearly vertical position, while Lee loped back and forth, tightening the come-alongs as we raised the pole.  Working the come-alongs allowed Lee to center the top of the pole precisely over the bent.  When the pole was leaning forward so that the block and tackle hung directly over the center of the tie beam, Scott pulled down tight on the block and tackle, connected the hook at its base to the center of the tie beam, and pulled down on the free end of the rope (pictured above).  This created a stable triangle of opposing forces (block and tackle, come-along and come-along), securing the gin pole in place about 10 degrees from vertical.  This completed the raising of the gin pole.

    Scott pulled down on the raising rope, and, nothing happened.  If we had not had the tractor at our disposal, we would have needed a block and tackle with more pulleys, and a rope with less stretch.  As it was, we hooked that sucker up to a tractor, corrupting the purity of a hand-raising.  For shame! Anyways.  We attached the rope to the front of the tractor as high and as close to the top of the gin pole as feasible.  I reversed the tractor and lowered the arm with all the grace of Kevin Bacon in Footloose as Scott monitored the post feet and Lee let out the cable on the come-alongs, incrementally.

    First Bent, raised
    First Bent, raised

    Once the bent was lifted past 45 degrees, I set the brake, re-tied my shoelaces, and Scott and I used the 16′ pieces of KD attached to the tops of the posts to lift the bent to vertical, and seat the tenons in their mortises.  We screwed the KD kickstands into the eave sills, and stopped to admire our work. With the kickstands in place, we were able to plumb the bent precisely.  When we satisfied with the bent’s location, we moved the gin pole, and prepared to raise the second bent.

    Lee in Tee at 10 degrees
    Lee in Tee at 10 degrees

    The gin pole was not the only low tech technology employed at the Carpenter’s shop.  Lee used an adze to cut the tenons of the first floor joists, allowing him to work in a tee shirt in single digit temperatures.  After the bents were raised, we used a water level to level them.  On sunny sites, it’s sometimes easier to use a water level than a laser.  If you want to know more about either of these methods, please let me know.

    New blue water level hung at reference corner
    New blue water level hung at reference corner

    Sometimes the oldest technologies provide the best solution for the job at hand.  From wedges and ramps to pulleys, I am surprised at how right my physics teachers were about the ubiquity of simple machines.  When applied purposefully, with careful consideration, these approaches can be safer, simpler and cheaper.  While I appreciate the romance associated with historic contraptions, ultimately, romance is not the reason we employ them.  These technologies are selected when they are the most functional option for the job at hand.  We were just lucky to have some fun with them up in Poland.

    Tradition
    Tradition! – tra-di-tion!

    Completed frame
    Completed frame


Think we can help? Get in touch.