Author: Jessica MilNeil

  • Good Day, Bad Blog

    Good Day, Bad Blog


    Sub net pier from the top of the Wood Island staging
    Sub net pier from the top of the Wood Island staging

    This blog goes dark when it’s sunniest. Seems like every day this summer has been a good day to be working outside. We’re installing the last repairs to the undercarriage at East Derry First Parish Church, installing electricity for the clock at Hampton Town Clock Tower, waiting for the last of the ceiling to be removed at the Winter St Church in Bath and finally hanging exterior trim at Wood Island. They’re all big jobs, with little updates.

    ext-t1-wall-b-iso-w-church
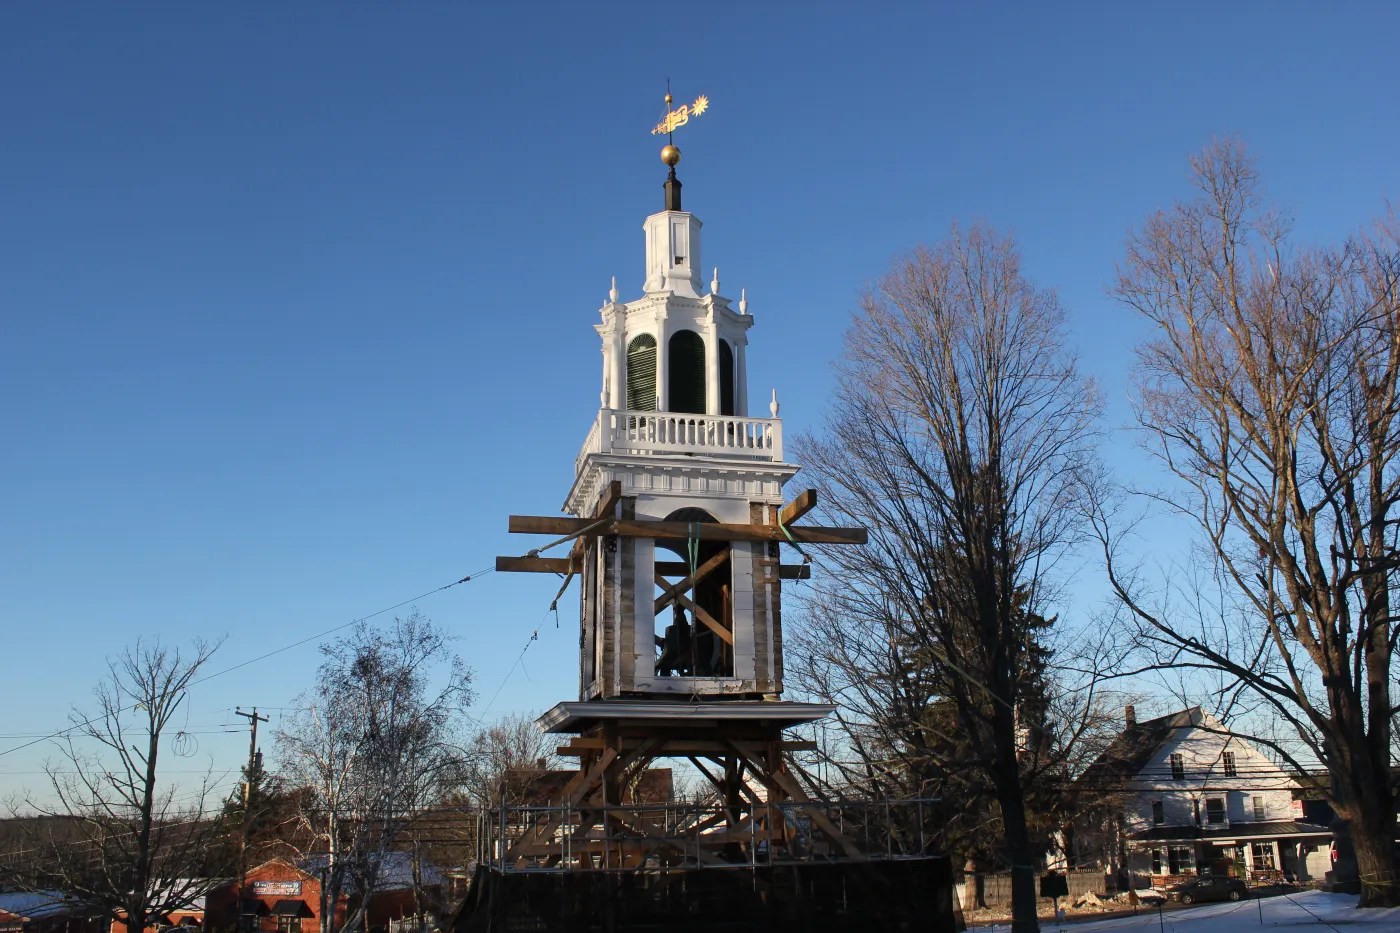
    East Derry First Parish Church and steeple

    The First Parish Church is the biggest, heaviest building that we’ve ever lifted (thanks to Rick Geddes of Geddes Building Movers). The building was estimated at 188 tons, but actually weighs 288 tons. For the first time in PTF history, we bent a lifting bracket, as well as the shaft on a hydraulic jack (which is why we always use redundant rigging, and shim hard to ground).  “It’s been quite a challenge,” says job lead Brian Cox. A poorly conceived connecting ell was dumping water and moisture onto the historic meetinghouse, resulting in a nearly complete undercarriage replacement. Almost a year ago, we removed the steeple from the building and placed it on the front lawn to await repairs. In the early spring, the building was lifted, a new 4’ basement was excavated and concrete foundation poured. In May, the church was lowered onto its new foundation. Throughout the summer, Brian Cox, Dan Boyle, Seth Richard and Kirk Hennequin have been working diligently to replace any rotten girts and floor joists. Paul Lindemann on the restoration committee has kept a thorough blog to document their process and progress, and the building’s history. Read more here.

    Hampton Town Clock Tower
    Hampton Town Clock Tower

    The small Northern contingent of Lee, Jake, Scott, Seth and Jess built the Hampton Town Clock Tower this Spring and Summer. The standalone clock tower is building-sized display case for Hampton’s historic Howard round top tower clock. The 8-day clock, with dials that read “M E M O R I A L G I F T” instead of numerals, was given to the town in 1897 and ticking in the Odd Fellows Block until the building was destroyed by fire in 1990. The building is a design departure for PTF, as it references the Odd Fellows Tower, but does not replicate it. The four gable roof, topped with a “witch’s hat” spire, and four corner pent roofs was taken from the original building. Below, the body of the building is much simpler than the Odd Fellows tower. The 10’ arched windows reference the original arches, but the elaborate corner trim was eliminated, allowing the historic clockworks to take center stage. The clock will stand on a low lofted floor above the bell, making the clockworks accessible to its civic owners for the first time in history. Phil D’Avanza is completing repairs on the clock, and Skip Heal, of Northeast lantern, donated an enormous reproduction of the original weathervane. Read more about history of this clock, from installation, through destruction, disappearance and ultimate restoration.

    Sagadahoc elevated timber deck, partially erected
    Sagadahoc elevated timber deck, partially erected

    In August 2015, high winds shook loose nearly a third of the coved ceiling at the Winter Street Center in Bath, ME. Enormous swaths of plaster and lath crashed onto the pews, and hung loosely from the trusses. Remediating and repairing the 26’ high ceilings posed a unique challenge. The sanctuary needed to be cleaned of hazardous debris, and the rest of the dangling plaster needed to be removed. Following the removal, Sagadahoc Preservation will need to raise the funds to make necessary truss repairs and ultimately reinstall the ceiling. The process is expected to take years, and a lot of staging. Given the original timber framed floor framing, with large, widely spaced girts and joists, and the time-span of the project, it made more sense to build a timber-framed deck 13’ above the floor, and cantilevered over the balcony. The deck is perfectly flat, and allows EnviroVantage to safely remove the ceiling where it is 6’ above the deck at the eaves, and from rolling baker’s staging at the center of the room. The timber deck even allows Sagadahoc to continue to use and show the sanctuary as they fundraise for the next phase. Jake Imlay wrote a great post describing the building and our approach there. Coming soon.

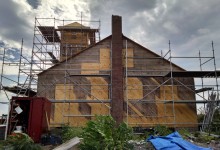
    Wood Island Life Saving Station boathouse and tower
    Wood Island Life Saving Station boathouse and tower

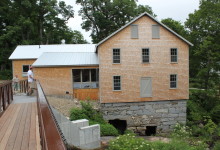
    The restoration of the Wood Island Life Saving Station, in Kittery Harbor, has had Arron and his salty crew of Tom, Dave, Jake, Tim, Scott, Jess, Gail and Kendall up to their armpits in work. The life saving station was built in 1908 for the U.S. life saving service and became part of the coast guard in 1915. The U.S. Navy used the site to defend Portsmouth Naval Shipyard against U-Boats during World War II. Since the early 1950’s, the life saving station has been unused. Although the island is a popular destination for kayakers launching at Fort Foster, the building fell into dangerous disrepair, with radiators dropping through the floors. The Wood Island Life Saving Station Association applied for National Register status based on the building’s historic significance, and the integrity of the original interior trim and cabinetry. Over the summer, the intrepid crew rebuilt the boathouse, porches and dormers. As ever, sheathing repairs revealed more extensive rot than expected, but we’re finally finished with taking things away, and can focus on rebuilding. This week, we commenced with hanging reproduction trim milled right in our shop in Berwick. I’ve worked in wind like that on one other job-site: Mount Washington. We hope to have the building roofed by the end of September, which will mark the completion of phase one. And we’ve had some good press, from the Portland Press Herald to the Associated Press. Read more here.

    As much as we’ve enjoyed these projects, we’re looking forward to Fall, continuing repairs at the Abyssinian Meetinghouse and Troy Union Church and commencing work at the New Harbor Methodist Church, among others. When it rains, check back for more.
  • “We’ve been watching that steeple slant backward for years”

    “We’ve been watching that steeple slant backward for years”

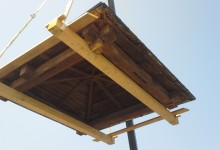
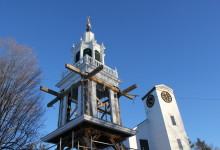
    The Troy Union Meetinghouse had a crane day last week. The long-leaning steeple was partially dismantled, leaving behind the two front posts to stand like wooden antennae. The entire replacement frame has been cut by a crew of local craftsmen, and will be resurrected before the end of the summer. Read more about the process here, and show your support. If you don’t see a video below, click on the link to watch the story.

    http://wabi.tv/2016/05/12/construction-underway-on-troy-union-church/

    Check out Troy Union’s facebook page for the most up-to-date information about the project.

  • East Derry Derring-do

    East Derry Derring-do

    Steeple and Meetinghouse
    Steeple and Meetinghouse

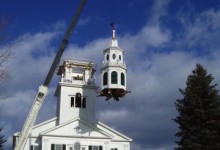
    The First Parish Meetinghouse of East Derry, NH is preparing for a big anniversary, its tricentennial. What does one even get for a church on its 300th? Wood? Copper? Both, as it turns out. Beginning with a thorough assessment and rehabilitation plan in 2011, the congregation has been working steadily to repair extensive damage throughout the steeple and undercarriage. This past fall, we extracted the belfry and lanterns from the steeple stack. After the new year, we documented the upper sections from a woman-lift and dismantled them from finish to frame.

    Lower lantern roof, crowned with urns
    Lower lantern roof, crowned with urns

    As we surgically removed trim, we encountered earlier salvage efforts. Dan and Rod peeled back the gracefully curved roof between the upper and lower lanterns and revealed an oiled sailcloth roofing. The sheathing below was labeled November 1916.

    Lower Lantern Posts
    Lower Lantern Posts

    The frame was in far worse shape than we expected. Years of roof leaks and patchy repairs had finally overtaken the stout timbers. Once the lower lantern posts were exposed, we wondered how the structure was still standing and realized too late the bravery of dismantling it. Above, you can see that the six of the eight posts were hollow or non-existent at the top. An extensive repair campaign in the 1990s consisted of bolting channel steel and L-brackets to the crossing crab members (a “crab” is a horizontal web of timbers that spans the posts of a lower level and support inboard posts above). Looking at this picture, stiffening the crab fell far from the root of the problem.

    Lower lantern crab above belfry ceiling

    The crew struggled to free the timbers from their steel cages only to discover a corpse. It’s tragic that this rot wasn’t addressed when the church raised money for its repair two decades ago. A comprehensive, traditional approach at that time would have prevented the wholesale replacement necessary today.

    Truss spread

    In 1719, Scotch-Irish immigrants, fleeing religious persecution in Northern Ireland, settled the area that became East Derry. In 1722, they built their first meetinghouse on this site. The present structure was built in 1769. By its centennial, in 1822, the congregation had so grown that they cleaved the building in two and dragged one end 24 feet to the east. Above, you can see the first additional bay, indicated by the absent strainer beam and braces.

    East Derry Wall D
    East Derry Wall D

    In our assessment drawing above, the strainers and bracing between the trussses in bents 3 and 4 and bents 5 and 6 are non-typical. The strainers and bracing in bright green are non-existent; that is the bay in the photograph above. The yellow strainers and bracing between bents 5 and 6 do not quite reach bent 5, they are connected by a series of sisters and scabs. The evidence in the frame complies with the history: our hypothesis is that in 1822 the building was split between bents 3 and 6, (originally bents 3 and 4). Bents 6 through 9 were dragged to their current position, and bents 4 and 5 were built as exact reproductions of the originals. The strainer and braces that used to connect bent 6 (originally 4) to bent 3 were sistered to bent 5, and the strainer between bents 3 and 4 was deemed unnecessary. We are curious to uncover more of the eave wall framing, specifically the plates and the sill scarfs, to see whether there is more evidence to support our theory.

    Parallel rafter chord truss

    The East Derry First Parish truss is iconic. It has a king post in the center, with parallel rafter-chords and crossing pairs of ascending and descending struts. The king post is in tension, picking up the tie beam at the middle of its span, and the ascending struts rise from the king post and prevent the rafter from sagging. In the Timber Framing series, “Historic American Roof Trusses,” Jan Lewandowski explains:

    Outward pressure on the walls can be eliminated entirely by affixing the feet of each rafter couple to their own tie beam. The problem of sag can then be addressed by hanging a joggled vertical member, or kingpost, from these rafters and using it in tension to support the midspan of the tie beam… By a less obvious intuitive leap, it might be realized that the midspan of the long rafters can be kept from bending by struts rising from lower joggles on the suspended kingpost.

    East Derry Bents 1-4
    East Derry Bents 1-4

    The parallel rafter-chord is an innovation that protects the Achille’s heel of the king post truss. The casual observer often assumes that the joint between tie and king post is where we would most frequently see failure over time. I’ve seen many iron stirrups that attest to the builder’s concern for this joint. But most trusses fail at the rafter heel, where the upper rafter-chord intersects the tie beam. Of this foot joint, Lewandowski writes:

    Those we can inspect seem more prone to failure and impairment than most other connections in the truss, for a combination of reasons: the lack of relish beyond the mortise and the large forces involved, coupled with the low angle of attack of rafter to tie, all exacerbated by a high incidence of leaky eaves. The significance of the roof slope is that the geometry of low-pitch roofs channels more horizontal force against potential long-grain shear failure in the tie at the foot joint than it does comparable vertical breakout load on the kingpost at the peak (see TF 72, 19). The point: on both empirical and theoretical grounds, the principal rafter-to-tie beam joint is the likely weak sister in the mix.

    In Sedgwick, we saw the foot of the upper chord shear a 2″ x 12″ x 22″ block clear off the end of the tie beam (It was about the size of a hefty wedding-present-breadboard). With a parallel rafter-chord truss, the duties of principal rafter and upper chord are separated. The principal rafter, the top angled timber, carries the roof, while the upper chord, the inner angled timber, carries the compressive loads created by the truss. The upper chord intersects the tie beam farther from the end of the beam, thereby protecting the relish just past the joint from shear. We so liked this truss that we reproduced it in a building where it will be on grand display: the Lewis Conservation Center.

    Steeple extracted

    Paul Lindemann, East Derry historian and devoted parishioner, keeps a detailed website documenting the history of the church and their repair process. The Nutfield History blog is a fascinating read for anyone interested in New Hampshire history or building history in general. The blog also benefits from Lindemann’s web design skills, something that doesn’t always attend the dual callings of historian and parishioner.

    The vigor and ingenuity of the immigrants who built this Meetinghouse is evident in its frame. We honor their labor with our efforts to preserve it. In 300 years, what will historians write about the immigrants seeking refuge in the United States today?

  • Hard Work, Adaptation, and Love

    Hard Work, Adaptation, and Love

    Bents stacked on Thursday afternoon

    The client’s wedding was in a week, and the barn in which he’d marry was in pieces on the ground. It was crane day, and a Friday, two things that don’t usually go together. In the worst case, a crane day on Friday means you don’t have an additional weekday in case you hit a bad snag; in the best case, it means the crane operator wants to get home, and the roof frame flies in fast and loose. In a week we’d complete a job started almost exactly four years earlier. Back then, Arron was patrolling the net, looking for a barn in need of saving, and spotted a damsel in West Poland, ME. That Saturday, he dragged his teen-aged son with him to visit the barn and get some driving practice. The frame was for sale, but not the land beneath it. It would need to be documented, disassembled, repaired and rebuilt elsewhere. When Arron arrived, another potential buyer was already poking around.

    Before (September 2011)
    Before (September 2011)

    Arron wanted to repair the barn, but needed a buyer; Charley wanted the barn, but needed someone to repair it. It was a good match. Since then, PTF has embarked upon a number of projects with Charley, most notably the disassembly, repair and rebuild of his Carpenter’s Shop two winters ago. The West Poland barn was neatly stacked in a Dairy barn at his home, awaiting its turn on a long to-do list. This fall, as Arron’s son prepared for his sophomore year in college, PTF erected a barn that had spent four years being designed and refined in Charley’s head.

    Barn Frame Iso with transparent grade
    Barn Frame Iso with transparent grade

    Charley needs the barn to house his three draft horses, donkey and a flock of sheep. The draft horses wouldn’t fit under the barn’s original girts, 6′ 4″ above the sills, about 6 inches shorter than your standard doorway. He designed a foundation that raised the posts 2′ 8″ above grade, creating 9′ of clearance for the horses. The perimeter posts are each tenoned into a sill, which rests on a foundation wall. Each drive post lands directly on a 8″ x 8″ granite pier. Precisely 7′ tall, the piers rest directly on two longitudinal footers, 4′ below grade. A frost wall was poured between the posts; it’s top level with grade. Each post is point loaded upon a foundation wall that extends below the frost line and rests on a connected footer. This will prevent the posts from moving due to annual freeze and thaw. Ensuring that each drive post landed on its granite post required precise cutting, measuring and measuring again.

    The barn we took down was built in the mid-19th century; it has hewn posts and both sawn and hewn girts. The center drive posts are more than 24′ tall, and are joined directly to the rafters. The ties are discontinuous, the outer tie mortises over the eave post, and tenons into the drive post. The plate is also discontinuous and is dropped eight inches below the top of the post. The original barn was almost square in plan, 38′ x 39′. With all that livestock, Charley needed larger bays, and decided to extend the length of each bay from 9′ to over 13′; the rebuilt barn is 38′ x 56′.

    Tie Girt Scarf Fix
    Tie Girt Scarf Fix

    In early August, our first task was to repair the bents. Eighteen of twenty original posts could be reused or repaired, and thirteen of the original tie girts were salvageable, most requiring face fixes to their outer ends. All of the original braces were nailed, and we replaced them throughout with mortise-and-tenoned braces. Originally, the barn contained no loft girts within the bent beneath the ties; the loft joists had rested on top of eave and drive girts. We inserted loft girts into the bents, to better connect the eave and drive posts. Each drive post was 24′ long, hand-hewn, and twisty. We used the traditional scribe rule method to install the new framing members. Using a transit, we built a level “table” on which to assemble the bents. The “table” is eleven stacks of 6″ x 7″ cribbing laid out to support the post feet, the joint between tie girt and post, the joint between tie beam and post, and the rafter apex. We laid out each post and shimmed it level. Considering the twist of the posts, we leveled by measuring off the arris. On each timber, the two best faces are established as “reference” and the corner where they intersect is called the arris. The handhewn surface may vary, but this way, our posts will still line up on the foundation. We fit the tie beams and checked measurements, squaring the bent by measuring across diagonal corners. Then we laid the new loft girts and braces out on top of the bent and used a level and combination square to scribe their shoulders to the associated post or tie girt. Not one of the original rafters could be salvaged, except maybe for use as a dugout canoe. We increased the size of the rafters to  7″ x 9″ and used string lines to scribe them to the bents. Due to the time restraint, we weren’t able to scribe the actual rafter timbers to the bents until their final fitting before crane day, and this ultimately pushed our crane day from Thursday to Friday. Next time, we’ll go slower and scribe rafters while we’re fitting the rest of the bent.

    Mortise in sill to accept twisted post

    By the time the bents were fit, the foundation was poured, and sill timbers cut. We were able to use the foundation as our “table” while we fit the eaves. This was ideal, because the drive posts could be laid directly over their granite piers. After the posts were laid out and square, the new, longer eave girts and plates were laid out and scribed. This is where the use of reference faces becomes essential. During assembly, reference face is always up. When fitting the eave walls, the reference face is 90 degrees to the reference face that was used to fit the bents. By consistently measuring and laying out the timbers to the same point along the arris, we can ensure that the eave joinery will fit tightly when the building is standing.

    Fitting the Final Rafter
    Fitting the Final Rafter

    Crane Day required the entire crew. Placing the barn on a high foundation wall meant the loft girts were high, 9′ above grade, and the plates were 7′ above that. For each timber, there needed to be a crew member on the ground and two more up high. We used blue frame staging along each eave and a scissor lift in the drive. After bent one was raised, a dozen more timbers needed to be placed (loft girts, drive girts, interior post and braces) before bent two could be flown in and connected. When the bents were all standing, the 7″ x 9″ x 25′ rafters were each flown in and fitted over the drive posts. Lastly, the crane set the purlins. It was 3:00 pm on a Friday, and they came in fast.

    Sheathing the Roof
    Sheathing the Roof

    Sheathing the roof that Monday was exhausting, the boards were hemlock, and green. But we finished with a couple days to spare. This barn has had a long life. Like marriage, it is the product of hard work, thoughtful attention, adaptation and love. We wish Charley and his bride the very best.

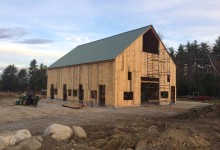
    Foley Horse Barn
    Foley Horse Barn, photo by Charles Foley

    For more photos, explore our Flickr album.

    Foley Horse Barn
  • Meeting Housing

    Meeting Housing

    Installing meetinghouse truss on crane day. One of many (cranes days, and trusses)
    Installing meetinghouse truss on crane day. One of many (cranes days, and trusses)

    The Lewis Conservation Center will be made up of five connected timber frames, a “Big House, Little House, Back House, Barn” where the Big House is a reproduction of the 1722 East Derry Meetinghouse. One frame, the Gallery, re-uses the Green Barn, a scribe rule frame from the 1740s. The Education frame has the same exterior dimensions as the Gallery, but the interior has an open plan and a king post truss system. Similarly,the roof of the Meditation frame is supported by a king post truss, but with studded gable ends, and additional office space. The fifth frame, the Porch, is a relatively small frame, exposed to the weather, and constructed entirely in white oak. This is a big project, with a tight timeline. The frames are also mostly reproductions, built from new wood, which created opportunities to increase efficiency. Throughout the LewCon frame we used one efficient technique that we rarely find in old barns and churches. It’s called housing.

    Green Barn, with Education king post, behind
    Green Barn, with Education king post truss, behind

    The Green Barn determined the patina and surface pattern of the rest of the frames. The frame was hewn with adze and broadaxe, which gives the timbers a surface texture like hammered copper. They’ve patinaed to a silvery brown. The frame was cut with scribe-ruled, which is the method PTF must use for most in-kind repairs. In cutting a scribe rule, the framer arranges the timbers on the ground, and traces their intersections one onto the other. At each intersection, the framer uses a marriage mark to identify the joint. Each piece is specifically fitted to its mate, and has only one home.

    Parallel rafter chords and their housed birdsmouths
    Parallel rafter chords and their housed birdsmouths

    Contemporary square rule frames are much more promiscuous. Square rule relies on the concept that within each imperfect timber, there is a perfectly square and straight timber of consistent width and thickness. For instance within a timber that measures approximately 6 3/4″ wide and 6 7/8″ thick, we have a perfect timber measuring 6″ x 6″. We align this imaginary perfect timber with the two straightest faces of our real timber, and label these faces our “reference faces.” At each joint we measure 6″ from the reference face, and cut a parallel plane on the opposite face exactly 6″ from our reference, and exactly as wide as the ideal adjoining timber. On the non-reference face, a square cutaway reveals the face of the ideal timber. Into that new face, we cut the mortise. On the tenon end of adjoining timber, we perform the same trick, reducing the end so that its shoulders fit within the shallow canyon. The cutaway is called “housing.” Housing in a post, for instance, creates a ledge that relieves some of the weight from a girt tenon. Housing can significantly increase the stability of a joint, reduces twisting, and results in a neater looking joint by hiding the end-grain cut on the tenon’s shoulder. Since each piece is reduced to its ideal thickness, multiples are interchangeable, any brace can fit into any brace mortise. No one’s wearing a marriage mark. The result doesn’t look like a scribe rule frame, but sometimes it doesn’t need to.

    Unrigging a beautifully hewn truss
    Unrigging a beautifully hewn truss

    Ironically, using square rule, a contemporary joinery method, makes hewing, a historic surfacing method, much more efficient. The client wanted all of the exposed framing to have the “hammered copper” look of the ancient Green Barn. Hewing from trees the enormous Meetinghouse frame was not an option. But without housing, hewing after cutting joinery can result in gaps between the joined faces. Housing preserves the joint, while the hewer scallops the faces surrounding it.

    LewCon crane day, one of many
    LewCon crane day, one of many

    The 1722 East Derry Meetinghouse sports a parallel rafter chord king post truss. It has two pairs of ascending struts, and one pair of descending braces. The tie beam, or bottom chord is cambered, or curved, so that the center of the tie is an inch higher than the eaves. The tie beam is 44′ 6″ long and has mortises to accept four rafters, two struts, two braces, and a king post. Achieving 7 tight joints over a very shallow curve is challenging. Instead of calculating and trimming the end cuts of the rafters, struts, braces and post, the crew accommodated the curve by varying the depths of the housing. In the event of loose joinery, slightly shaving housing across the long-grain is much easier than shaving end-grain. The rafters were so thick that the depth of their housing increased 1/8″ from the rafter toe to rafter heel. The housing for the king post was exactly 1″ deeper than the housing for the upper rafters. Essentially, the crew adjusted housing depths to create an “ideal” straight tie beam out of a cambered bottom chord.

    Jesse cutting housing with router and custom base
    Jesse cutting housing with router and custom base

    The crew cut all this housing using a router with a custom aluminum router base. The base is 2′ long, with handles, which gives the operator plenty of bearing on the timber. The finished frame fit together beautifully, with minimal futzing. We’ll continue to scribe rule our historic frames, but hope for more opportunities to square rule our new frames and near-reproductions.

    Crew-be-doobie-doo
    Crew-be-doobie-doo

    More photos, below:

  • Kung Fu Timber Framing

    Kung Fu Timber Framing

    Time to Lean
    Time to Lean

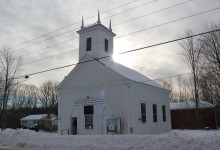
    Troy Union Church was built in 1840, in a vernacular style that combines elements of Greek and Gothic Revival. It is a modest building, 34′ x 42′, built to host the small town’s various Christian denominations, hence the “Union”. Caught up in that communal spirit, the bell tower is preparing to take a trust fall onto the back of the church. I’ve photographed a lot of buildings, and capturing a slumping wall, or humped roof can be challenging. This steeple has a model’s slouch. In fact, the center of the tie beam supporting the rear tower sags 7″ below eave height. The 10 x 10 tie beam is 34′ long, which means that there is a 7″ deflection over 17′.

    Bent 2, rear tower wall. Yellow string represents height of tie beam at eaves
    Bent 2, rear tower wall. Yellow string represents height of tie beam at eaves

    Typically, we also have trouble photographing center rot in a beam. The timber will be hollow, but look perfectly sound on its face, the only visible evidence seen through the pin’s hole in a mortise. At Troy, there is a crevass in the top of this tie beam, a 3″ x 12″ valley of rot. PTF stabilized the steeple in 2011; building a cross braced KD wall to support the failing truss. The fact that the timber was able to deteriorate that far, without dropping the entire tower, is a marvel.

    Rot Crevass
    Rot Crevass

    The design of most New England steeples is idiosyncratic. Vernacular church design is informed by regional tradition, availability of materials, individual ingenuity and a shared copy of an Asher Benjamin book. Entering a church attic can feel like entering the builder’s brain. Especially so at Troy Union Church. The main timbers are hand hewn, and the design is uncomplicated, braced wherever possible. The king post truss is without flourish, straight-sided, no flare at the head, or shoulder at the struts. The rear tower wall is a common adaptation of the queen post truss, where the tower posts take the place of the queens. Occasionally, such an adaptation can be successful, like the queen post truss in the United Church of Craftsbury Common, VT. Unfortunately, at Troy, the revised truss misses the mark. The large braces running from tie to tower post aren’t large enough to serve as upper chords, and the girt isn’t located properly to function as a strainer. That said, its hard to fault a design that supported the bell tower for more than 170 years.

    King Post Trusses Bents 3-5
    King Post Trusses Bents 3-5

    The restoration effort is led by Norma Rossel, one of 12 remaining members of the congregation. Soft-spoken, Rossel challenges one’s expectations of leadership. She is as determined as she is doe-eyed. In the Kennebec Journal, Rossel explained, “”The ladies of the church got together and said, ‘It’s up to us.’” With a population of 1000, Troy faces a challenge shared by many of Maine’s rural communities: they are in possession of a historically significant building but lack the resources to repair it. The Maine Steeples Project, of the Maine Communities Foundation, was established to address just this need. In 2011, the church was elected to the National Register of Historic Places, and received from the Steeples Project a $2,500 grant for assessment and stabilization. The church received an additional $15,000 grant from the Belvedere fund, in total raising nearly $40,000 to re-build the trusses.

    Still, it wasn’t feasible for the church to hire PTF outright. The congregation is tiny, the budget is tight, and the travel costs would be prohibitory. It will take double the funding they’ve raised already to place the trusses and complete the restoration. Fortunately, what the community lacks in local funding, it makes up for in skilled neighbor. Through connections made at a longstanding monthly potluck, Rossel found Marvin Daugherty, a caregiver and swordmaker, and Scott Pfeiffer, a farmer at the Garcelon House, a cottage industry incubator. Pfeiffer recruited Adam Joy, who raises goats at his farm and has some timber-framing experience with an uncle at Red Suspender Timber Frames, to join the restoration effort. Troy used to be called Joy, ME, and Adam descends from its founders.

    Pfeiffer and Joy sighting plumb for Daugherty, drilling pin holes
    Pfeiffer (left) and Joy (foreground) sighting plumb for Daugherty drilling pin holes

    Pfeiffer is a busy man, he and his partner sell eggs, produce wool, and maintain an organization that runs like a communal homestead. He says he is a farmer in every sense of the word, in that he farms himself out to the work that needs doing. He cannot afford to volunteer through the winter months, and neither can his fellow crewmembers. Following the model used to restore the Acworth Meetinghouse, Preservation Timber Framing will provide documentation, a repair plan, training and on-going guidance to the crew. The crew receives training and is paid a fair hourly rate that saves the church money, while spending fundraising dollars locally.

    Bent 2 frame elevation
    Bent 2 frame elevation

    In March, we visited the church to document existing conditions and develop construction drawings. Daugherty and Pfeiffer had already removed the sanctuary ceiling, allowing light into the attic space and making documentation much easier. We try to preserve the original design of a frame wherever possible, but the modified queen post truss at Bent 2 was under-engineered for its task: supporting half of the bell tower over an open span of 32′ (there is a 1′ overhang past either plate). We recommended rebuilding Bent 2 as originally arranged, with slightly larger timbers, and inserting a king post truss directly behind it. The new truss would be a replica of the king post trusses in Bents 3 and 4. Two bed timbers will run directly beneath the tower posts, and span from the front gable to the new truss, spreading the tower load over three tie beams (Bents 1, 2 and 3). We drew up detailed construction drawings of the repair plan, and assembled the crew in Troy.

    Fitting and Filming
    Fitting and Filming

    Timber Framing isn’t particularly complicated, but it is a rare skill, unlikely to be encountered on contemporary job sites. Working with large, un-dried timbers requires a completely different conception of layout, relying on reference faces to account for variation and shrinkage. It also requires a furniture-maker’s attention to detail, a basic understanding of the forces that put beams into tension or compression, and willingness to use hand tools. Scott Lewis and Lee Hoagland met the crew at the Garcelon House, in Troy, which Pfeiffer graciously offered as a cutting yard. The crew was accompanied by sheep, goats, pigs and geese in an adjacent barn, along with their spring lambs, kids and piglets. They spent a day organizing the yard, spreading out and labeling posts, rafters, struts, braces and tie beams. They showed the crew how to establish and use reference faces and arrises, how to lay out a line and carry it around the timber, and how to lay out joinery from cut drawings. Scott and Lee laid out mortises and tenons while the crew cut. They wielded 16″ circular saws and chainsaw mortisers fearlessly. It took the crew about two weeks to complete the cutting. As soon as the weather cooperated, Scott, Lee and I returned to Troy to fit the pieces together.

    Assembling the king post truss
    Assembling the king post truss

    We were met there by two local TV crews and the Kennebec Journal. Rossel will use the completed frame to raise the money needed for a crane to put it in place. WABI Channel 5’s coverage focused on the repair process and the timber framing itself, while ABC 7/Fox 22’s coverage shows more of the church. The Kennebec Journal wrote a great article detailing the history of the building, and Rossel’s efforts with the community to raise the restoration money.

    Scott Lewis checks the fit of the half dovetail joint
    Scott Lewis checks the fit of the half dovetail joint

    Marvin Daugherty speaks in the sort of aphorisms you’d expect from a practitioner of Kung Fu and maker of samurai swords. When asked how his skills working with metal transfer to working in wood, he responded, “skill is skill and either you have the touch or you don’t” and that “it’s just being sensitive to things.” He says, “If you can be good at one thing, you can be good at a lot of things.” Talking to Daugherty, I learned that a person can have Kung Fu in any craft that requires training over time, and that the singular association with martial arts is an American invention. I must not have a good appreciation of Kung Fu, because what impressed me, visiting the jobsite in Troy, was how quickly Daugherty and the rest of the crew had picked up timber framing. After training with Scott and Lee a handful of times, Pfeiffer, Joy and Daugherty had re-constructed the entire rear wall of the bell tower and a beautiful king post truss. If you are interested in the efforts to complete the restoration, please visit the Troy Union website.

    More photos, below:

  • Timber Grading

    Timber Grading

    Don Pendergast
    Don Pendergast, NELMA Northeast timber grader

    “They still call it Black Monday,” says Don Pendergast, standing over a 10″ x 16″ timber, 48′ long. He’s trying to grade a yard full of timbers destined for the Lewis Conservation Center while a wannabe April O’Neil peppers him with questions about his 20 year career grading wood for NELMA, the New England Lumber Manufacturer’s Association. He’s grading tie beams for the “Meetinghouse,” one of five timber frames that will make up the Center. A marriage of traditional design and modern engineering, the frame is a reproduction of the 1722 East Derry Meetinghouse, clad in enormous glass panels nearly running sill to plate.

    The timbers, with their #2 pencils sharpened,
    The timbers, with their #2 pencils sharpened,

    The LewCon crew has been working ten hour days, and weekends, to meet the client’s March deadline. They need this timber to be graded to the engineer’s specs so that they can start cutting. These tie beams have to make a grade of #2 or better, over 47 feet, which leaves us a whole foot of wiggle room. Pendergast walks to the end of the timber and locates the pith, the center of the former tree’s bole, or trunk. For stability’s sake, the pith should centered in the timber too. Knots radiate from the pith in a cone shape, reflecting the tandem growth of branch and bole. He’s looking at overall wood displacement, which means that a knot at the center of the wide face of the timber is more acceptable than the same knot at the edge. To receive a #2 grade on a 16″ wide timber, a sound knot’s diameter must be less than 8 1/8″. Unsound knots must be half that. He’s looking for shake, where the grain appears to be de-laminating; skips, of the planer; and splits. He’s looking for the slope of grain, which must be 1 in 6. He’s looking for torn grain, stains and wane. He’s looking for pitch pockets, he’s looking for unsound wood, which, if present, must be evenly scattered, and no more than 1/6th the width of the face. These are the requirements for a grade of #2. If we were going for select structural, the knots alone would need to be half that size. It takes four of us just to roll each timber, and Pendergast inspects all four faces.

    Pendergast assesses a knot
    Pendergast assesses a knot

    Pendergast’s grading territory contains all of Maine and part of New Hampshire. It’s customary for him to spend only a few hours grading at each site; he was headed to Lovell, ME after meeting with us in Nottingham, NH. With prodding, Don’s telling us about his days inspecting sawmills, before he started grading timbers. Most mills have trained graders that grade the stock on-site. Dan asks, “What’s to keep the mill from inflating its grades?” Pendergast says that the grade is a guarantee, and that the grader, or mill who employs him, is liable if the timber fails. It’s that, and Don Pendergast. Pendergast used to visit mills for NELMA, inspecting stock to be sure that it met grade. He’d inspect a pallet of stock on the floor for sale, after the mill’s graders had done their work. Since grading relies on “the common sense and good judgement of the grader,” 5% of a mill’s stock is permitted to be below grade. If more than 7.4% is found to be below grade, then the lumber must be held, re-graded, and attain no more than 5% below grade. On Black Monday, Pendergast was inspecting a mill, and encountered stock that was 14% below grade. He held 865,000 board feet of lumber from sale.  “It screwed up my whole week,” Pendergast said. He rented a hotel room, and every morning for a week he’d check the stock that had been re-graded the previous day. There was enough material to fill 31 tractor trailer loads.

    Grade stamp
    Grade stamp, and yes, that’s a #1 below it

    All of six tie beams passed, and two even made #1. In addition to tie beams, Pendergast graded rafters, braces, plates and posts for the nearly 50′ x 70′ meetinghouse frame. The stock was so big that we’d had to go all the way to Currier Farms in Danville, VT to source it. Ultimately, all but three of the timbers made the grade. Fortunately, we ordered extra.

  • Freedom Mill in Food & Wine

    Freedom Mill in Food & Wine

    Mill at Freedom Falls, home to the Lost Kitchen. Photo by Ashley Conti for Bangor Daily News

    Last Month’s Food & Wine featured The Heartbreaking Story Behind The Lost Kitchen about Erin French’s revived restaurant in the restored Freedom Mill. The author was especially charmed by her surroundings:

    …Take a quick left on Main Street, and there’s The Mill at Freedom Falls—The Lost Kitchen’s once crumbling, now beautifully renovated home. Cross a narrow bridge over a rushing stream, and you’re there.

    The dining room has sanded plank floors, exposed beams and suspended mill trestles. A wall of windows looks out onto the stream and bridge. Upstairs is a school for local kids; downstairs, a stone-walled wine store with bottles carefully curated by The Lost Kitchen’s sommelier

    This isn’t the first press the Lost Kitchen has received. In addition to a favorable review in the New York Times last fall, the Bangor Daily News published a story last summer that covered even more of the restaurant’s, and the mill’s, history.

  • After Fire, a Family Doubles Down on Preservation

    After Fire, a Family Doubles Down on Preservation

    Restoring an historic building takes a lot of stamina. The sense of warmth and meaning one feels within a restored structure comes from the labor invested by the craftspeople who built it and the experiences of the community that used it. Once complete, the Steiner-Truesdale residence in Newfields, N.H.,will reflect not only a century of life as a church, but also the owners’ dedication to restore it as a family home, twice. In April, a fire destroyed much of the interior, an 8-year long labor of love for owners Jack Steiner and Kimberly Truesdale. In November, PTF began its role in the home’s re-restoration.

    Ribs and Roof system
    Ribs and Roof system. Photos by Brian Cox

    Newfields’ Sacred Heart Church was built in the 1880’s — a transition frame, 40′ wide by 80′ long. Five interior timber bents were constructed from a pair of posts, a pair of steeply pitched rafters, two pairs of ribs and a collar tie. The lower ribs brace the posts to the rafters and the upper ribs brace the rafters to the collar tie. The ribs are let-in and bolted, rather than mortise-and-tenoned, reflecting the dominant technology of the period. A tie rod takes the place of a tie beam, tying the eave walls together. Had the church had been built in stone, in the original Gothic style, buttresses would have provided the support necessary to counter the outward thrust of the rafters. The roof system is substantial, consisting of the principal rafters let in with principal purlins and infilled with common rafters. The balloon studs run from sill to plate, and are spaced approximately 20 inches on center. The plate consists of doubled 2x stock, which is mortised and fit onto a tenon at the top of each of the posts.

    Stopped chamfer detail
    Stopped chamfer detail

    PTF was hired to rebuild a second floor that had been destroyed in the fire. The height of the floor was determined by the tie rods, so that the rods could be enclosed between the 10″ high floor joists. Two 8″ x 10″ x 60′ floor girts run parallel to the eaves, supporting the joists. Five pairs of posts, in line with the bents, support the girts. The posts rest on first-floor girts, or carrying timbers, parallel to the girts above. The carrying timbers rest on masonry piers set directly beneath the posts, point-loading the interior structure to ground. Ultimately, the entire frame will be exhibited within the living space. The timbers were planed, and the crew matched a chamfer detail from work that Jack completed: a 1″ chamfer on all posts and girts, a 5/8″ chamfer on joists and braces, stopped 1 1/2″ from joinery.

    Once onsite, Brian and the crew’s first step was to unload and organize the stock. In addition to the six 8″ x 10″ x 20+” stock required to create the second floor girts, there were more than seventy-five 4″ x 10″ x 12′ joists, ten posts, and sixteen white oak braces. The crew, Brian, Shawn and Seth, took half a day to lug lumber, moving the timbers along a pick through the window, and another day just to organize it all. Organizing timbers is like sharpening chisels –t ain’t romantic, but it’s necessary to a well-run job. A clean and well-organized job site makes a big difference in the efficiency and accuracy of the good stuff, such as cutting joinery.

    Shawn, girt timbers, and Shawn's breath
    Shawn, girt timbers, and Shawn’s breath

    All the joinery was cut and test-fit on sawhorses prior to installation. Each 60′ second floor girt was made up of three 20+’ sticks joined with two bladed scarf joints. Cutting a frame indoors in November sounds like a pretty cushy job, but because the floor girts and joists were so long and still green, the crew wanted to do everything possible to prevent them from corkscrewing, and this meant working without heat. With the heat off, the timbers would dry more slowly, ensuring their stability. Furniture makers will sometimes avoid kiln-dried wood, instead stacking freshly-cut boards evenly; plenty of air flow lets the boards dry naturally over the course of years.

    Thanks, Grandma! the scarf fits perfectly.
    Thanks, Grandma! the scarf fits perfectly.

    Each of the posts was connected to the floor girt by two braces. After cutting, all of the brace joinery, as well as the six scarves, were fit and laid out on sawhorses. In order to prevent the joinery from opening as the timbers dried, the crew decided to draw-bore all the joinery. Draw-boring is a joinery technique in which the pin hole in the tenon is placed 1/8″ closer to the shoulder of the joint than the pin hole in the mortised piece. A tapered pin is driven through the holes, squeezing the mortise and tenoned pieces closer together.

    Lee and Scott assist with assembly
    Lee and Scott assist with assembly

    After the pinholes were drilled, the crew erected two towers of staging along the center of the church. Using a chain fall, they lifted the three pieces of one girt into place, and re-assembled and pinned the girt on the staging. Next, they righted the posts and threaded their feet through holes in the first floor, maneuvering the posts into mortises on the carrying timbers below. Due to variation in floor depth, the posts were buried 9 1/2″ – 22″ below the surface of the first floor. The crew squared and plumbed the posts and temporarily braced them to the exterior walls with 2x lumber. Then the oak braces were fit into their mortises and pinned.

    Second floor girt in position, and blurry
    Second floor girt in position, and blurry

    Three one-ton chain hoists were needed to raise the assembled 50′ floor girt into position, 4 1/2″ above the post shoulders (and 1/2″ above the ends of the tenons). The girt just kissed the 1″ round tie rods, which ultimately run between the 10″ high floor joists. When the weight was released from the staging ledgers, those ledgers sprung up, and as the ledgers were removed, their wedges popped out with a “ping.” Coordinating efforts, the crew released the chain falls and slowly lowered the girt onto the five post and eight brace tenons. Then they pinned the joinery. For the second girt: rinse, and repeat.

    Floor framing, resurrected
    Floor framing, header visible near window, far left

    The second floor is supported by more than seventy-five 4″ x 10″ x 12′ joists, which were lifted into place using a winch. At each of the eight windows, the crew created a window well by inserting a 6″ x 10″ header between the joists adjacent to the window, so the top of the window and the arched trim can be seen from the first floor. The header fit into a pocket into the adjacent full-length joists, and the short joist sits in a pocket in the header.

    With the framing now complete, the Steiner-Truesdale family can finish their adaptive re-use of this Gothic Revival beauty. We were truly saddened to hear of the fire, and now we are honored to be part of this building’s journey.

    Completed framing, from below
    Floor framing, from below

  • Kitchen of the Community

    Kitchen of the Community

    New Hampshire Preservation Alliance recently released an inspiring video about the restoration of the Acworth Meetinghouse. Built by Elias Carter in 1821, the Acworth Meetinghouse, with its double lantern spire, is a masterful representation of historic building craft. In 2008, the steeple and undercarriage were repaired by local craftspeople trained and supervised by PTF in techniques unique to steeple repair, and timber framing. In 2011, the Acworth model won a Preservation Honor Award from the National Trust for Historic PreservationNHPA’s video is an inspiring glimpse into the effort invested to repair this “kitchen of the community.” Next year, we’ll be drawing upon lessons learned in Acworth to help the community of Troy restore the trusses of the Troy Union Church (fb). 

    Feature photo courtesy Acworth Meetinghouse Restoration Project


Think we can help? Get in touch.