Author: Jessica MilNeil

  • It really tied the barn together

    It really tied the barn together

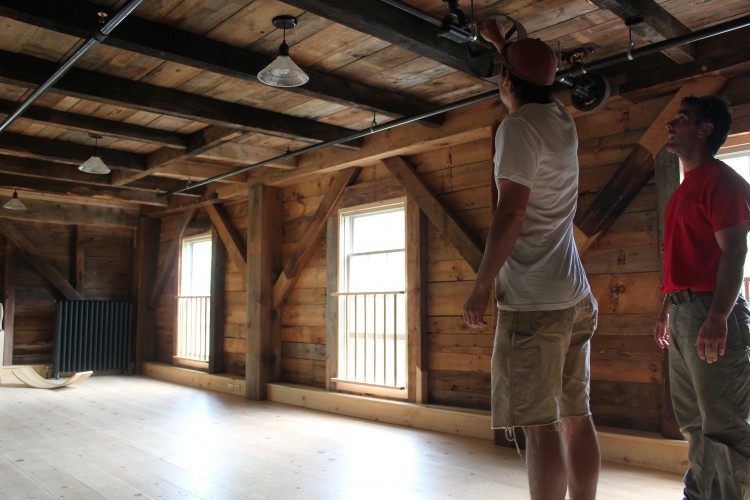
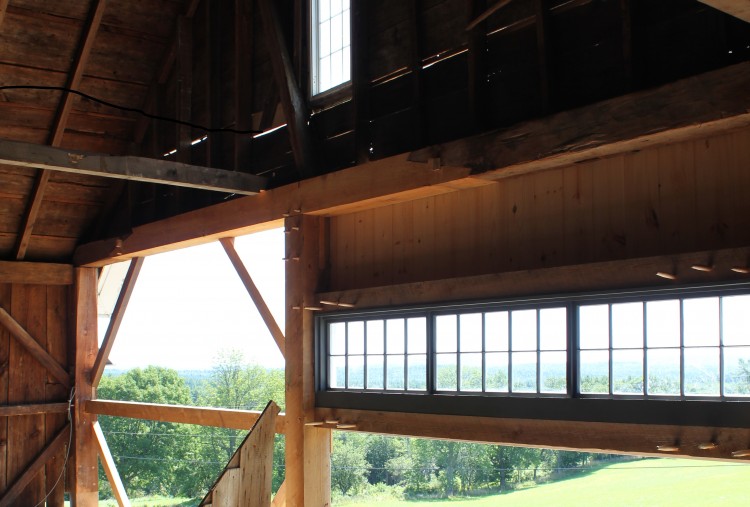
    True-Randall Farm Barn, roof system from rear loft
    True-Randall Farm Barn, roof system from rear loft

    Tie Beams are the defining component of a timber frame.  They tie a barn together better than The Dude’s rug ever could. A tie beam crosses the gable at or below the plate (eave) level, and prevents the eave walls from spreading under the outward pressure of the rafters.  Tie beams, more than any other element, identify the style of timber frame, be it English-tie, drop-tie, or interrupted.  While a tie beam alone can’t date a building, these designs are associated with particular time periods; the English tie with the 18th and early-19th century, and the drop-tie with the 19th century (in Maine). I’ve written elsewhere about these impressive framing members, and the relative pros and cons to their design (Historic American Timber Joinery, by Jack Sobon, and made available by the Timber Framers Guild, is a fascinating and exhaustive source of joinery information).  Below, I’m going to describe what goes into repairing one, in a standing building.

    The owners of True-Randall Farm have a strong preservation ethic, combined with a desire to have their property serve their contemporary needs.  They walked a fine line throughout the project, preserving every original, functional framing member, while installing a clean, contemporary kitchen in a long re-muddled connecting ell (preserving any remaining original framing even here, even though invisible).  The house and barn on either side retain their original design and artifacts, as well as transitioning beautifully into a functional modern kitchen.  The barn is visible through a sliding glass wall in the kitchen, where the expansive timber frame and associated repairs can be admired during meals.

    Scott, laying out fixes
    Scott and Lee, laying out fixes

    The repairs to the barn were extensive.  We replaced sills, foundation and drainage, and shored up the undercarriage. Two posts were replaced, along with their adjacent loft girts.  Unfortunately, pernicious rot in the tie beam was invisible until exterior sheathing was removed to replace one of the drive posts.  One of the advantages to timber frames is that a beam can rot extensively before losing functionality, or before the damage becomes visible.  This is also one of the disadvantages.

    The True-Randall barn has endured a history of alteration and adaptive reuse long before PTF or the current owners arrived.  According to the history researched and written by owners George and Karin Look:

    In 1889 the barn was moved to its current position and connected to the house by an ell. Local history indicates that it was rolled across the road using oxen and logs and that a small American Elm run over during the move stood back up and grew into a giant tree in front of the barn. The roof was removed before the move and roof elements, including the purlins, were used in building the deck for the barn, which was converted into a bank barn. At the time of the move an original eave wall was moved to the east 6 feet to increase the size of the milking parlor to accommodate the new, larger breeds of dairy cows that were becoming popular at the time. Also, the new roof was built with higher pitch to allow for storage of more hay. The barn was in use in a dairy operation until the 1970s.

    Series of c.1899 stop-splayed, underquinted and wedged tie beam extension scarf
    Series of c.1899 stop-splayed, undersquinted and wedged tie beam extension scarf

    In order to extend the barn 6′ east, a scarf joint was cut into the east end of each of the tie beams.  As its name suggests, a tie beam functions in tension and any scarf along its length must equally resist those forces as any link in a chain.  PTF’s commonly used halved-and-bladed scarf joint (p. 47, Sobon) is a great joint, but wouldn’t necessarily be effective here.  The barn-wrights in 1889 used a stop-splayed, undersquinted and wedged scarf joint (p. 49, Sobonto extend the tie beams by six feet and accommodate a new milking parlor.  The two inch wedges in this scarf push the two halves of the joint together, countering the outward thrust of the rafters.  This wedged key resists that force better than the shear strength of one inch pins (as would be used in other scarves).  Additionally, the wedges can be driven into the key with seasonal and yearly wood shrinkage.  This adaptive quality of wedges is employed elsewhere in timber-framing, such as the wedged-half-dovetail joint used at the ends of the Carpenter shop’s drop-ties, and in the wedged-half dovetail at the bottom of the king post in the Abyssinian Meetinghouse.  The beauty of the wedge in a king post truss is that, being oriented vertically, the wedge drops deeper into the joint as the wood shrinks, automatically tightening the joint, like a glacially-paced Rube Goldberg contraption.

    Lee, Chuck and Scott strategizing on staging
    Lee, Chuck and Scott strategizing on staging

    The front gable tie beam was badly rotten due to water infiltration.  Located at the top of Randall’s hill, the front of this barn endures an inordinate amount of wind-driven rain, indicating the window directly above as the most likely culprit.  The 18′ section of punky, rotten wood extended from the center of the drive to within 8′ of the rafter-tie-plate connection.  We were fortunate that the rot didn’t extend to the English tying joint at the eave, as the repair would have required more complicated rigging and joint-cutting.

    One scarf half, on the existing tie beam
    One scarf half, on the existing tie beam

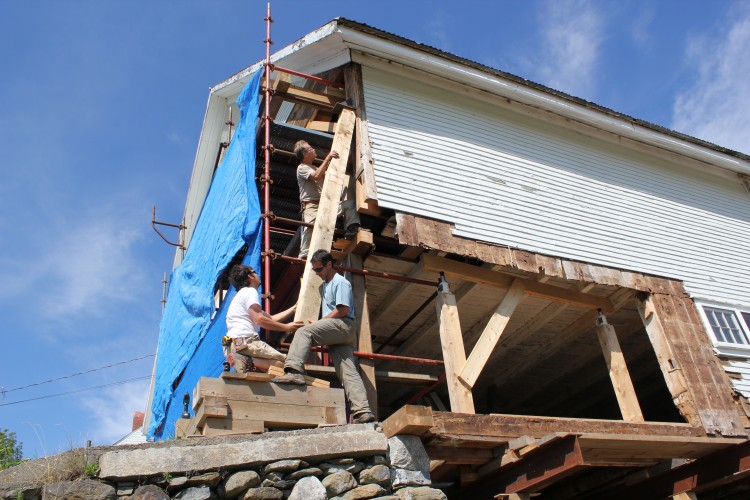
    As it was, we built 3 levels of structural, wedge-lock staging across the plane of the front gable, extending from 7′ of lawn adjacent the gable into 7′ of the first bay of the barn.  By crossing the upper ledgers of the staging with heavy, 8×8 rigging timbers, we were able to pick up the tie at two points, directly outside of the rot.  The studs above were stabilized with a 2×10 hemlock ledger screwed across their faces.  After the rigging securely supported the tie beam and framing above it, we carefully began to excise the rot.  When we reached sound wood, we laid out half of a stop-splayed, under-squinted and wedged scarf on each of the two remaining ends of the tie beam.  On the ground, we cut the analogous scarf halves on a piece of 9″ x 9″ x 18′ Eastern White Pine (we are currently avoiding the use of hemlock due to the preponderance of white mold).

    Tie fix rising
    Tie fix rising

    We used a 1-ton chainfall, mallets and muscle to lift the repair into place and engage both scarves.  The two hydraulic jacks allowed us to adjust the height either end of the existing tie beam separately, allowing us to dial into each scarf connection relatively independently.  When each scarf was snugly fit, opposing wedges were driven in from each side, driving the halves of the scarf together and locking the repair in place.

    Stop-splayed undersquinted wedged scarf repair, c. 2013
    Stop-splayed undersquinted wedged scarf repair, c. 2013

    Repairs of this level require extensive stripping of sheathing and clapboards.  In the case of this barn, the clapboards badly needed replacement anyways.  Some had been replaced ten or so years prior, with low-quality claps; others had been “repaired” with a spray of drywall screws.  Inevitably, the replacement of sheathing, clapboards and trim takes as much, if not more, time than the timber frame repair itself.

    Completed tie beam repair
    Completed tie beam repair

    While the condition of this tie beam was an unfortunate surprise, we were happy to be able to amend the damage with a traditional repair that blended seamlessly with the history of the barn, and its previous alterations.  I can only hope that next month, the full replacement of a tie beam in a two-story Greek Revival in Brunswick goes as smoothly.
  • A Carpenter’s Shop

    A Carpenter’s Shop

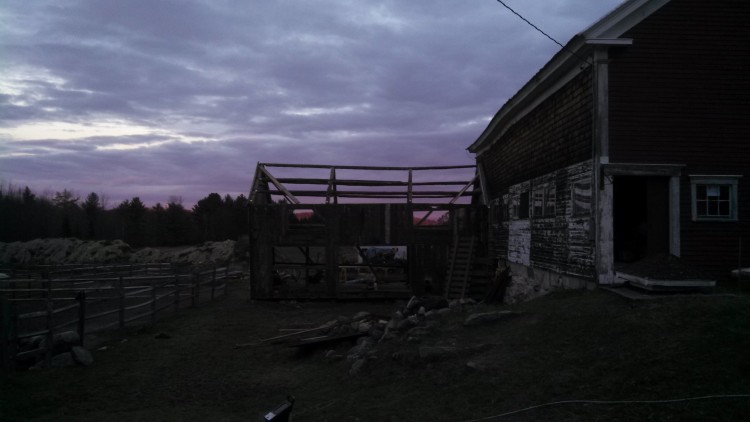
    Carpenter's shop, naked at dawn
    Carpenter’s shop, naked at dawn

    I think most people on the crew have come across a frame that made them stop, and think, “Man, that’s the frame I’d build for myself.”  I think I’ve found mine.  It’s one of what will be three barns on a piece of property in Poland, ME – a horse barn, dairy barn and carpenter’s shop.  We dismantled the horse barn over a year ago, on another property in West Poland; we’ll rebuild it next, and it’ll become a home for the client’s draft horses.  The dairy barn is stabilized currently, and will need a complete undercarriage repair at a later phase.  The dairy has some of the finest trim details I’ve seen on a barn yet, but it’s the carpenter’s shop that I love.  It is a re-used frame, 17 x 30, with a drop tie, and purlin roof.

    Dairy Barn, ain't she precious?
    Dairy Barn, ain’t she precious?

    To a lot of folks, the English tying joint  is the pinnacle of tying joints, but the drop tie in this shop is pretty charming to me.  In any barn, the tie beam is the timber located at or near the top of the posts, parallel to the gable; it prevents the eave walls from spreading under outward thrust of the rafters.  In an English tie, the tie beam crosses over the tops of the eave plate and posts; it is connected to the plate by a half dovetail joint (on the flat), and to the top of the post by a teasel tenon.

    Corner post removed, Scott leaning on loft girt, end of tie beam exposed
    Corner post removed, Scott leaning on loft girt, end of tie beam exposed

    A drop tie beam is an early 19th century development, in which the tie beam is dropped below the plate by 2-5 feet and joined to the posts, directly.  A collar tie is necessary to help prevent rafter spread, and the height of that collar tie is integral to it’s function.

    Exterior of post, showing wide end of half dovetail and end of wedge on top
    Exterior of post, showing wide end of half dovetail and end of wedge on top

    In this shop, the drop tie is connected to the posts with a wedged half dovetail.  An extended mortise is cut into the post, with a sloped bottom.  The tenon on the tie beam is cut with a half dovetail (on edge), which drops over the sloped face at the bottom of the post mortise. After the tie beam is inserted into the post, a wedge is driven through the top of the mortise, above the tie beam, to help lock the joinery into place. A major difference between these two tying joints is how it affects the raising of the barn; an English tie would require an eave raising, and a drop tie requires a bent raising.

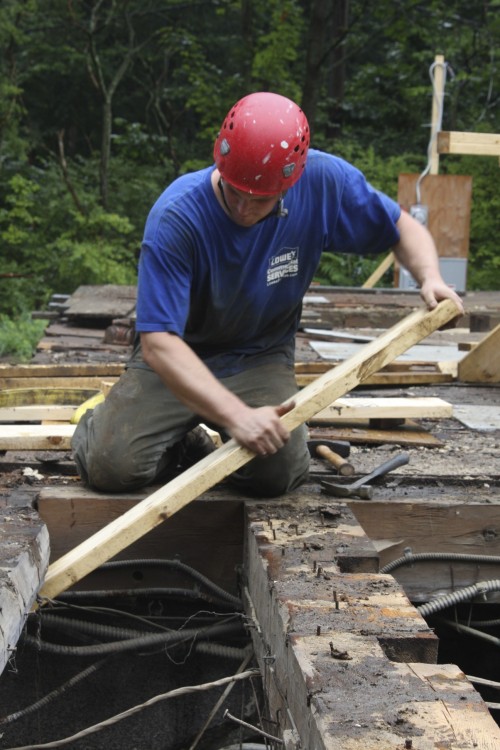
    Scott safely stripping
    Scott safely stripping

    The benefit of a drop tie is that is provides higher head room in the attic story.  In this shop, I thought the proportion of the room created at the attic level will be perfect for the client’s bench tools and hand work.  The first floor will be used for machine work – the client plans to use the shop to restore antique sleighs.  Both floors have enough headroom to spin things around and enough length to rip something as long as you’d like.  It’s small enough to heat easily, and I especially like the way the light comes through the windows at the floor of the loft level.

    Scott a-prying
    Scott a-prying

    Anyways, the carpenter’s shop was attached to the dairy, and was propping up its rear end.  We dismantled the shop fully, both to repair it, and to move it away from the Dairy barn, which worked better for the site, and allows one to appreciate the beauty of the dairy more fully.  It was a big help to have the client’s tractors on site.

    Cutting in the snow is much better than cutting in the rain
    Cutting in the snow is much better than cutting in the rain

    Scott and Lee cut the replacement sill and post timbers quickly, and in the snow, too.  They left for me the tie beams with the half dovetails that I love so.  Lee followed his post work by cutting eighteen oak braces.  The down braces at the loft level are part of what makes this drop-tie frame so durable.

    Check out those down braces
    Check out those down braces
    Oak braces
    Oak replacement braces

    Last week, we used our 8th grade geometry skills to lay out the frost posts.  With the help of an enormous excavator, and a little mason’s line, it was a breeze to lay out the posts to the dimension of the shop’s footprint, but we needed to use the Pythagorean theorem to figure out what our diagonals should be, and make sure that the frost posts were laid at right corners to one another.  It is a great joy of my job to get to use the theorems I learned in geometry class.

    Scott, plunging mortises with the chain mortiser
    Scott, plunges cog mortises into a floor girt with the chain- mortiser

    Next week, we’ll be topping the frost piers with granite capstones, and laying and fitting the sills over the granite.  Lee has his adze sharpened, and we’ll be using it to cut the first floor joists.  We’ll cut the joists to length and drop them upside-down into their associated cog-mortises in the tops of the sills and floor girts.  Sitting in the cog upside-down, the rough floor joist will be 4-5 inches proud of the surface of the floor girts.  We’ll then use an adze to cut an angled shoulder in line with the inside edge of the floor girt and to cut a tenon on the end of the joist that is perfectly level with the top of the sills.  After the tenon is smooth, we’ll turn the joists over, and they’ll create a perfectly leveled floor.

    Scott and Lee surveying the site, that's the barn frame stacked in the piles in the foreground
    Scott and Lee surveying the site, that’s the barn frame stacked in the piles in the foreground

    We hope to raise the Carpenter’s shop frame in time for Christmas, and then our client can start sheathing it over the Holidays.  I hope he thinks it’s an awesome present, because I would.

    Bents 1 & 2
    Tagging Drawings, Bents 1 & 2
  • Mill at Freedom Falls wins Maine Preservation Honor award

    Mill at Freedom Falls wins Maine Preservation Honor award

    Lee shows Scott the mill works
    Lee shows Scott the mill works

    Maine Preservation held their annual honor awards ceremony last Thursday,  to “recognize owners, developers, professionals and leaders responsible for transformative historic preservation efforts throughout the state.”  We were proud to be part of the team honored for the restoration of The Mill at Freedom Falls.  Read the full list of honorees, here.

    Chris Glass, Tony Grassi, Carmen Bombeke, Jay Fischer and Arron Sturgis accept a Maine Preservation Honor Award
    Chris Glass, Tony Grassi, Carmen Bombeke, Jay Fischer and Arron Sturgis accept a Maine Preservation Honor Award

    This project was a true collaboration between client, architect, architectural historian, general contractor and ourselves, the traditional timber framers.  There are so many folks who should be proud of their participation, who gave their time, energy, intelligence and passion to completing a very challenging project.  Thank you Ed Bell, Reese Crotteau, Shawn Perry, Lee Hoagland, Chuck Michalek, Tom Glynn, Scott Lewis, Jesse Turgeon and Rod Bishop.  Read more about the finished project, here.

  • True-Randall Farm: Post of Posts

    True-Randall Farm: Post of Posts

    Lee, Chuck and Scott install a deadman under the barn's corner post
    Lee, Chuck and Scott install a deadman

    Nov. 15, 2013 – When I tell people what I do, I sometimes run into the misconception that preservationists are single-minded, inflexible, and uninterested in innovation and design.  It’s true that at Preservation Timber Framing we think that if a frame stands strong for 200 years, it probably has good design to thank, and that time-tested building details last longer.  We also think it’s possible to combine contemporary design with the stewardship of a historic property, and achieve successful results.  True-Randall Farm was just such an example. The connected farmstead required repairs to house, barn and ell. The clients have a strong preservation ethic and want to preserve the original framing members but they also wanted a functional kitchen with clean, modern lines.  The ell had been extensively renovated by previous owners, and the clients decided to dedicate that portion of the house to the new kitchen.  They preserved any original framing within the ell (and without) that remained.

    Even working within a strict preservation ethos requires adaptability.  The house and barn at Randall’s Hill retained most of their original elements and were repaired traditionally, with in-kind materials.  Both house and barn had rotten corner posts, but the repairs to each post were entirely different in scope and in design.

    Barn corner post removed, from interior
    Barn corner post removed, from interior

    The barn repair was a more typical, and traditional, fix.  It was also more extensive, because the rot extended above the girt that supports the right loft bay,  and the frame was more accessible to repair.  In order to get access to the post, we stripped the corner of trim, clapboards and sheathing.  We affixed an L-shaped bracket, custom-made for lifting, to the exterior of the post, and built a cribbing pile beneath and just to the outside of it.  Beneath the bracket and on top of the cribbing pile, we inserted a dead man (temporary post) and hydraulic jack, which would be used to level the corner, and support the weight of the post and roof above it (See first photo, above).  We also inserted a deadman beneath the loft girts to pick up the weight of the loft (See “Barn corner post removed…,” center of photo).

    Corner post, with center mortise repair
    Corner post, with center mortise repair

    Lee carefully cut away the post where it was rotted, and removed the braces.  With a circular saw, auger bit and timber framing chisel, he cut the female half of a center tenon scarf joint onto the part of the post that remained.  We used a center-tenon scarf on this post to preserve both the reference (outside) face of the post and the inside face that was most visible.  The fix was also oriented to resist any outward thrust that was transferred from the rafters.

    Lee and his corner fixes, (the center tenon post repair is on the bottom, a repaired nailer is on the top)
    Lee and his corner fixes, (the center tenon post repair is on the bottom, a repaired nailer is on the top)

    Lee cut the second half of the post out of a large 10 x 10 timber, the same dimension and species of the piece that was removed.  In order to fit the post fix into place, we used a free tenon at the bottom of the post fix (see diagram, below).

    Installation of a free tenon
    Installation of a free tenon

    Lee cut an extended mortise into the front gable sill and a long open slot on the adjacent face of the post fix.  After the post fix was installed, and the center tenon scarf was fit and pinned,  a free tenon was inserted vertically into the extended mortise in the sill and slid into the slot in the post.  The remaining mortise space in the sill was plugged with a wedge, and the free tenon was pinned into the post.

    Barn front gable, rebuilt in place
    Barn front gable, rebuilt in place

    After the post was fixed, I replaced the loft girt in the front gable, and neighboring braces, door post, and nailer.  Unfortunately, this barn typified the worst case scenario involving hidden rot.  Working in preservation we face a harsh reality in which, sometimes, significant rot can be completely hidden, and once rot is uncovered, it can’t be re-sheathed until repaired.

    Open house
    Open house

    We also performed a post repair on the Federal-style house and, in contrast with the barn, we could disturb none of the interior surfaces.  In this way, the repair was similar to the timber frame repair at the Marrett House in Standish, where the framing had become detached from the plaster and lath, but the plaster and lath still needed to be preserved, with early 19th century wallpaper left intact.

    House corner post repair, installed.
    House corner post repair, installed.

    The post requiring repair was located at the front-right corner of the house.  We first noticed that the front eave and right gable sills were punky.  The rot in this post did not extend upwards past the second floor girts, or inward throughout the post thickness, except at the very bottom.  This fortuitous turn of events allowed us to repair the post with a three-stepped lap joint – cutting away the exterior surface of the post to the depth of the rot, and using epoxy and fasteners to install a new-in-kind repair that fills the negative space left by the rot.  Relative to the post repair in the barn, this was a non-traditional fix, utilizing modern epoxy and fastener technology.  It was the appropriate fix for the level of rot and its context.

    House corner, post repair.
    House corner, post repair.

    The contrast between these two methods of post foot repair, and the combination of traditional repair and contemporary use in the ell, shows that the best preservation is adaptable. Our process is developed from traditional methods, but it isn’t staid or prescriptive.  Part of the reason we document the multitude of barns we come across is that they provide us with a greater variety of long-lasting approaches to repair.  We’re always eager to learn a design solution that is new to us, it’s just that the best solutions we’ve found have been proven over 200 years.


  • No Worms in this Birdsmouth

    No Worms in this Birdsmouth

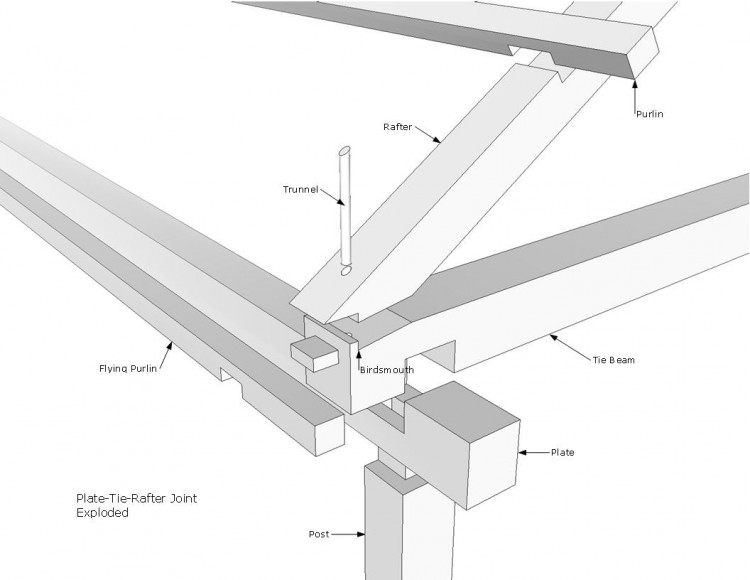
    Roof framing, exploded
    Roof framing, exploded

    Last week, Arron and I saw a neat roof framing detail at a Greek Revival home in Brunswick.  The rafter was joined to the tie beam with a birdsmouth and pinned with a trunnel, the tie overlapped the plate and supported a flying purlin, and the plate ran past the gable end post to create the overhang for the return.

    Roof frame detail at return
    Roof frame detail at return

    There were areas that were badly deteriorated by critters and leaks, but the tie-plate joints were as tight as the day they were assembled.  The relish at the ends of the tie beams, after the birdsmouth, were all still intact, probably due to the work of the trunnel, pinning the rafter foot in place.  This was the first time I’d seen this particular joinery in a roof assembly; it’s always nice to see how well timber frame joinery withstands the pressures of weather and time.

    Dimensioned roof detail, from gable
    Dimensioned roof detail, from gable


  • True-Randall Farm: A Quintessential Maine Connected Farmstead

    True-Randall Farm: A Quintessential Maine Connected Farmstead

    PTF began work on the undercarriage of the True-Randall barn in November 2012, and recently completed a comprehensive timber frame repair of the house, barn and ell. George and Karin Look, owners and custodians of the True-Randall Farmstead, researched the history of their property extensively and are deeply committed to ensuring its preservation.  The following account is a summary of their findings, which they’ve graciously allowed me to publish here.

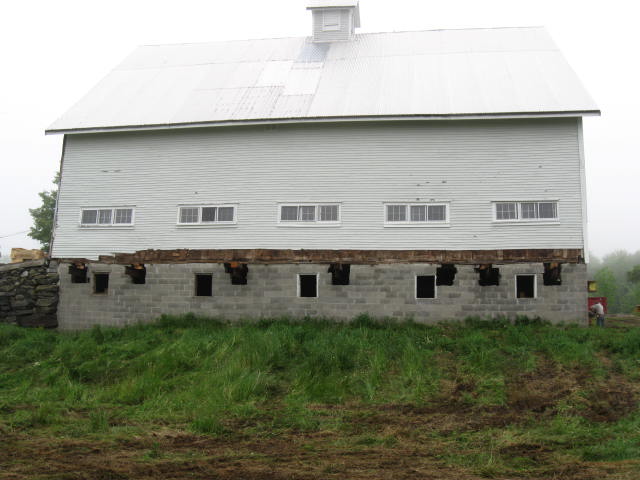
    Barn from below
    True-Randall Barn, from below

    True-Randall Farm: A Quintessential Maine Connected Farmstead

    In 1813 Deacon Ezekiel True’s twin sons, Moses and Paul, built him a “house on the hill” above his mills on the St. Georges River, in what is now South Montville, Maine. A barn, which has the same timber frame construction as the house, was built for the farm across the road in 1814. Its largest timbers, primarily second growth hemlock, were hand hewn, most likely on the farm. They include 60 foot long continuous timbers for the plates. The farm passed by marriage from the True to the Randall family in the mid 1830s and remained in that family until 1984.

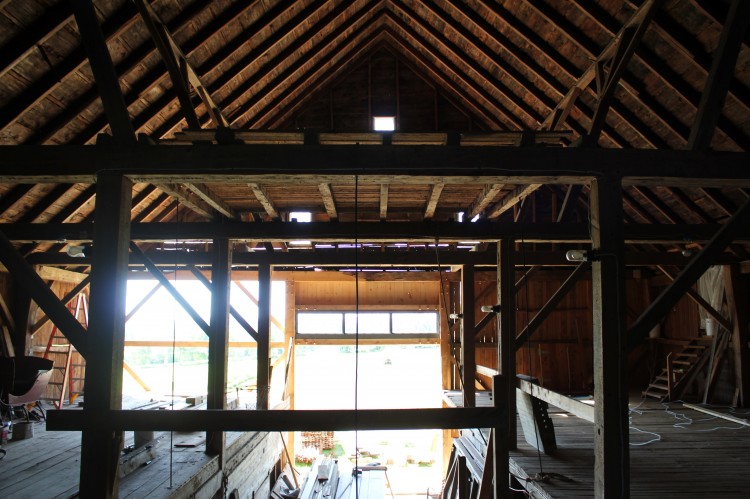
    Barn bent framing, from loft
    Barn bent framing, from loft

    In 1889 the barn was moved to its current position and connected to the house by an ell. Local history indicates that it was rolled across the road using oxen and logs and that a small American Elm run over during the move stood back up and grew into a giant tree in front of the barn. The roof was removed before the move and roof elements, including the purlins, were used in building the deck for the barn, which was converted into a bank barn. At the time of the move an original eve wall was moved to the east 6 feet to increase the size of the milking parlor to accommodate the new, larger breeds of dairy cows that were becoming popular at the time. Also, the new roof was built with higher pitch to allow for storage of more hay. The barn was in use in a dairy operation until the 1970s.

    Another of Deacon True’s sons, John, built the Mill at Freedom Falls (Maine), in 1834. PTF was intimately involved in the restoration of that Mill in 2012.

    -George and Karin Look

    Read our first post about True-Randall farm, about leveling the barn, here.  In upcoming blog posts, we will describe our process for repairing the timber posts in house and barn, and in-place tie beam repair.

  • Heavy Lifting on Randall’s Hill

    Heavy Lifting on Randall’s Hill

    Randall's Hill dairy barn, before
    Randall’s Hill dairy barn, before

    Reading Dave Ewing’s paper on the history of moving buildings, I started thinking about the part lifting buildings plays in our work (it’s a starring role), and the part that screws and other simple machines play in that lifting (co-starring the skid steer).

    Skid Steer as Narwhal
    Skid Steer as Narwhal

    This year, we repaired a barn on Randall’s Hill in Montville. It was a big lift, and hold.  The crew spent late fall and winter under the barn digging footers and preparing the ground for both the lift and the posts that would be installed below the undercarriage.  The crew cut 6″ x 7″ cribbing into 4′ lengths and piled them, Lincoln-Log style, into ten boxes.   Building cribbing piles is something of an art; the piles need to be perfectly level, and when they are neatly cut, they can be checked for plumb at the corners as they are stacked.  We build with the 7″ on edge so that each layer is 7″ high.  This allows us to slide other cribbing, laid flat on the 6″, in and out of the stack when it comes to lifting and lowering the steel with hydraulic jacks.

    Dead men and cribbing piles, under the barn
    Dead men and cribbing piles, under the barn

    We built a wooden track atop the cribbing piles, and placed rollers along them.  Derek Davis, of Davis Dirtworks, inserted 35′, 1000 lb H-Beams under the building, and onto the rollers.  The rollers we use come from our clapboard supplier, Steve Jeffery, from the center of the log that is left over from manufacturing radial-sawn clapboards.  In the 1890s, they also used wooden rollers to move the barn, but instead of a skid steer, they used steer.

    So, we slowly rolled the H-Beams into place, and then Derek threaded four 25′ I-Beams under the building (called the “needles.”)  The entire grid was leveled across the cribbing piles and then raised to the underside of the first floor framing.  We lifted sequentially, using hydraulic jacks set onto cribbing that crossed the “ladder rungs” of the cribbing piles. Considering that the throw of the jack was less than 7 inches, I was surprised that we finished lifting the grid the same afternoon that the beams were installed.

    Barn, block, steel, steer
    Barn, block, steel, steer

    The beams were used to stabilize the building while the cinder block foundation was demolished and replaced with proper footers, frost wall, and timber posts that were tenoned to the sills above.  Drainage was installed around the exterior to manage the water that formerly ran through the basement and contributed to undercarriage decay.

    Demo day
    Demo day
    Holding the barn with steel, cribbing piles, and dead men
    Holding the barn with steel, cribbing piles, and dead men

    One of our main tasks was leveling the posts.  Over time, the sills and summer beams had sagged and spread to such a degree that the posts were all over the place.  We determined a reference post at the beginning of the project, in the front corner adjacent to the connector ell.  At each of the other 23 posts, we used both a water level and laser level to determine how far from level the top of each post was from the top of the reference post. One of the drive posts was more than 5 inches out of level; most of the rest ranged between 2 and 4 inches.

    Solid foundation
    frost wall
    New posted wall
    New posted wall

    When we were finished repairing the foundation, the steel beams were removed as they’d been inserted.  It took an afternoon to lower the beams, using hydraulic jacks, cribbing pile rung by cribbing pile rung, and removed just as gracefully by Derek in the skid steer.

    Elsewhere on the project, both during and after the insertion of steel, we repaired posts using a more typical method of lifting and holding, with brackets, screw jacks and jack posts.  I will describe multiple approaches to post repair in an upcoming blog post, and more about Randall’s Hill over a series to be published this month.  The barn was part of a much larger project to repair the house and barn, and renovate the connecting ell with a clean, modern kitchen.  The completion of a project that combined honest, best-practice preservation and the installation of a high-modern contemporary kitchen required a clear vision from the clients and a lot of stamina. I look forward to describing our process in future posts.

  • Better than a three-year-old thinks

    Better than a three-year-old thinks

    Butcher Barn, before.
    Butcher Barn, before.

    If forced to choose, I think most of the PTF crew would choose hand-tools over machines, our chisels and mallet.  Fortunately, we don’t have to choose, and one of the pleasures of our job is that we have a broad range of woodworking tools with which to solve the problems we face in the shop and in the field.  There are those of us who drool over the machines, and those of us who jealously guard our antique molding planes.  I tend to fall into the latter category, but I am here to admit that the three-year-olds were right.  On a beautiful spring day, big yellow lulls and tall blue manlifts are even better than my little buddy Quinn thinks they are.

    Barn and lull
    Barn and lull

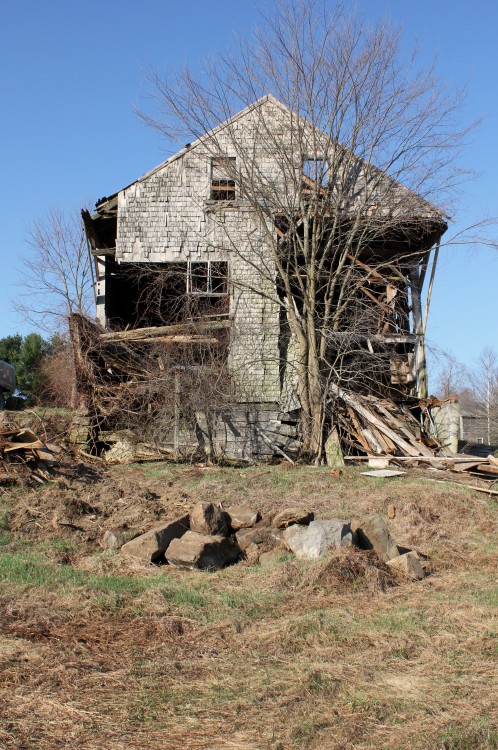
    A couple months ago, Shawn and I were facing the end of an enormous barn that looked as if it had been attacked by a pair of xylophagus tyrannosaurs.  The two corners posts, and the sheathing around them, were absent, and the large triangle of the gable end teetered on a center post, which was significantly supported by a neighboring tree.  The ends of the tie beam had rotted off just enough to disconnect from the eave plates, but not so much that their weight was reduced.

    Interior frame
    Interior frame

    The framing of the barn is unique.  A center drive post extends to the ridge, and is connected to the left eave by a tie beam.  On the right, a strut rises to the right rafter, and the right rafter heel joins directly with the top of the right post.  This gives the barn an incredibly high drive on the right side.  The client wanted to repair the entire barn, but due to financial concerns, and the fact that the gable end was disintegrating before our eyes, we decided to sacrifice the last gable bent.  If the condition of the last bent is cautionary tale about the consequences of roof leaks, the condition of the rest of the bents is a testament to good timber framing.  Above the deck, the frame is in remarkably good condition; below the deck is frankly a little scary, and we will be stabilizing there next.

    Gable triangle, afloat
    Gable triangle, afloat

    The challenge was to disengage the gable end from the roof, without allowing it to crash into the barn, and to do that, we used the lull, man lift and chain saw to great effect.  A man lift allowed us to stay above the fray, and carry the purlins and roof sheathing to the pile on  the ground.  Once the plate, purlins and roofing in the last bay were removed, the gable end was composed of a center post, braces, a tie beam and two rafters.  The rafter-tie beam connection was completed rotted through.  The stability of this limited framing in a stiff breeze is a testament to braced joinery.  We were able to cut the rafters into pieces above the floating gable end tie beam, and then chop the center gable post into pieces from the top down.

    Scribe line, 2 ft below the plate; the details afforded by man lift access
    Scribe line, 2 ft below the plate; the details afforded by man lift access

    This job challenged my perceptions of preservation and the kinds of work I enjoy.  This barn will serve as a good example of a preservation through triage and we were able to save an interesting structure for a client who had limited funds.  I learned that big machines can be as attuned to their task as a hand plane, and just as fun on a sunny day.

    Butcher Barn, after.
    Butcher Barn, after.


  • David Ewing to present at 2013 National Preservation Conference

    David Ewing to present at 2013 National Preservation Conference

    Dave, removing sheathing from the Demeritt-O'Kane House
    Dave, carefully removing sheathing from the Demeritt-O’Kane House

    PTF’s own David Ewing will present his paper, “Moving Historic Properties: A Valid Method of Preservation” at the National Trust for Preservation’s 2013 Conference in Indianapolis, IN.  Inspired by his experience dismantling the Demeritt-O’Kane house, the paper reviews the history of moving buildings and includes the example of a Boston apartment building which was moved at the rate of one inch per minute.  The move took three months, and the apartments were inhabited continuously.  He argues that the threat of demolition makes careful dis-assembly or intact movement a viable option for preservationists, as well as environmentalists.   From the abstract:

    The practice of Historic Preservation fundamentally involves the response to threatened historic places, buildings, or properties. Those involved in this professional field have the responsibility to use whatever means necessary to successfully thwart the deterioration or demolition of historic structures. For that reason preservationists must consider the merit of all potential methods. This paper investigates the evolution of building relocation as a method of protecting the resources found in the built environment. Furthermore, it explores the technological advances in the practice of relocation, the restrictive guidelines of National Registration Criteria and environmental implications in a thorough understanding of how relocation is a worthy option in the preservation of historic places.

    Dave will participate in a panel discussion on “Re-Booting Preservation for New Audiences.”   He is pursuing a Masters of Design Studies (MDS) in Historic Preservation at the Boston Architectural College, and his paper was selected competitively from a pool of preservationists from around the country.  Dave joined PTF after a summer internship through Maine Preservation, which PTF supports as a way to give preservation professionals headed for the office some time in the field.  We persuaded Dave to stay out in the field with us a little longer, and this paper is evidence that he’ll keep a boot in both environments.

    Dave, removing floor joists at the end of a long two days
    Dave, removing floor joists at the end of a long day
  • Guest Post by David Ewing: iFarm update

    Guest Post by David Ewing: iFarm update

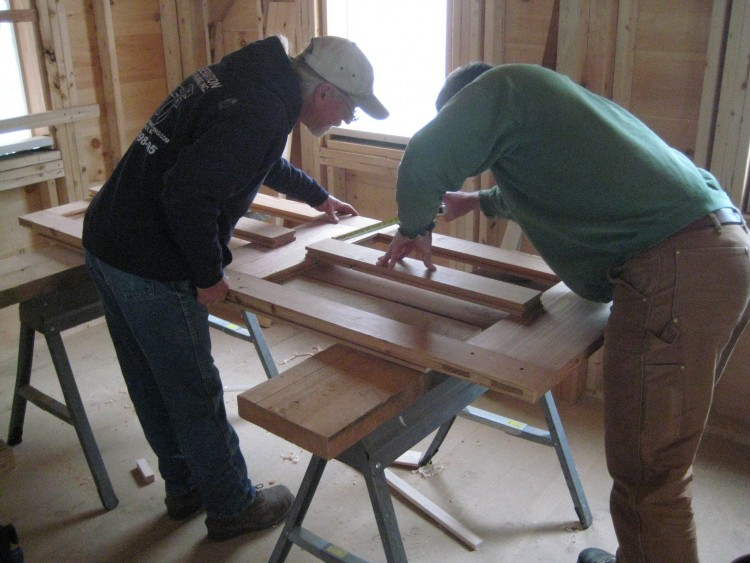
    Tom and Dan, assembling a frame and panel door, photos by Dave Ewing
    Tom and Dan, fitting the center stile of a frame and panel door.  Photos courtesy of the author

    Since 2009, the iFarm in Boxford, Massachusetts has been keeping crews from PTF busy. Christine Barensfeld, the owner of the farm, has collaborated with PTF to restore the farm which consistently operated from 1750 – 1932.  Chris purchased the farm in 2009 a midst the threat of developers who would have purchased the property and parcelled the land for the construction of new homes.  Since then, Chris has been accruing as much information as possible about the farm’s history, originally known as Towne Farm.  She has held several events at the farm providing lectures, slides shows of historic photographs, exhibits of archaeological artifacts found on the farm, and tours of the property.

    iFarmhouse, 2013
    iFarmhouse, 2013

    Chris’ concept to restore the farm covers both architectural restoration as well as re-establishing 19th-century agricultural operations.  She has composed a team of professionals who have been collaborating to help her reach this goal.  Preservation Timber Framing is proud to be a part of this unique team which includes Benjamin Nutter Architects, Howell Custom Building, Landscapes by Lillabeth.

    When I arrived to iFarm in August of 2012, efforts to restore the farm had been well underway. The projects that had been completed included the restoration of the barn, carriage house, utility shed, and water tower.  Focus during the early fall of 2012 was directed to the construction of a timber framed kitchen-ell addition to the original late-18th century farm house.  The frame was raised just before thanksgiving in November of 2012.

    Repaired second floor system
    Repaired second floor system

    Since that time we have been concentrating on the marriage between the old and new through the restoration of interior structural and finish components.  This has included tandem maneuvers re-leveling floors systems while selectively replacing deteriorated floor joists and a severely rotted beam which supported the chimney hearth.  Work has also been done to slightly reconfigure the room layouts in an effort to reestablish the original late 18th century design.

    Casing detail
    Casing detail

    Along the same thread of re-establishing the original design Dan, Keith, and Tom have used their combined expertise to determine what interior casing details are original to the construction of the house.  In the north-west bathroom we found the original interior casing of the window to be simple, with a single bead on the corner.  This discovery matches the single beaded baseboard and post casings in rooms on the second floor.  Using this information we have embarked on repairing existing casing and replicating this detail by custom milling identical 3/4 and 1 inch pine casing for the doors, windows, structural frame, and as baseboard.

    Door, partially assembled
    Door, partially assembled

    Additionally we have fully restored all of the doors original to the house, as well as doors for the addition that Chris and Benjamin Nutter Architects bought from a local architectural salvage yard.   The steam box method of scraping large quantities of doors, windows, etc. has proven to be the most effective and non-toxic method of removing lead paint.

    As work is steadily heading in the direction toward a full restoration of the farmhouse, complete with a new historically compatible kitchen-ell, there is never a dull moment on the farm.  Most recently in a collaborative effort with Lillabeth, Chris has recruited us to construct six 30’ tall bamboo teepees. The teepees will be used as a trellis to aid in the growth of hops.  Taking approximately three years to harvest the hops, Chris will be starting her nano-brewery this summer.  Any ideas on a name for this sure-to-be-tasty brew?  I, for one, like the name Towne Road Beer!

    The author, installing window casing
    The author, installing window casing

    More on iFarm here.

    David Ewing came to PTF through the Maine Preservation intern program.  While working at PTF, he is pursuing a degree from Boston Architectural College.  David lives in Dover, NH with his wife and beagle.

Think we can help? Get in touch.